Doodler’s Sampler Step by Step
I have always loved antique embroidery, and it inspires my art too. This week, I invite you to treat your pen as a needle and doodle the look of the precious hand-stitched fabric. My drawing – I call this Doodler’s Sampler – is 9 by 12 inches but you can make a smaller or bigger piece with these instructions. The best paper for this is Bristol paper. It’s smooth and nice to color with watercolors.
Step 1 – Draw a Grid
Because we aim for ornamental stiffness, a grid helps to place the elements. Use a pencil so that you can erase the lines before coloring. Start by outlining a space for a frame. Then divide the rest of the paper so that they help to place the main elements.
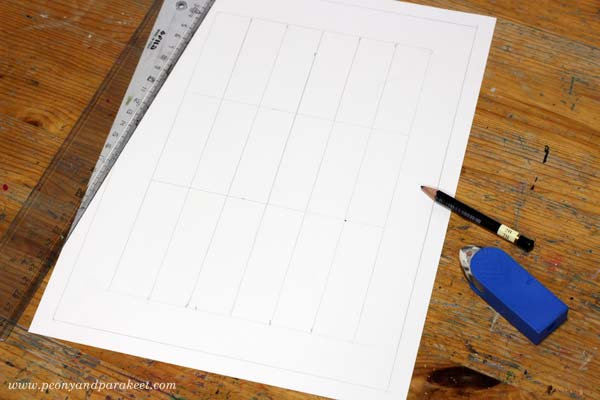
I wanted my Doodler’s Sampler to be symmetrical, so I drew a vertical centerline, and then divided the two halves into three parts. Another idea that I had was to have a vase of flowers. So I drew horizontal lines that mark each third, and the lowest third is reserved for the vase.
Step 2 – Sketch the Structure
Old samplers are filled with decorations but at the beginning, it’s enough to sketch the places for the biggest elements and their shapes.
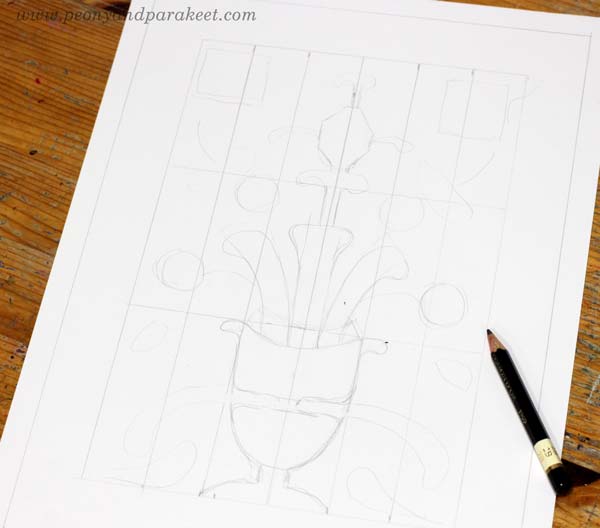
I wanted to have something rectangular on the top corners, the vase on the bottom, plant-like organic shapes coming out of the vase, and then an angular jewel-like thing on the top of the ornament.
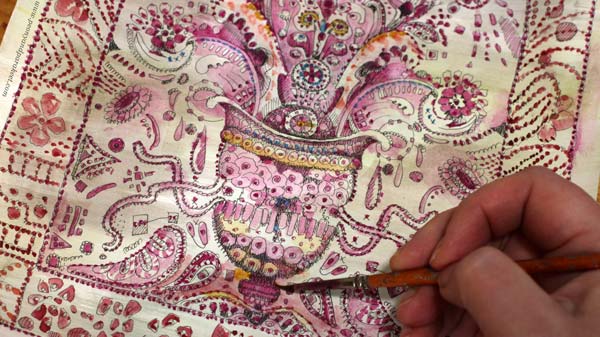
Step 3 – Doodle and Decorate
Pick a thin-tipped drawing pen, that has permanent ink, and start doodling! Make more shapes and fill them with circles, rectangles, flowers, hearts, anything you can think of!
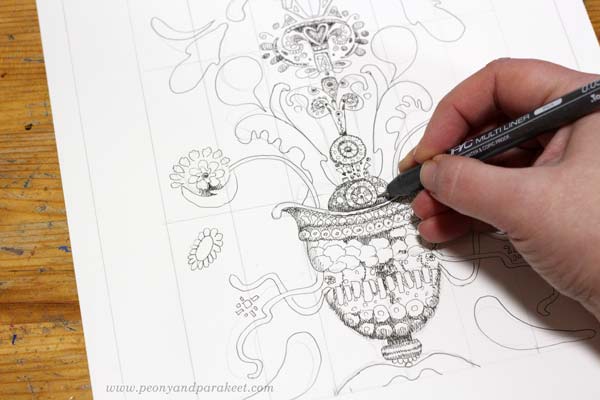
My pen is Copic Multiliner, tip size 0.05. I add shadows to my doodles so that they don’t just outline the shapes but there are darker parts too.
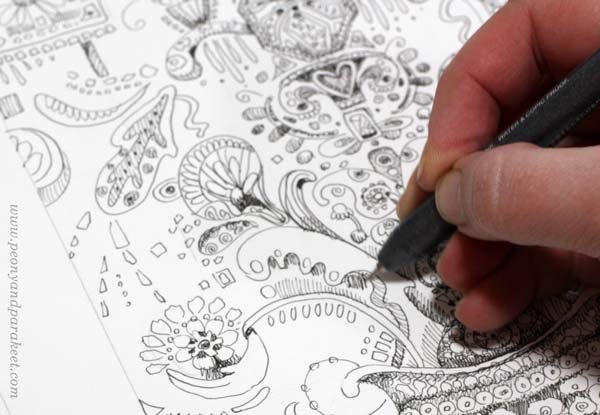
I make the decorative border simpler so that it doesn’t take the power away from the centerpiece. Trembling lines look more decorative than straight ones.
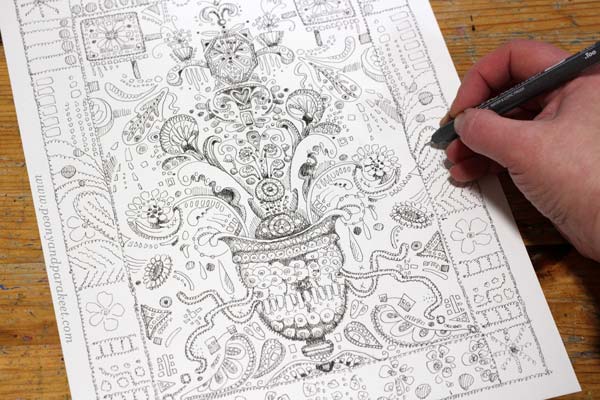
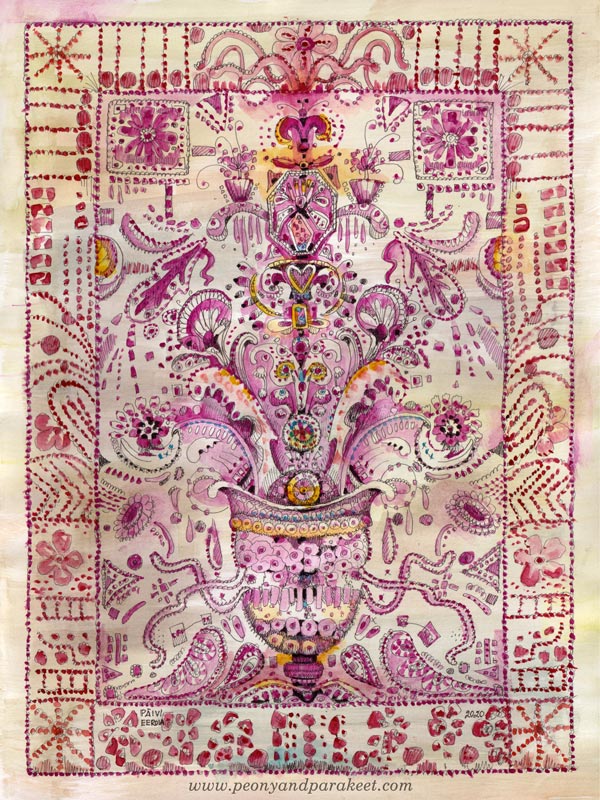
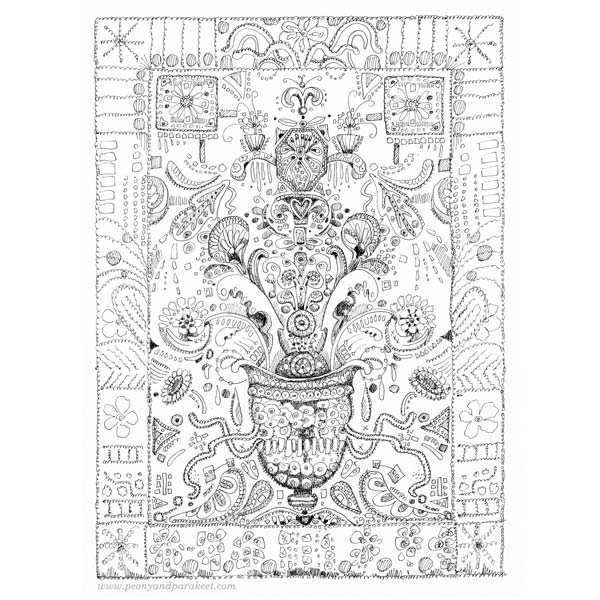
Here’s my Doodler’s Sampler after Step 3, ready for coloring.
Step 4 – Color the Background
You can use any supplies for coloring, but in my opinion, the softness of watercolors complements the sharp black lines best. Start the coloring by adding some color to the background.
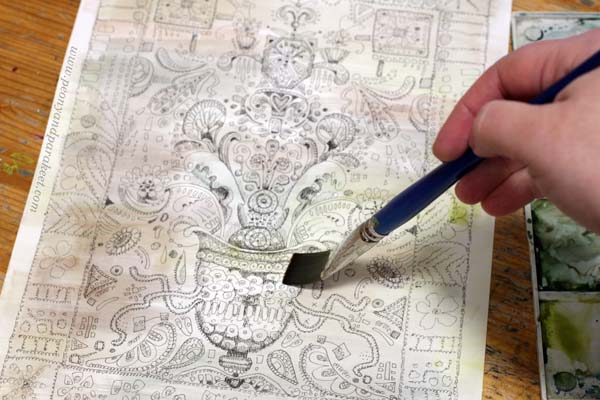
I use very little pigment and many tones so that the background looks like old antique linen.
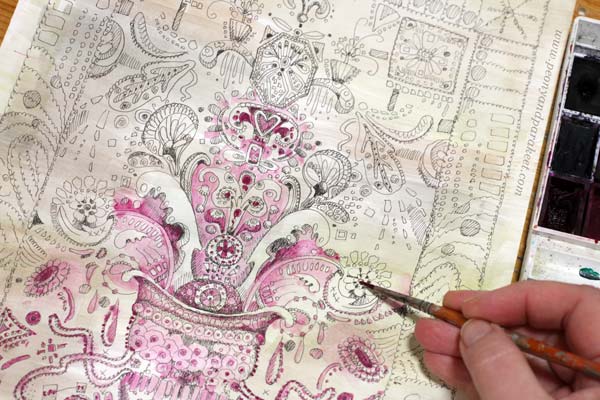
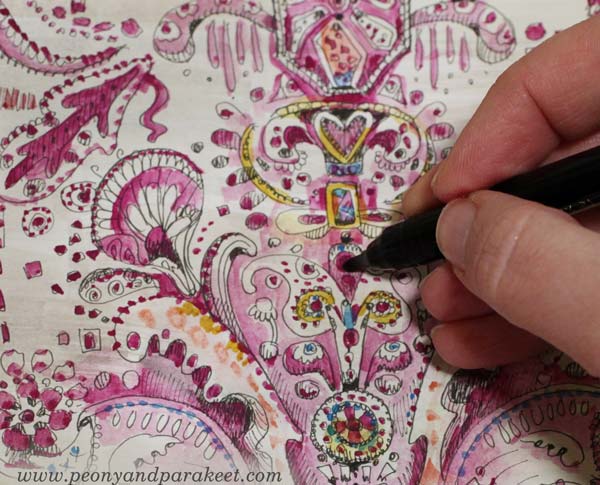
Step 5 – Color the Doodles
Pick one main color for the sampler. My choice is cool carmine red. When coloring, add more decorations like dots and other decorative shapes. You can also color around a shape instead of inside the shape.
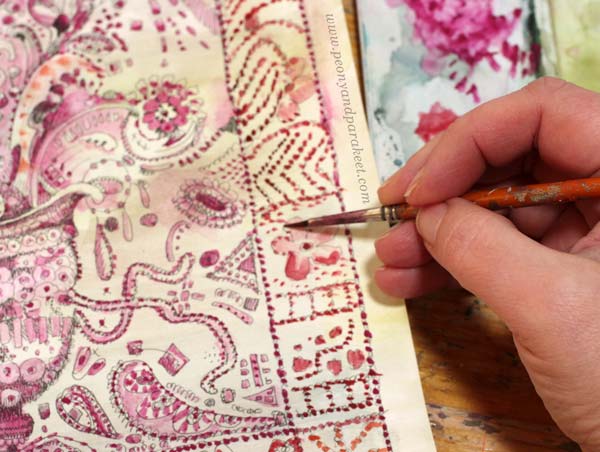
Pick slightly different tones for the frame. I use warmer red and a little bit of orange.
When you have colored the sampler with a very narrow color scheme, make it more lively with some new tones.
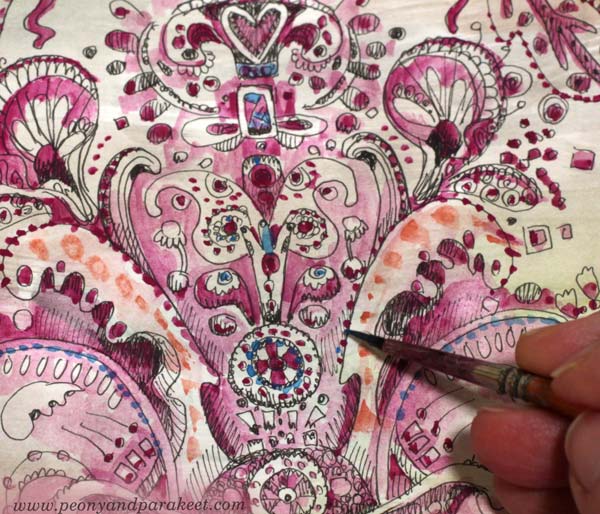
I added blue and yellow, but very sparingly.
You can also highlight the main elements by making the darkest areas pitch black.
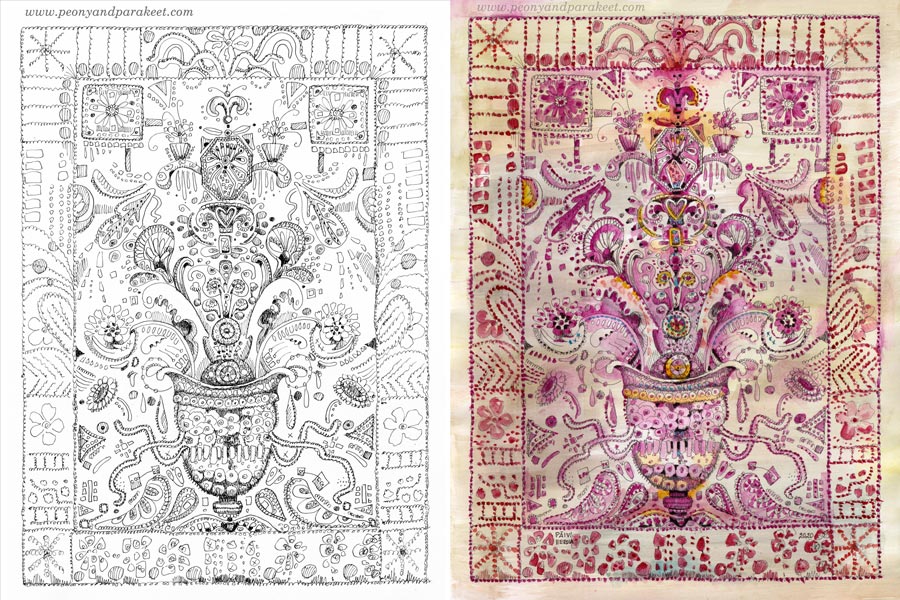
Here are the black and white version and the colored version side by side. Click the image to see it bigger!
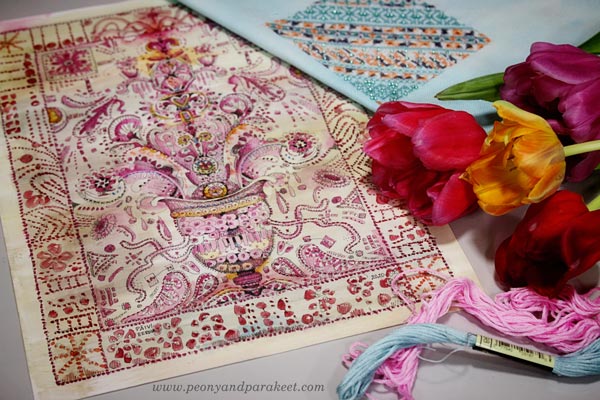
Doodler’s Sampler – For the Love of Flowers and Hand-Stitching
Henri Matisse has said: “I don’t paint things. I only paint the difference between things”. I think that to me, it goes like this: “I don’t paint things. I only paint the similarities between things.” So here’s for the love of flowers and hand-stitching!
Draw more with me – Check the courses Animal Inkdom and Magical Inkdom!
Hand-Drawn Collage Samplers
I have been browsing my art archives lately, and it has been surprisingly inspiring. I have lots of art journals and a big box of paintings and drawings from my teenage years. Even if I have experimented with many techniques and themes, it all looks very similar now. Everything fits together and gets my approval. Painting “Icebreaker” gave me a new kind of confidence, and with that confidence, I am now blogging about a playful idea that I got from cross-stitching – hand-drawn collage samplers!
These samplers are composed of hand-drawn paper pieces so that they look like cross-stitch samplers. They have ribbons, many identical ornaments, tiny floating elements, and some symmetry. There’s also stiffness and order so that it looks like the elements are on a grid.
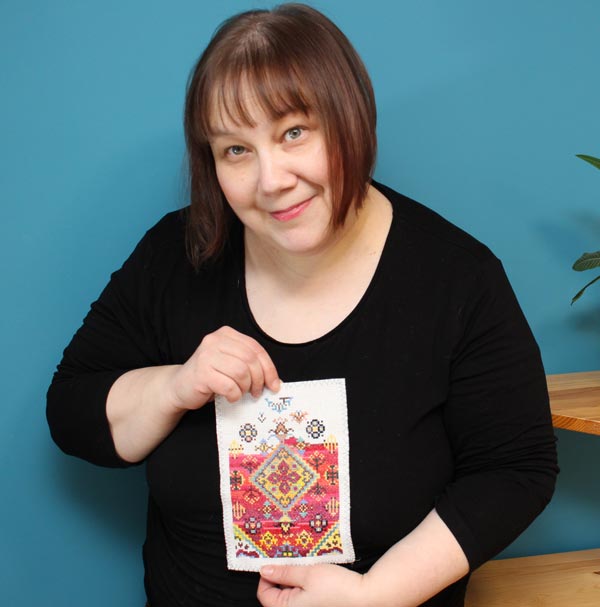
Cross-stitching is one of my hobbies, and even if I try not to think about art when stitching, I just couldn’t resist this idea! Here’s how I applied cross-stitching to collage art.
Print Tiny Scans of Hand-Drawn Collage Pieces!
It’s essential to have tiny decorations to make the collage look ornamental. I solved the problem by making collage sheets of scanned hand-drawn pieces. These collage elements were drawn for the classes Animal Inkdom and Magical Inkdom, and there are some jeweled flowers from the free mini-course for subscribers too.
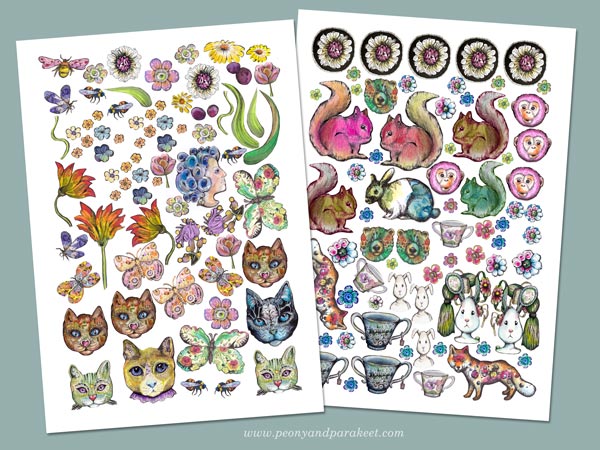
The original size of these pieces is much bigger than in the printed sheets.
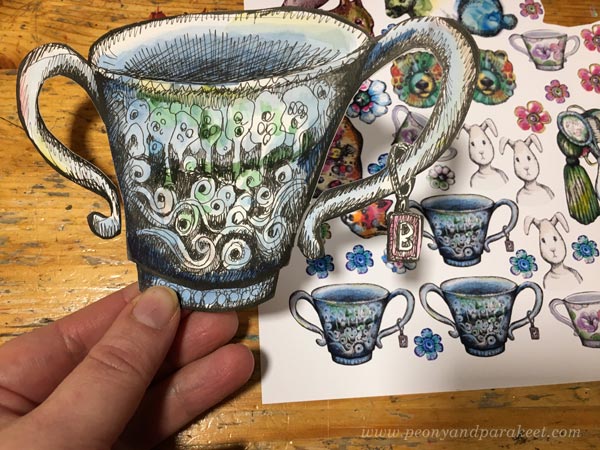
Use All Kinds of Hand-Decorated Papers!
Samplers have a variety of designs, so every little doodle is a potential sampler piece. I have a box of hand-decorated and painted papers (mostly leftovers from Collageland) and two boxes of hand-drawn collage elements. I have also cut some old art created in the 1980s. All these are a good addition to small printed pieces.
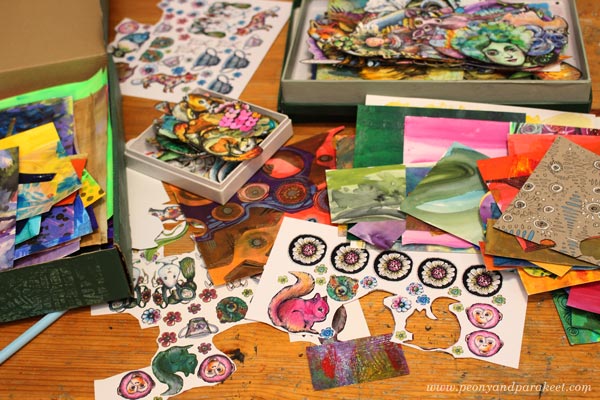
Of course, you can also use store-bought die-cuts, pictures from magazines, etc. but if all the elements are handmade, they will all fit together much better because they are all YOU!
Perfect Project for Hand-Painted Background Pages
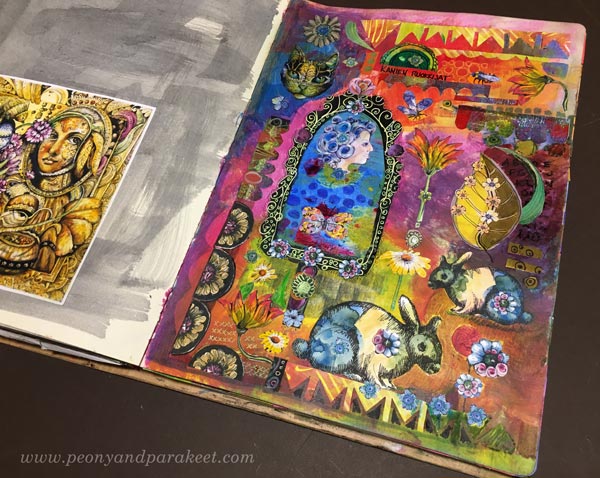
If you are an art journaler, I bet your journal has a lot of pages that are more like backgrounds rather than finished pages. You can use them for collage samplers!
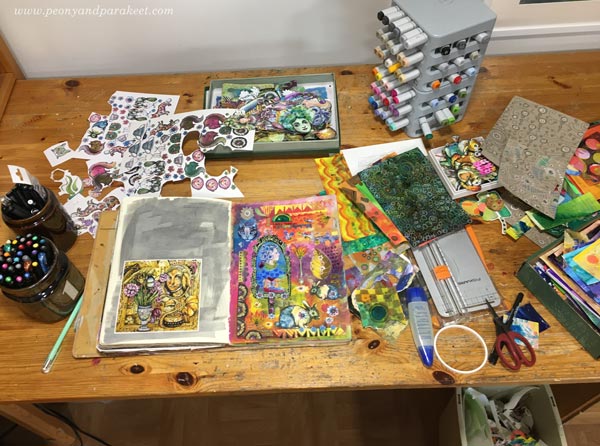
The background of this sampler was busy and bright, but I just added brown over some of the areas and let the colors speak, or should I say shout!
I attached the pieces with paper glue and some larger elements with double-sided tape. I usually use gel medium, but it’s messier, and it’s too difficult to cut all those tiny pieces with sticky fingers.
Self-Expression with Hand-drawn Collage Samplers
Sticking paper pieces can be just a relaxing hobby, like cross-stitching. But samplers can also tell stories!
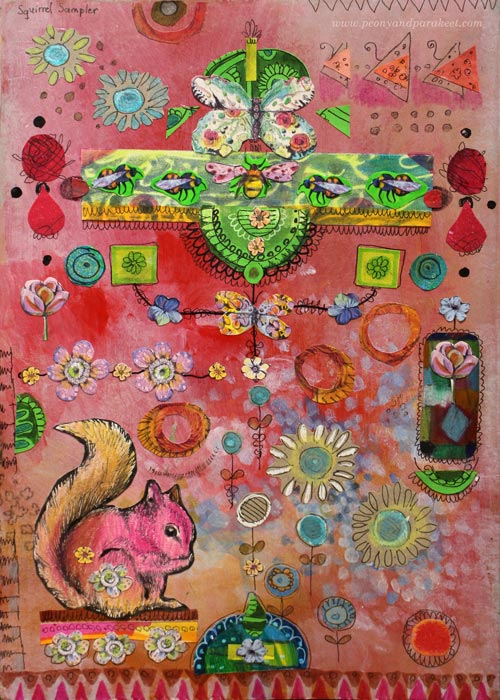
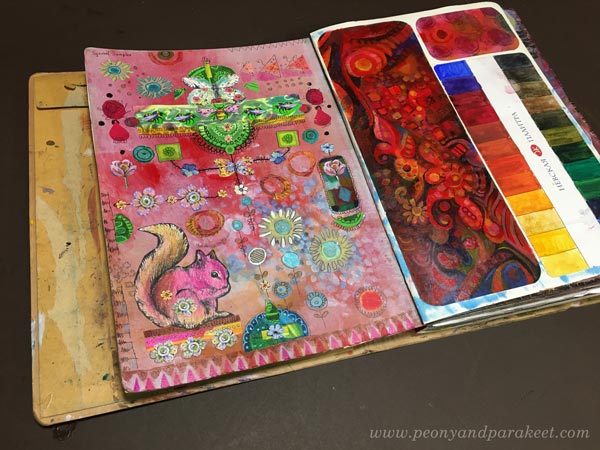
My first page is called Squirrel Sampler, and it has all kinds of little treasures that Paivi the Squirrel has collected.
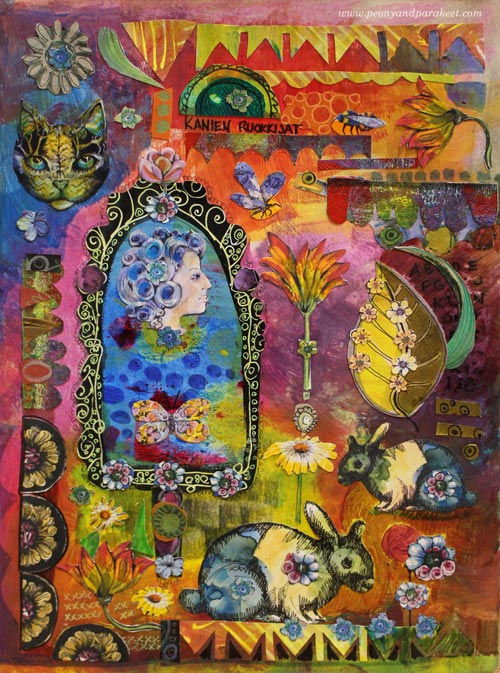
The second page is called Rabbit Feeders. It refers to women’s status and importance in Virginia Woolf’s novel The Voyage Out. An isolated woman looks at herself from the mirror and questions her importance for the world. I read Voyage Out as a teenager, and this allegory, even if it’s just a few rows in the book, touched me deeply.
It often happens that creative play evokes feelings and stories that are too big to express in any other way. I hope you’ll enjoy making these samplers!
Start drawing your sampler pieces – Subscribe to my weekly emails and get a free mini-course!
Your Art in 2020 – How to Set Creative Goals?
Here’s the problem with creative goals:
When forcing yourself to focus on a few things only, you will get bored and feel restricted. Rather than gaining more meaning for your art, you drift further away from what you are. You are then also less likely to fascinate and serve other people as well.
But let’s think this way:
The core of your creativity needs space for expanding. Don’t set a single technique, skill, project, or source of inspiration as your primary goal. Instead, ask:
“What kind of fantasy world do I want to build?”
Look Further Rather than Narrow the Goal
Don’t just say: “I want to paint flowers,” but imagine a place where your flowers grow. For example, is it a palace with huge vases, or a meadow full of light? Continue to travel further: what’s around them, where do they lead, what kind of patterns, colors, and atmosphere are there? When searching for inspiration, select things that fit with your imaginary world.
When you think about the world instead of a style, you allow things to get mixed and merged. You will see the many things you do as one big world-building factory. Your art-making is then more focused on how to integrate than how to minimize, and you become many steps closer to your true self.

Creative Goals – Frequently Asked Questions
“I want to become an abstract painter, how does this world-building fit with that?”
Abstract art also sets an atmosphere and takes ideas from representational things. If you try to avoid that, you won’t have any ideas for abstract art. The inspiration for the world-building also includes all the senses. You can curate what sounds and music belong to your world, for example. It’s also a mental thing: think what kind of philosophy and experiences you want to express, and see them as events in your world. You can go as far as you want, but start simple and expand as you create and integrate.
“I just want to create like my idol X.X. does.”
What kind of world is she or he building? What is missing if you think about your origin and your childhood? Two people never have similar worlds. But that’s also where the exciting part begins: our worlds can cross and enrich each other.
Come to Draw and Paint with Us!
Come to expand your visual world lesson by lesson! Forest is a place where nature meets both abstract and representational, intuitive and intentional.
>> Sign up for Magical Forest!
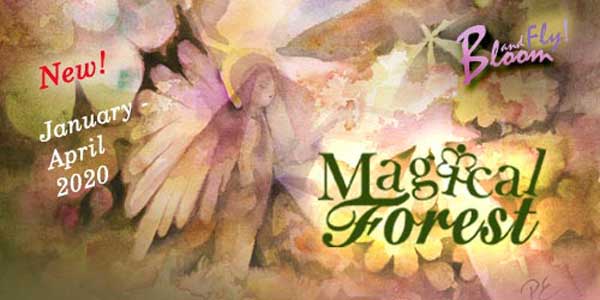
The class begins on January 1st, 2020! >> Sign up Now!
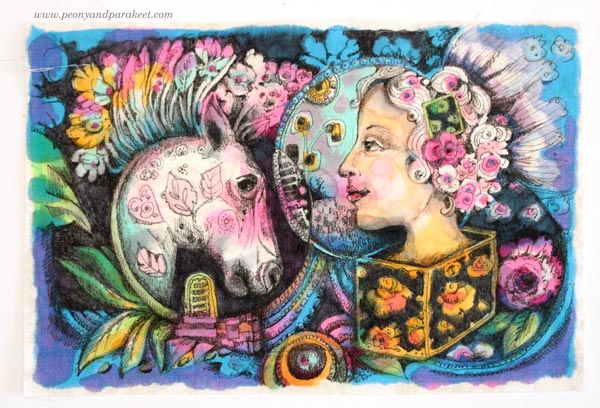
Drawing on Fabric – Illustrated Quilt Blocks
This week’s blog post is for all who love fabric! I have started building a new class, a magical sequel to Animal Inkdom! I want these “Inkdom classes” to be as versatile as possible so that you can use your illustrations in gifts, everyday items, and whatever you like to create. This goal perhaps brings out the designer from me – always seeking for ways to get the most of the beautiful pictures.
Brainstorming when Making a Quilt
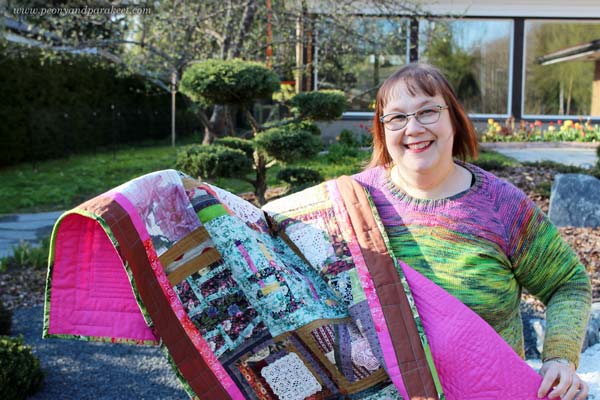
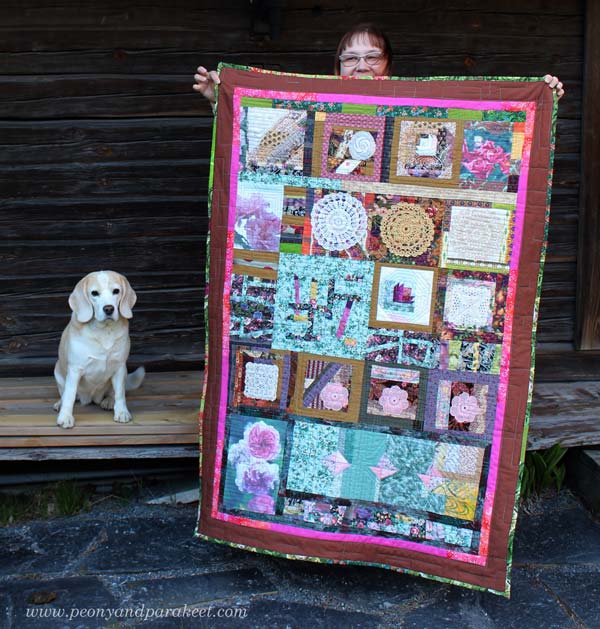
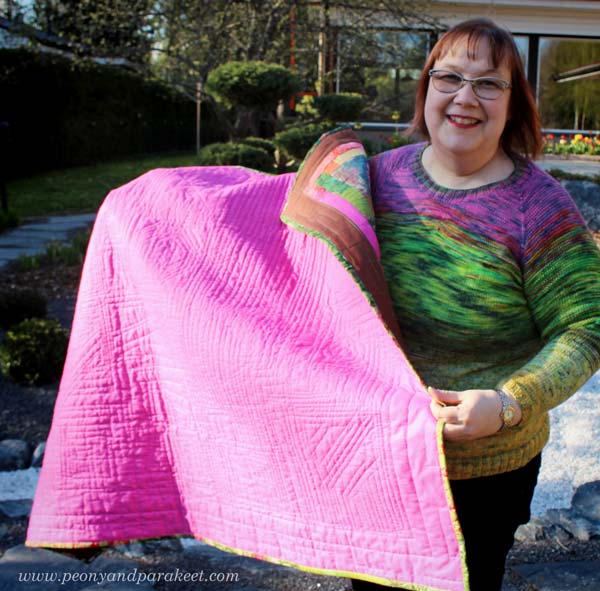
My best ideas come, when I am taking a break. Last week, I had to stop the class development for a few days, because my beagle Stella had been waiting for her quilt far too long. The old ones were so worn out that she could barely carry and wrap herself in them. I had almost finished the top of the new quilt but there was still quite a lot of work in quilting and binding it.
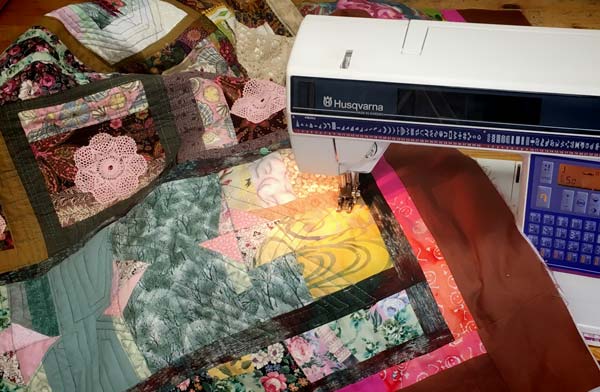
So I put the art supplies away, bought pink fabric for the back, and started stitching. The blocks had printed photos, crocheted doilies, ugly leftover prints, experiments that had piled up … I had just sewn them all together! But the more I worked on it, the more unique the blanket felt, and the improvisational way of working kept me energized. Just like when drawing!
So it hit me, that it would be wonderful to build bridges with this kind of fabric play and drawing.
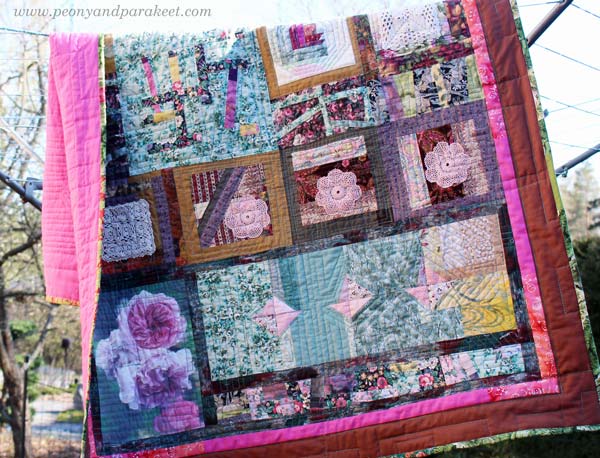
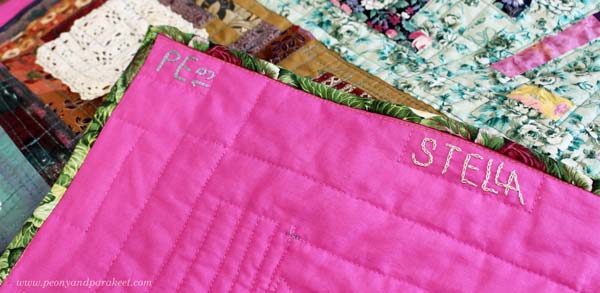
See how full of “doodles”, improvised quilt patterns, the top has!
I doodled a bit with the embroidery floss too. But that’s a lot of work, and it doesn’t feel the same as holding a pen in hand. I missed my markers!
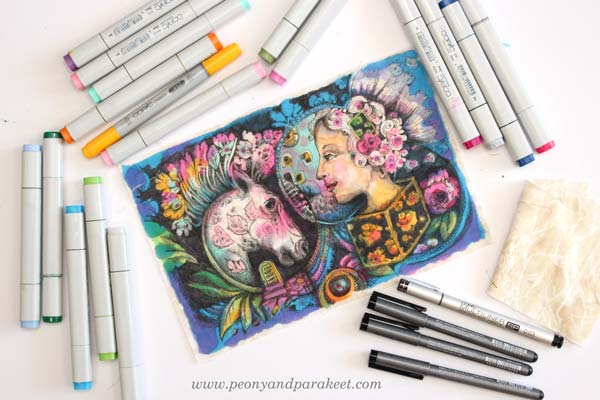
Drawing on Fabric with Copic Markers
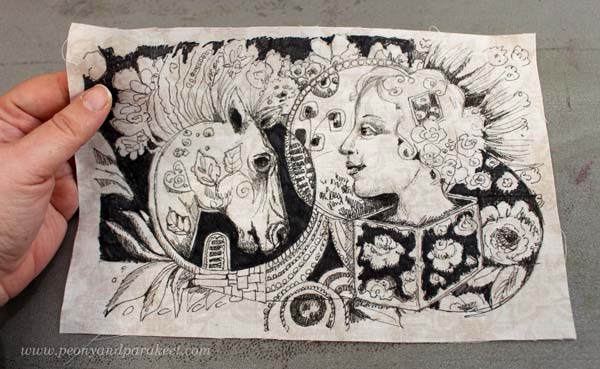
Once Stella’s quilt was finished, I went to my Copic markers. I ironed a piece of natural white cotton fabric that had some print patterns. To make the patterns even more subtle, I drew on the wrong side of the fabric. So I had a lively background that wasn’t too busy. First, I made a line drawing with thin-tipped black pens. They were Copic brand too.
Then I started coloring and making the drawing more detailed.
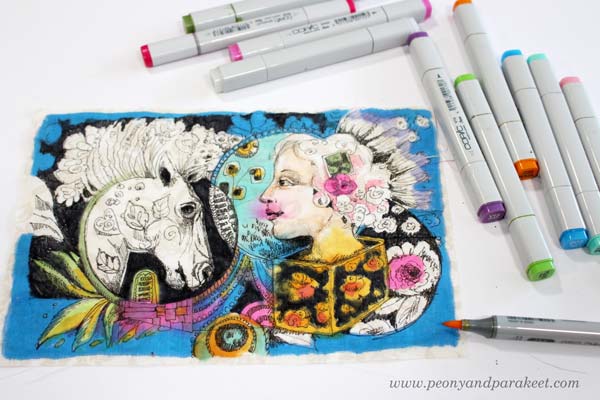
Here’s the finished piece. I loved the easiness, the softness of the lines, and that I now have a unique quilt block. I will certainly draw some more!
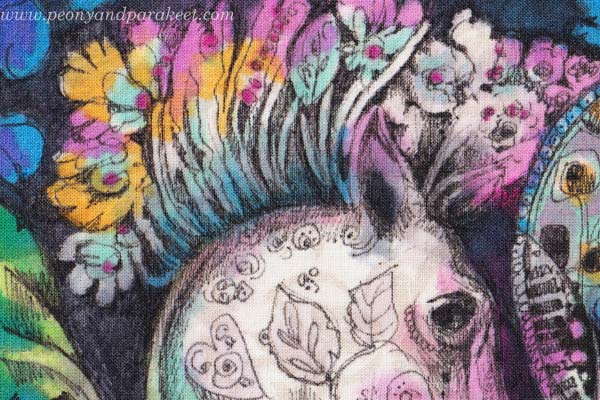
Here you can see how the lines, fabric and color blending go well together.
When I look at my fabric stash, this hand-made piece is definitely what I love the most.
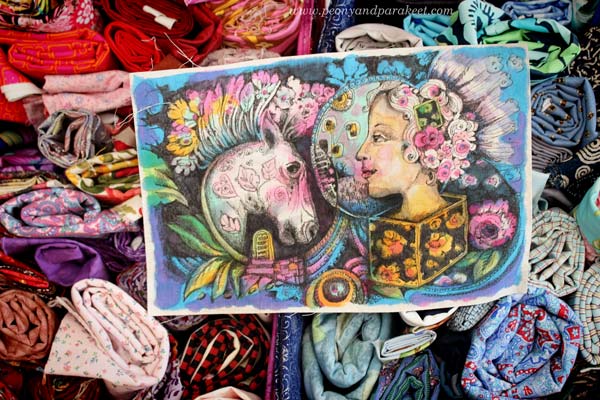
My art studio looks so happy now! The best thing is when many things that I love to create come together.

While I am preparing the new class, tell me, what kind of ideas and instructions have you been waiting for building bridges between your arts and crafts!