Fabric Collages

The idea for this card came from the pile of fabric scraps that I have. I began to wonder: could I use these instead of papers to create fabric collages?

Fabric Collages – A School Project from the Past
I also remembered one happy moment from the childhood. I was about 10 years old. A teacher asked us to bring fabric scraps to school. We were asked to cut the fabric into pieces and create a collage from them. My schoolmates were not excited but I was thrilled. I cut the fabrics into tiny pieces and began to glue them on a paper.
When I had finished the collage, I was very pleased with it. I had also had such a good time. Little did I know that I would be cutting tiny pieces whole my life – that the moment I picked the scissors was to follow me many times afterwards!

1) Cut and Glue the Fabric Pieces
The supplies for fabric collages are simple: scissors, glue, paper, fabrics.

2) Add a Layer of Gel Medium
Because my collage was small, I wanted to add some fine details and extra layering. To be able to do that, I covered the first layer with the gel medium. When dried, I would be able to doodle with markers and create dimensions by adding more layers.
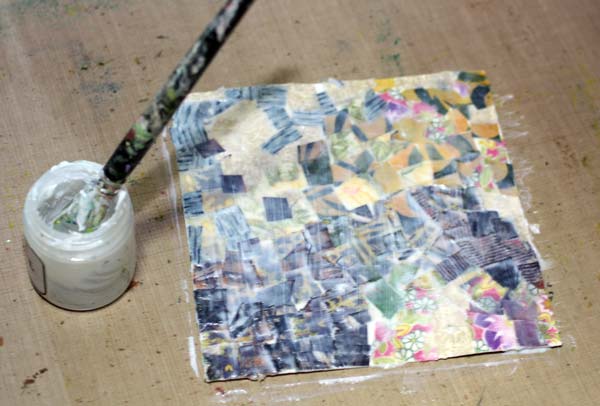
My favorite is Golden Soft Gel Gloss but any gel medium will do. Even if I am not a big fan of buying more stuff, purchasing this is a good investment. You can use gel medium not only to create surfaces but also glueing paper pieces when making paper collages.
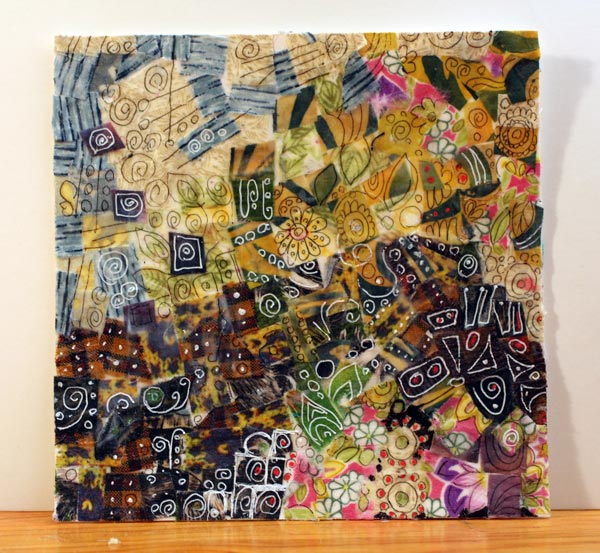
3) Add Doodling
When gel medium dries it becomes transparent and you can doodle with thin markers or gel pens on it. Make sure to dry it first throughly!
4) Add More Details From Fabric Pieces
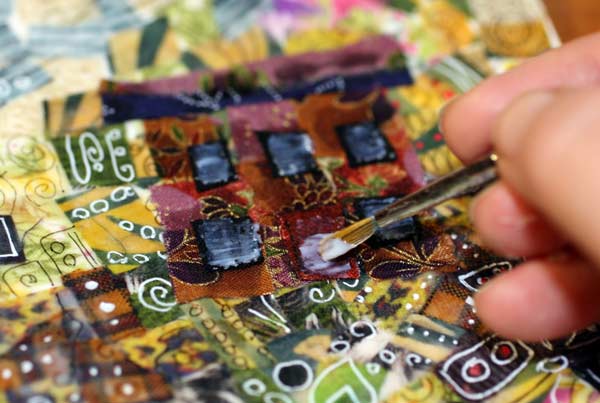
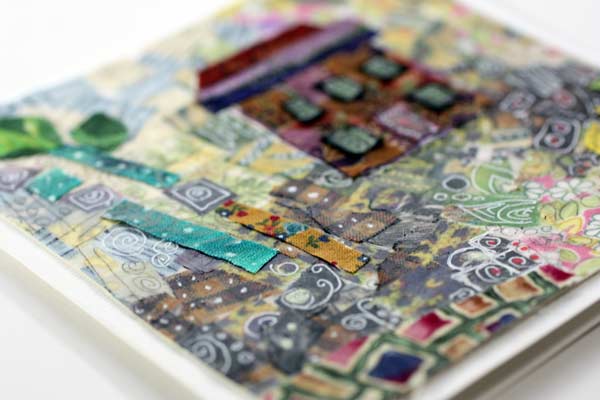
After doodling on the first layer, I wanted to add details like the house in the middle. After constructing the house with fabric pieces and glue, I added gel medium to the details to add some doodling on them.
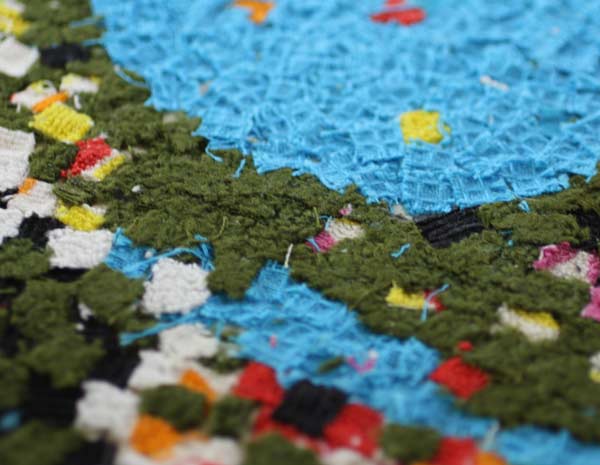
The photo below shows how the fabric is layered. A part of the card is covered with gel medium and feels like plastic. There are also fabric pieces without any coverage on the top and they feel soft.
You do not need a sewing machine to enjoy working with fabrics!
Let me be your art teacher: Subscribe to my weekly emails!
Decorated Papers for Knitters (or wannabe ones!)
I often get drawing ideas from crafting. I made this decorated paper by mimicking the way I knit with many colors.
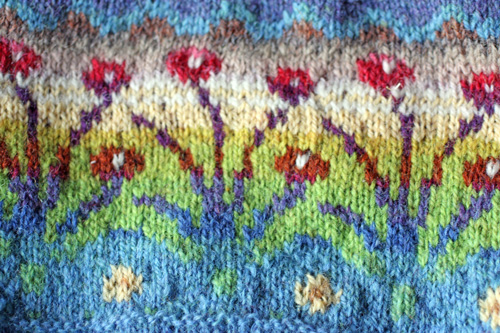
Stranded knitting (or fair isle knitting as some call the technique) can feel tedious at first. Constantly changing the colors can be tiresome. But if you do that long enough, your brain will get used to it. I think it is a way of thinking: constanty interrupting what you are currently making. If you do that, you will also prevent yourself thinking too far ahead and too logically.
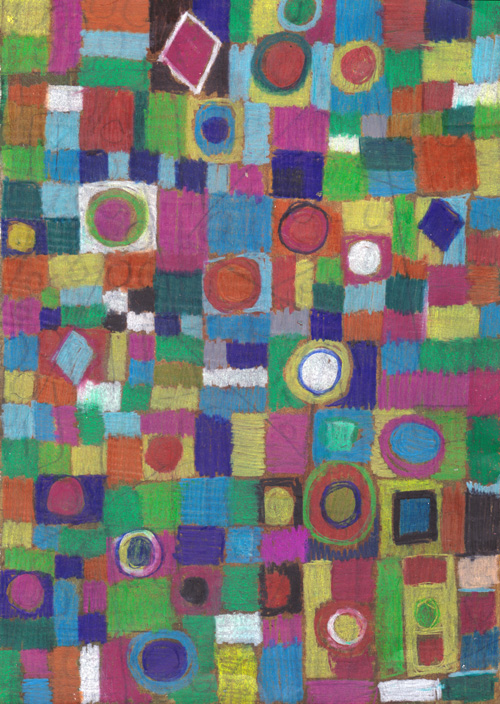
I began with an odd paper that had been watercolored throughout. That way I created depth instead of showing white paper between the colored areas. Color pencils work great on watercolored surfaces a long as the paper is fairly smooth. I created the paper just by adding basic shapes so that they formed some kind of fairly free grid. Changing colors and plans all the time kept the interest at the work and prevented too monotone visual appearance.
After making that paper I began to think about handdyed fiber. I love this photo of my bobbins! It’s mind-blowing when I think about spinning handdyed wool and how the color changes so seamlessly.

I also often knit socks from handdyed yarn. Like these ones I just made recently.

As a result I decided that the irregular stripes deserve to get on paper too!
I began with few colors first, again on watercolored paper.

Then I added colors. I worked pretty fast here. Even if I like my papers to be super detailed the sharp and regular stripes often look too static.
Most of my papers have round shapes. These knitting inspired ones are edgier in style. They will look great when combined with the circles. When you are building the stash of hand decorated papers for collage art, take care that you have a variety of papers.
In these papers the motif size can also be maintained fairly small. So these will look absolutely gorgeous even when cut in tiny pieces!
P.S. I you are more of a quilter than knitter, read what you can bring to art from quilting.
Let me be your art teacher: Subscribe to my weekly emails!
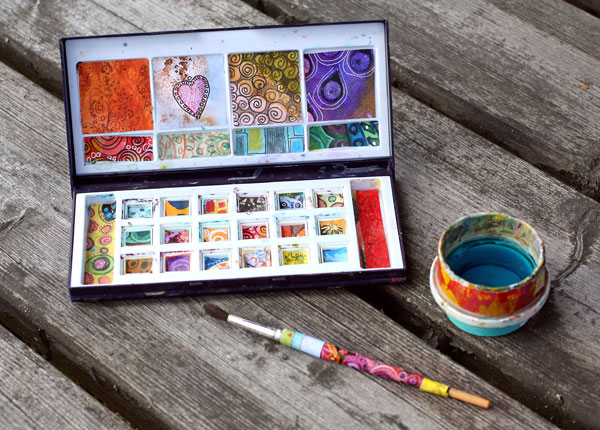
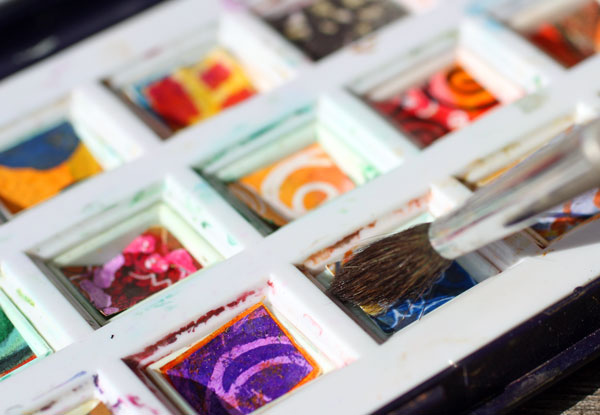
Tribute to the Old Watercolor Set
I loved my old watercolor set. I bought it at the time I thought I should learn how to use watercolors. I also bought a book about watercolor painting. It would explain to me how to do it in correct way. That meant: merrily paint those landscapes and still lives in a row like all watercolor artists seemed to do. Soon I realized that even if I admire all those great artists I got nothing out of painting like that myself. Partly blaming my watercolors for it I put them away.
They must have been sad. All those beautiful things that they held inside was in the dark for years. How happy and thirsty they must have been when they were finally able to see the light again. They persuaded me to give them another try. They promised to be ready what ever I would assign them to. “Come on, stroke us with those soft brushes you have”, they pleaded.
I gave them a stroke, and another… After many long and hard discussions I realized that all I had to do is to let go. Not only put away my assumptions about their purpose but also their nature. These were social guys. Ready to talk not only with me but also with my color pencils, acrylics, inks, markers, you name it.
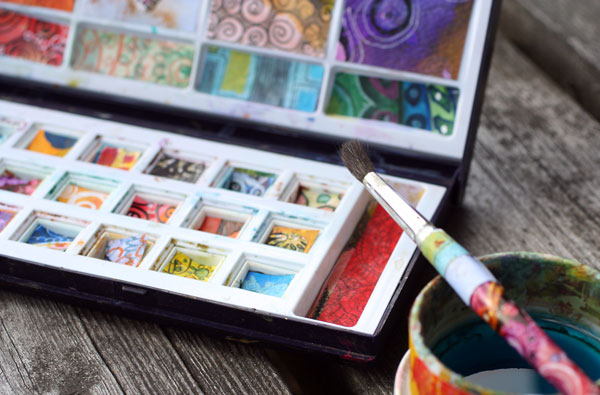
Now the pads are all gone. But even if the tray is empty, the beloved colors can be found in my art journals and display books. I kind of think that I have set them free. To celebrate their freedom and the happy moments spent with them I made a tribute for them. I even dressed their favorite brush and their water cup.
With this tribute I let my watercolors speak to you: use your art supplies and let them show you where art can take you. Art is not a competition, neither any other predefined experience. Art is not too noble or too serious. You have the privilege to fly to the world of imagination and your art supplies crave to help you with that!
Let me be your art teacher: Subscribe to my weekly emails!
Can Rubber Stamping Be Art?
I love to explore the fine line between making art and creating crafts. One morning I woke up questioning myself: “Could rubber stamping be art?” I posted the question on Twitter and got one answer. It was “I would think so.” Yes, I would think so too! The only problem left was: how to stamp so that the result still has my style and does not look too mechanical.
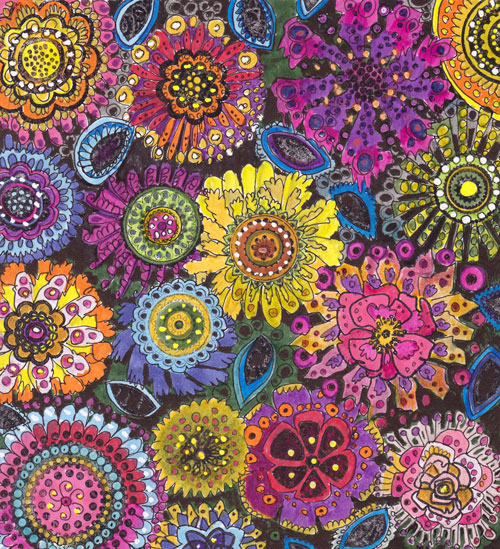
Rubber Stamping without Repeats
I decided to create flowers that have stamped centers but hand drawn pedals. I used each stamp only once. It is so tempting to stamp one more time with the same stamp! But if you avoid repeats the result looks much more genuine! The only stamp that I used more than once was the leaf stamp. Even the leaf could be different each time, but I ran out of the different shapes.

I used black ink and doodled the pedals with a thick black marker. That way the doodles looked pretty similar to the stamped images.
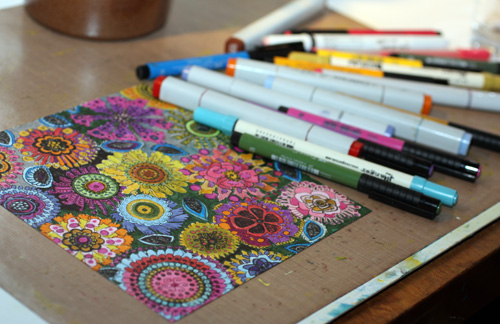
Then I colored the stamped areas and hand doodles with markers. And finally, of course: added even tinier hand drawn details with black markers and white correction pens!
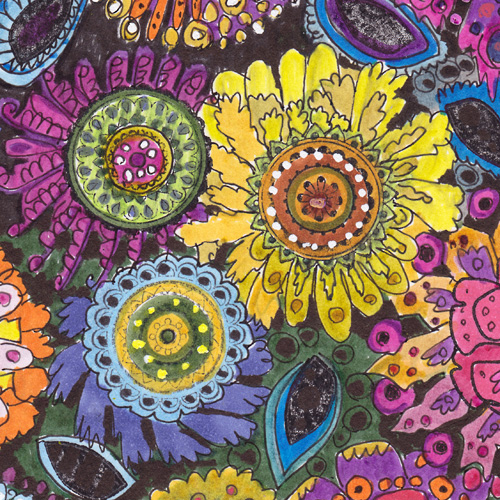
The result is a decorated paper with plenty of flowers but with this concept: using each stamp only once and adding doodles by hand you can create even complex illustrations – something that could be called art!
Here’s another example, made in 2013. In this project, I have used corner stamps that I have borrowed from my friend. They are not placed in corners but stamped to all directions. Then I added doodling. Thin black pen goes well with stamped motifs.

Let me be your art teacher: Subscribe to my weekly emails!