12 Spring Art Ideas from Over the Years
This week, I share spring-themed art from the past 10 years and give ideas for creating spring art.
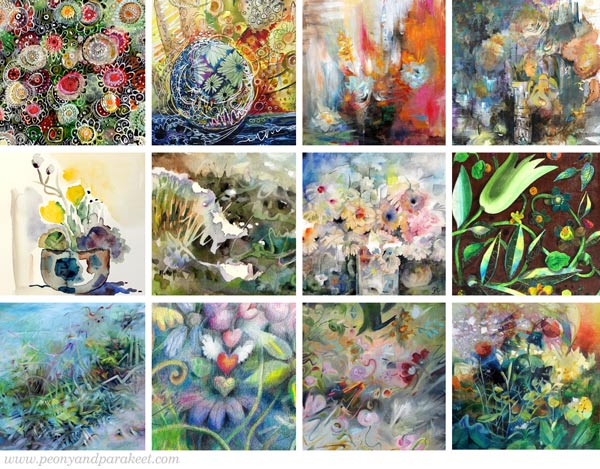
There’s a variety of ideas and I hope everyone can find some that inspire to get creating!
#1 – For Beginners and Dull Moments
Doodle spring flowers with the mindset “more is more”!
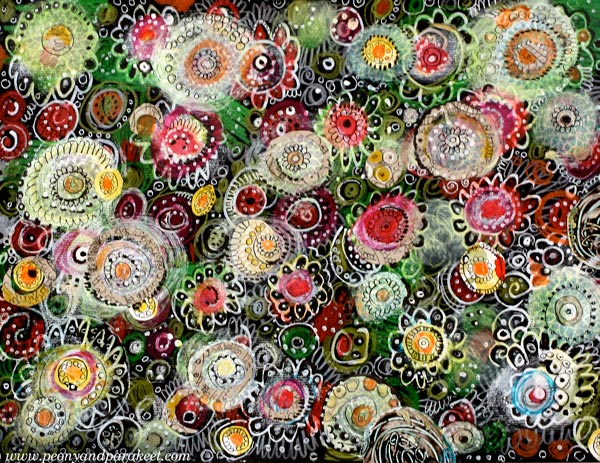
See the blog post: Subconscious Art
Course recommendation: Collageland
#2 – For Self-Explorers
Express your spring energy by following this step-by-step exercise: Bursting Circle
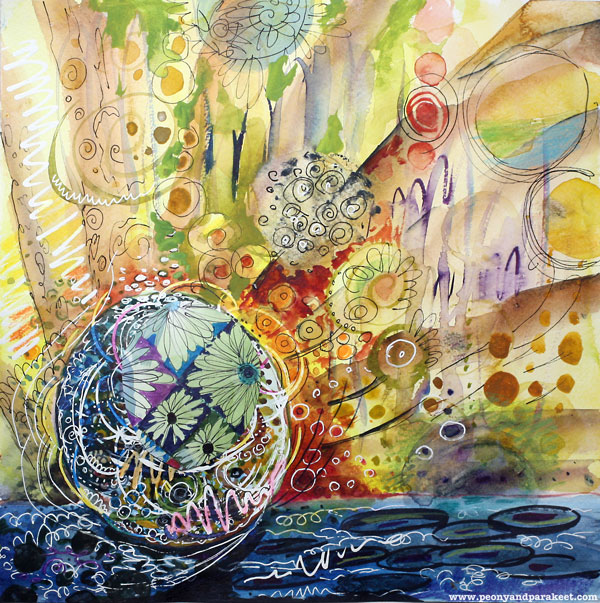
See the blog post: Bursting Circle
Course recommendation: Inspirational Drawing
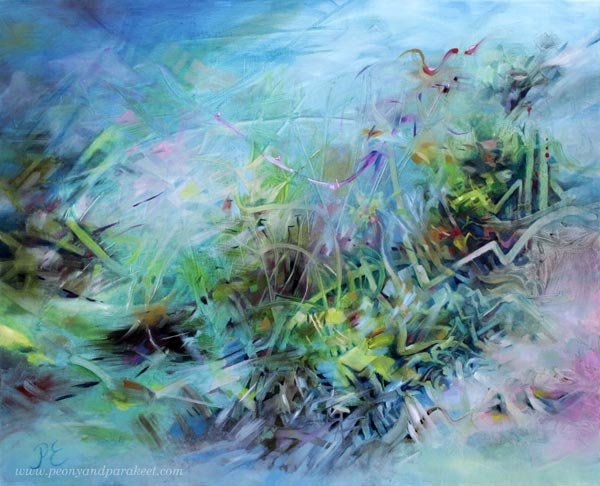
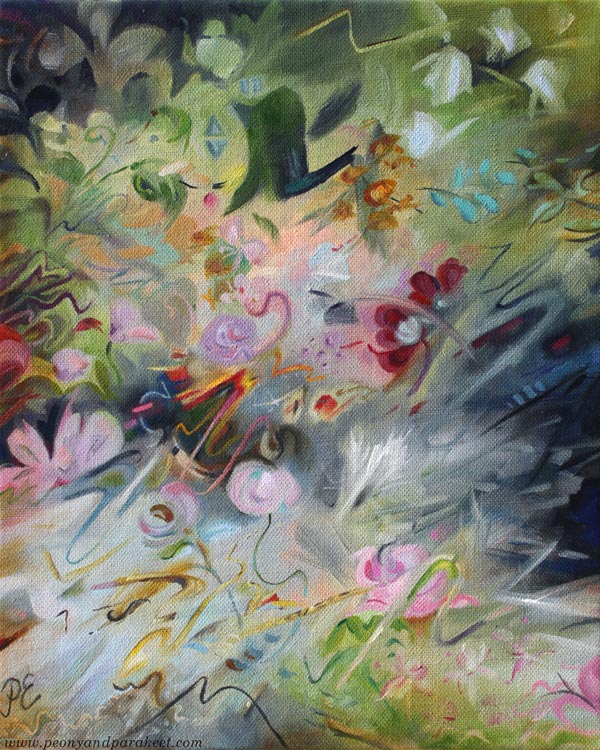
#3 – For Free Spirits
Splash color and let everything grow from there!

See the blog post: Art is Freedom
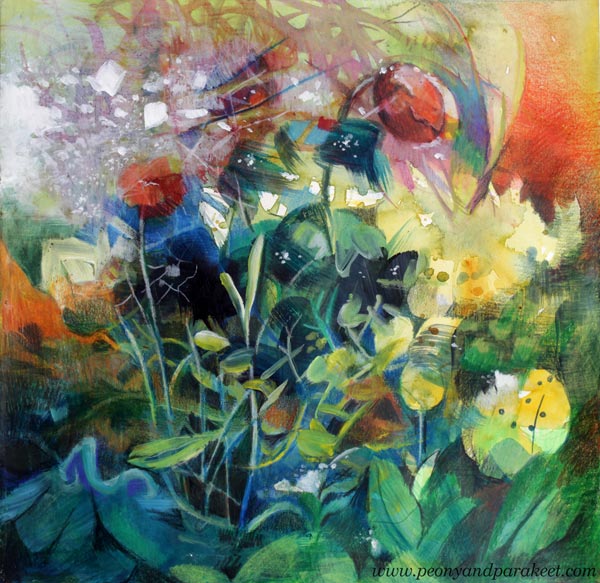
#4 – For Those Who Want to be Freer
When you want to be freer, the art of seeing is as important as the art of creating.
See the video of making “March Still Life”: Painting in Liberated Style

See the blog post: Painting in Liberated Style
Course recommendations: Liberated Artist Revisited and Freely Grown
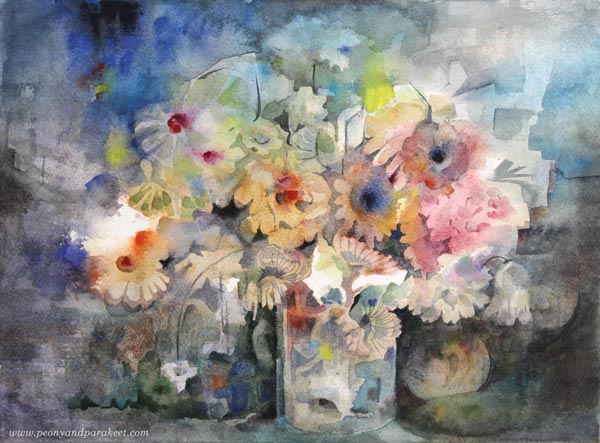
#5 – For Minimalists
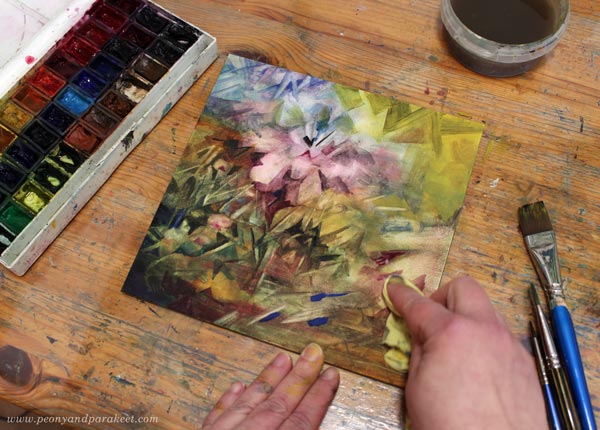
Pick a small piece of watercolor paper, moisten your watercolor pans, and let water do the trick.
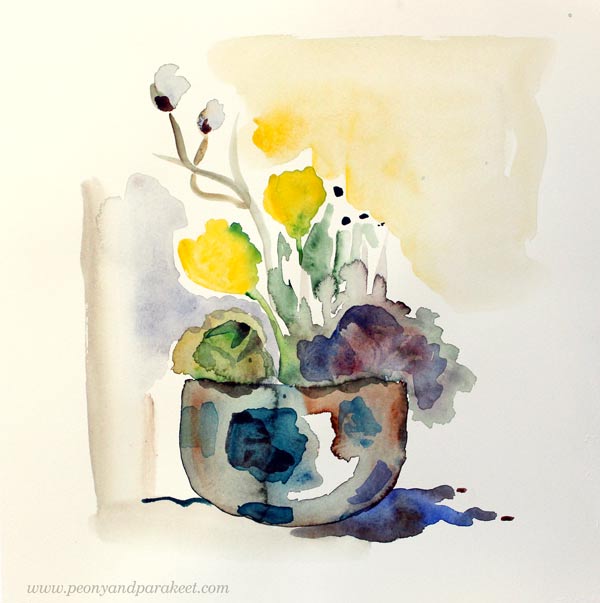
See the blog post: Easter Still Lifes in Watercolor – Video Included!
#6 – For Travelers
Paint a spring panorama. More examples: Watercolor Panoramas to Express Travel Memories
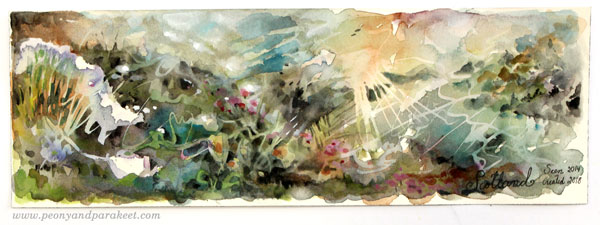
See the blog post: Watercolor panoramas to Express Travel Memories
Course recommendation: Watercolor Journey
#7 – For Beautiful Mess-Makers
Beautify the mess by adjusting the details: paint frilly edges and draw fine lines!
See the blog post: Freely Born Watercolor Florals
Course recommendations: Floral Fantasies and Freely Grown
#8 – For Journalers
Decorate a journal cover with your original art! See more instructions in this blog post: Painted Paper Collage
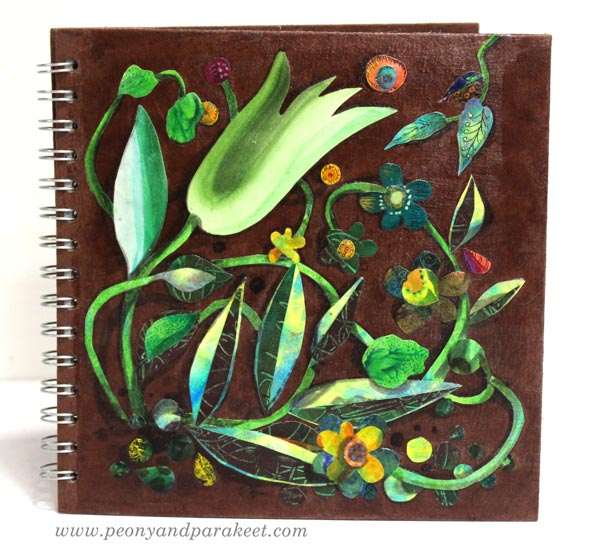
See the blog post: Painted Paper Collage – 6 Tips for Intricate and Fun Art
Course recommendations: Collageland and Decodashery
#9 – For Bird Watchers
Take this challenge to move from illustration to fine art:
Step out of your comfort zone and think about a bird shape as a canvas for expressing its surroundings.
See the blog post: Pros and Cons of Becoming an Artist
Course recommendation: Floral Freedom
#10 – For Art Lovers Who Procrastinate
Reduce watching those photo-realistic colored pencil videos and start coloring freely. One heart shape can lead to many and start your flight to the world of imagination!
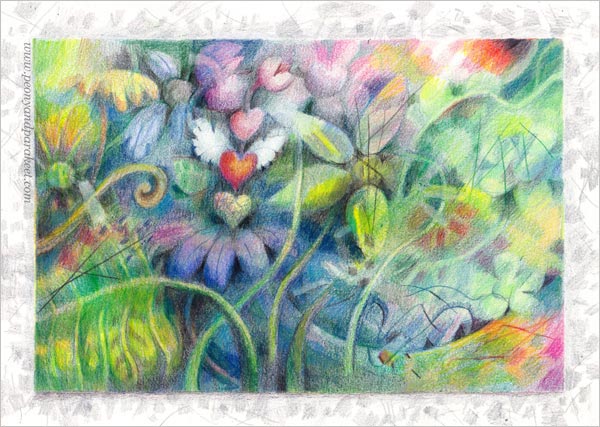
See the blog post: 5 Reasons Why I Love Colored Pencils
Course recommendations: Intuitive Coloring and Fun Botanicum
#11 – For Wannabe Fantasy Artists
Find the story first, then its surroundings! A character is not only described by his face.
See the blog post: Wonderland Art – Inspiration from Alice in Wonderland
Course recommendations: Magical Forest and Magical Inkdom
#12 For Artists at Heart
Our creativity has winter and spring too. We need each other to keep the inspiration going – to turn the winter into spring.
A challenge for you: How can you make a new start – create a new spring for your art?
See the blog post: New Beginnings in Art-Making
Course recommendations: Liberated Artist Revisited
Bonus Idea #1: Spring Art Display
Gather your art on a side table for display! Make a collection of all kinds of pieces – even the smallest drawings and collage pieces can look fun this way.
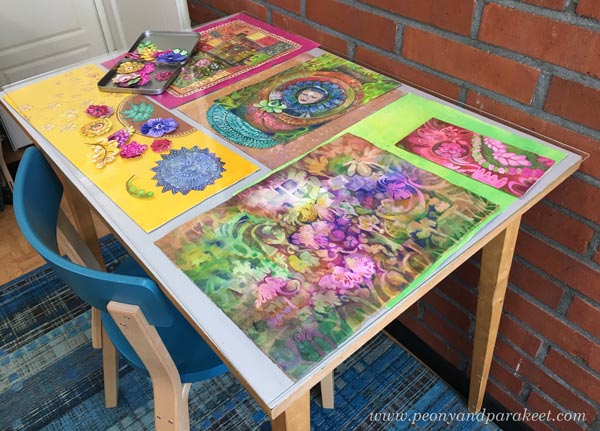
I have a plastic plate that is the same size as my table.
It protects my art, and it also protects the tabletop when painting in watercolor.
Bonus Idea #2: Listen to This!
I also have a music recommendation: “Kevät”
Kevät is spring in Finnish and the song was presented by a Finnish girl band Tavaramarkkinat in 1985. Here’s an English translation of the lyrics. The tone of the song is melancholic. This kind of controversy between melancholy and joy is one of the most inspiring things in spring, I think!
P.S. PostScript for Spring Art Ideas
We still have a lot of snow in Finland, and I miss spring so much! In these spring art ideas, I wanted to combine my yearning for spring and the celebration of being a full-time artist for ten years. The actual anniversary is in September, but I want to celebrate this life span the whole year of 2024.
One part of the celebration has been making the course Liberated Artist Revisited where I invite you to paint with me – to follow directions from Paivi many years ago, and then create more with the current Paivi. At the same time, you can ponder, how your art-making has changed and will change.
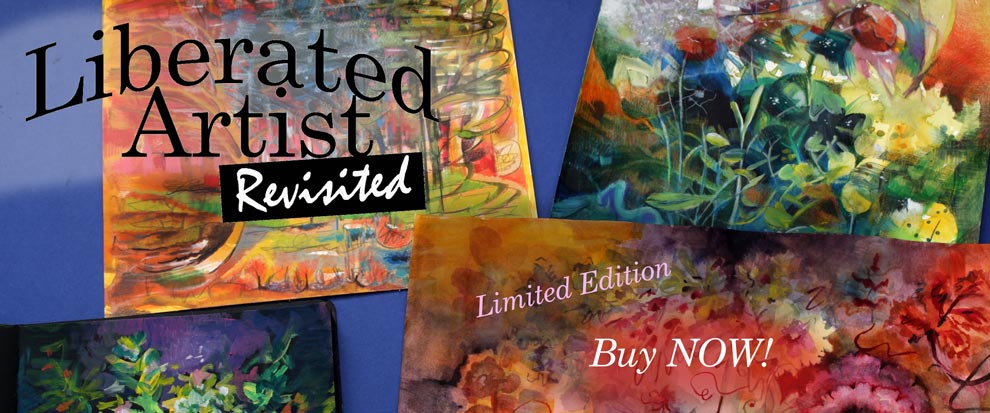
Because of the 10-year celebration and the nature of personal stories, Liberated Artist Revisited is a limited edition – only available for purchase until the end of March 2024! >> Buy Now!
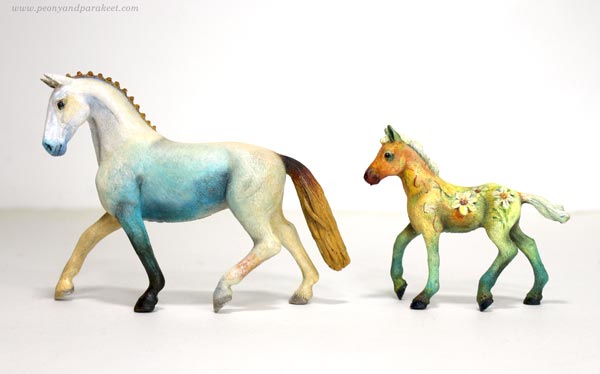
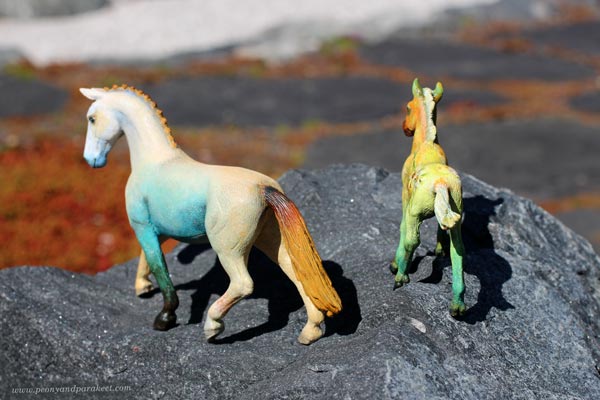
How to Paint a Fantasy Horse Figurine
This week, we apply art to something different than usual. We use our skills to transform a Schleich horse or other plastic figurine into a fantasy animal.
I have a soft spot for plastic horse collectors, and I follow many of them on Instagram. One of the most inspiring accounts is Lightning Leoo (@lightningleoo). Leo has organized community challenges on Instagram and Discord. I have participated in them a couple of times. Like Leo, most of those who customize collectible miniatures aim to make the animal look more realistic. However, I want to be more playful with colors and ideas.
Step 1 – Choose a Theme and Paint the First Layer
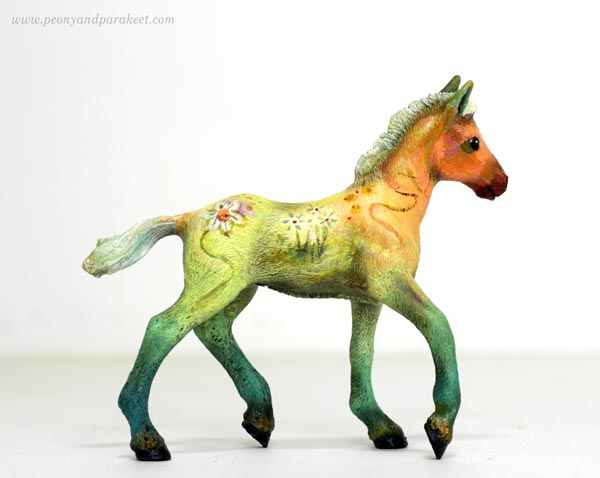
Start by choosing a theme that gives ideas for the coloring. The animal figurine here is a brown Schleich foal and my theme is daffodil. I used acrylic paints to make the legs green, the body yellow, the hoof orange-red, and the tail and the main white – just like the flower!
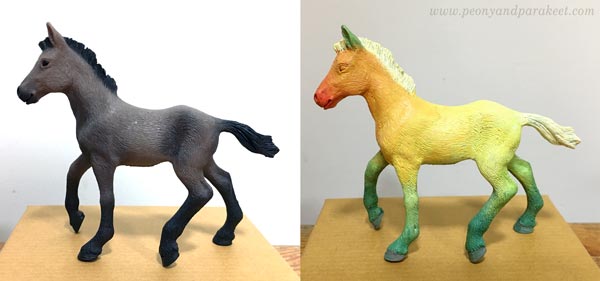
At this point, the animal doesn’t look nice at all, but that’s ok. The idea is just to cover the original paint and make a simple foundation for the decoration.
Step 2 – Add More Tones and Decorations
After covering the original color with the theme colors, mix more tones of those colors. For example, if you have used one green in the previous step, now mix more green tones – cooler and warmer, darker and lighter, brighter and more muted. Add slight variations of tones on the top of the first color layer so that what used to be one solid color has now a gradient of tones. This makes the color more natural. Note: you can use this technique in any art!
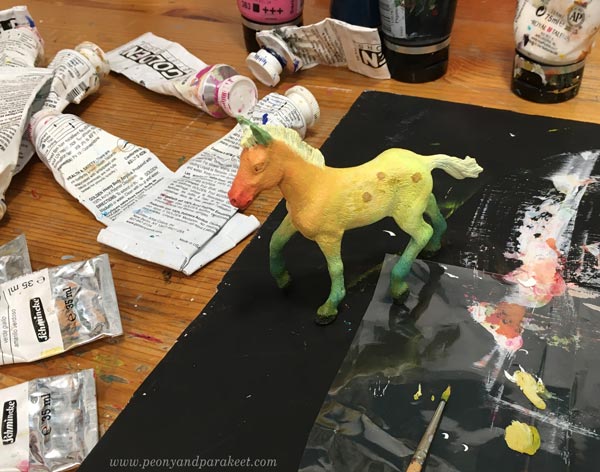
In this project, I created color mixes of all kinds of greens, oranges, yellows, and whites.
At this point, you can also start decorating the figurine and use these color mixes in decorations, eyes,You and other details.
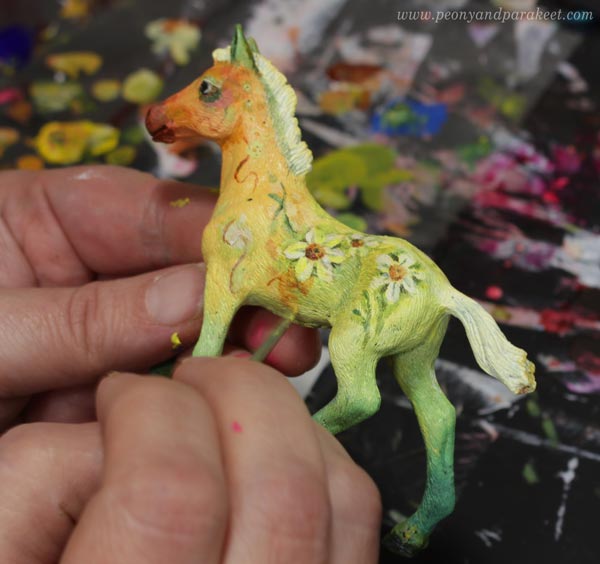
Get ideas for decorations from the theme! I painted small daffodils.
Step 3 – Optional – Add Shadows with Soft Pastels
Soft pastels make the figurine look more real and highlight the best parts. First, scrape them with a sharp blade to get color powder. Use a small brush to spread it where the shadows are, for example, where the leg meets the belly. You can also soften the color changes with pastels.
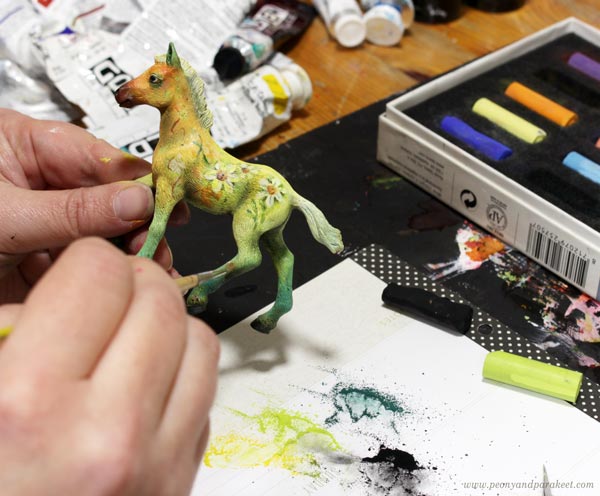
Attach the powder more permanently by spraying the fixative over it. Notice that after attaching the powder, you can continue with the finishing touches in acrylics!
Step 4 – Take a Fantastic Photo!
We always should take a good photo of the finished work, but with a fantasy horse, it is very rewarding. Find a place where you can fool the eye about the scale and bend down to take a photo a bit upwards.

Another option is to make a gallery set up so that the background is white and the figurine is photographed like a piece of art.
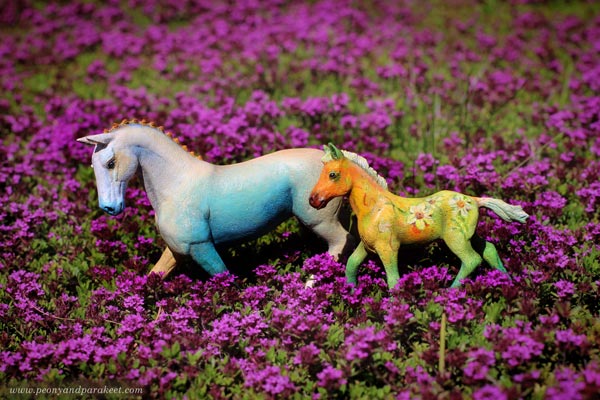
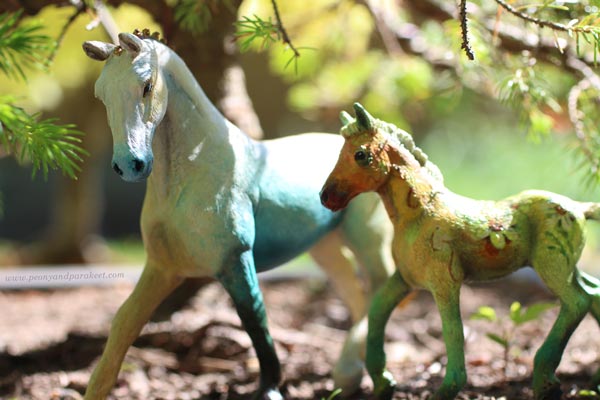
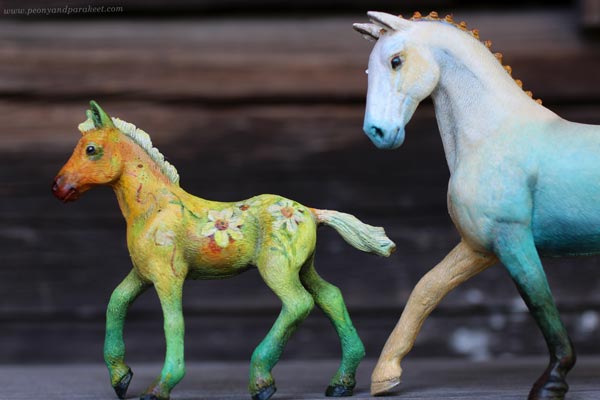
Another Example of a Fantasy Horse Repaint
Here’s a Schleich horse that is bigger than the Daffodil fowl. My theme for this one was peach. The decorations are simple, but there are many tones and lovely gradients.
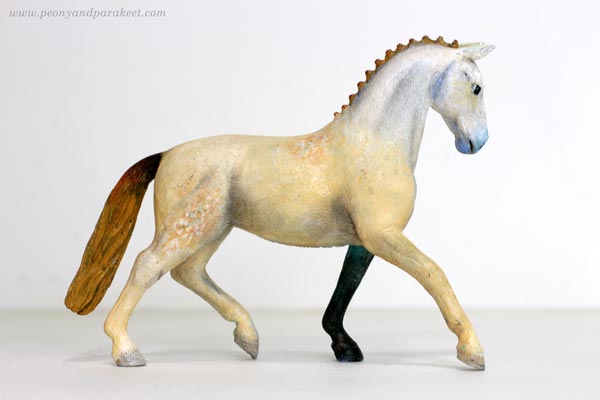
Making one foot in a different color adds drama and a bigger horse is easier to paint.
It was fun to photograph these two together!
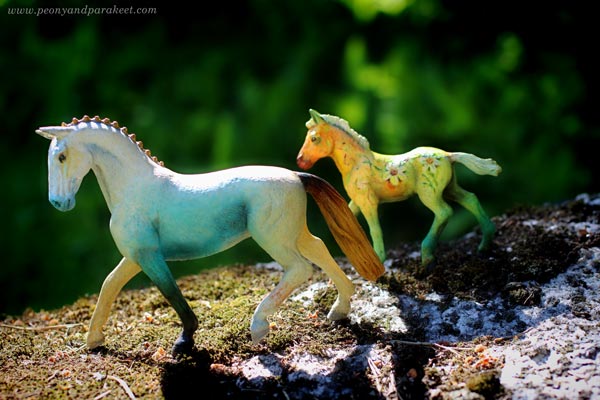
Natural light creates its own effects and makes the fantasy look real.
Horizontal lines in the background make the movement look more real.
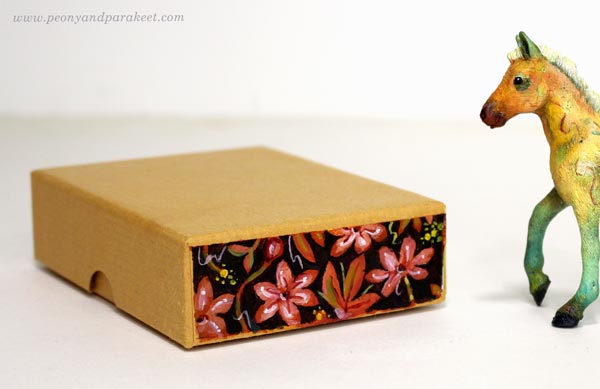
Gift Box for Fantasy Horse
These small fantasy horses are great for presents. I gave the fowl to my friend who owns not just a collection of plastic figurines but a real horse too. I found a sturdy box that I had got when ordering paint tubes.
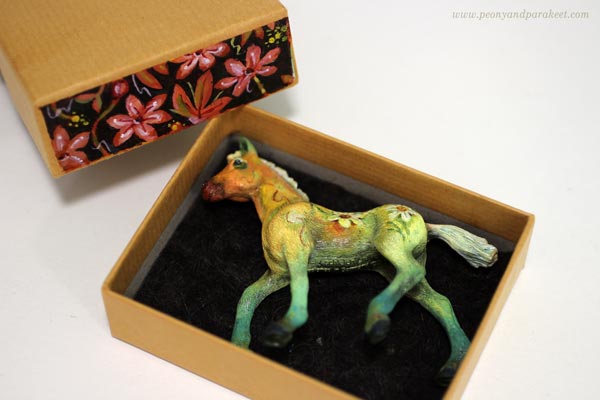
One side had writing on it, but I painted a floral decoration over it.
Creative Play as an Art Form
Playing has always been important to me. When I play, I get ideas that go beyond the ordinary and that combine different fields. In 2020, I even made a painting about the power of play called Steppe Wind.
In the course Magical Inkdom, we draw and decorate paper horses and other animals.
By playing we can enjoy the beauty and be comforted. It’s like we enter the same big hall of art but from a different door. Then when it’s time to get more serious, we have new energy and new power to overcome our fears.
That’s why I want to bring up topics like painting and photographing figurines in this blog.
What do you think?
Watercolor Fairies – Painting the Magic of Nature
I’ve been going through my art supplies lately and reflecting on my path as an artist so far. In recent blog posts, I’ve featured drawings, but now we’re moving on to watercolors. This post is about painting watercolor fairies and the wilderness around them.
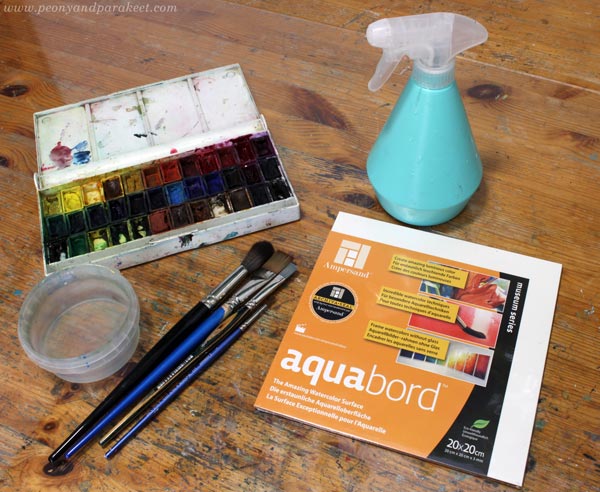
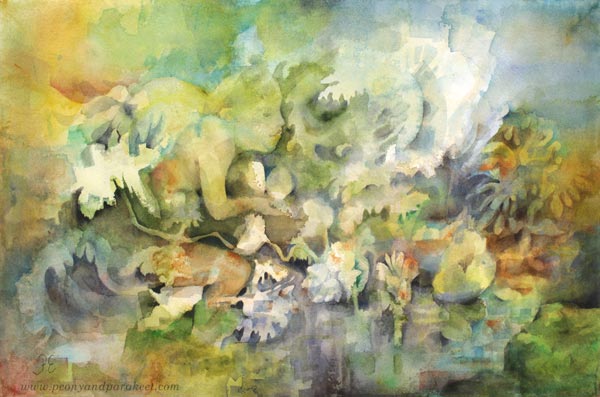
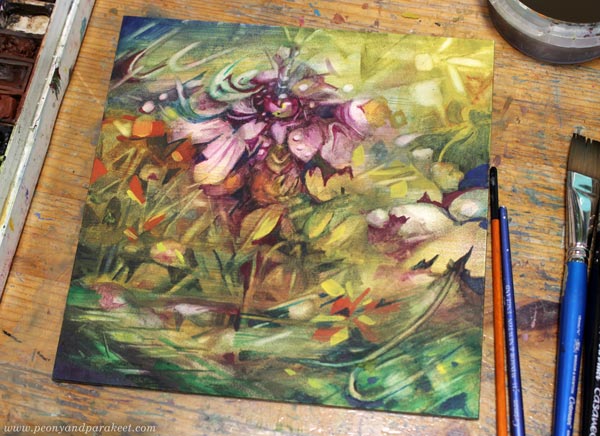
Watercolor Surfaces – Aquabord vs. Paper
I love thick watercolor paper, but I made a special find in my stash: a hard base meant for watercolors. I bought it years ago but had forgotten it. But now I had to try this Ampersand Aquabord!
Watercolors have a built-in sense of surprise that keeps me interested in the work. Still, you can also do accurate and illustrative details. I like to use a lot of water at the beginning and less at the end. Even if Aquabord is surprisingly absorbent, I prefer the effects that a good-quality paper creates. But maybe this is the thing that would need more practice. It is said that to get to know a certain paper, tens of experiments are needed.
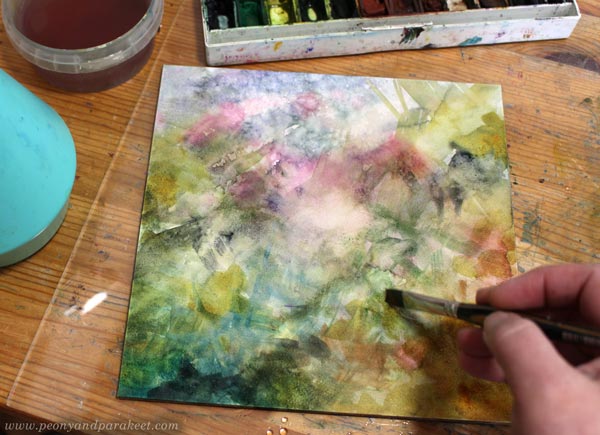
When the painting progresses I move on to negative painting, so paint the background in such a way that I leave the shapes from the previous layers exposed to maintain the brightness.
Aquabord turned out to be more convenient than paper in keeping the painting light. It is easy to wipe off color with either a rag or a dry brush. But even if lifting color is harder on paper, I still would prefer watercolor paper, especially 100% cotton, because it feels so wonderful! However, for beginner watercolorists, Aquabord is great because you can erase and start over!
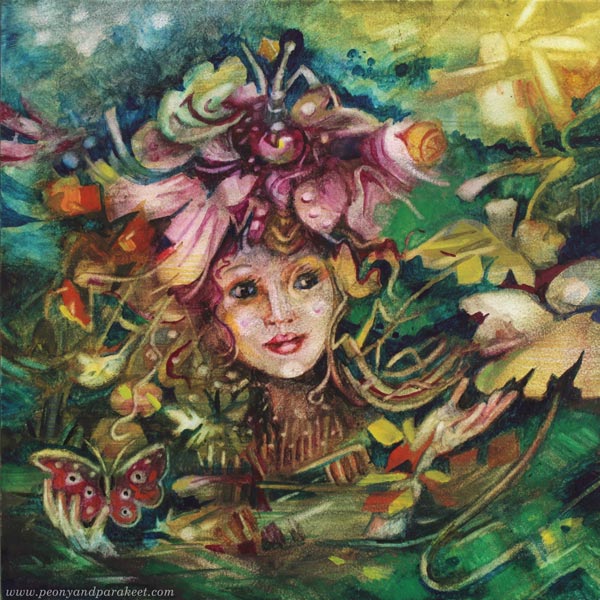
Watercolor Fairies
About four years ago, my watercolor set was a close friend, and I thought I was at my best in watercolor painting. One of my favorite subjects in watercolor was fairy-tale characters – spirits of nature that rise from the surrounding greenery and have the sensitivity of a butterfly. It was also fun to come up with names for them!
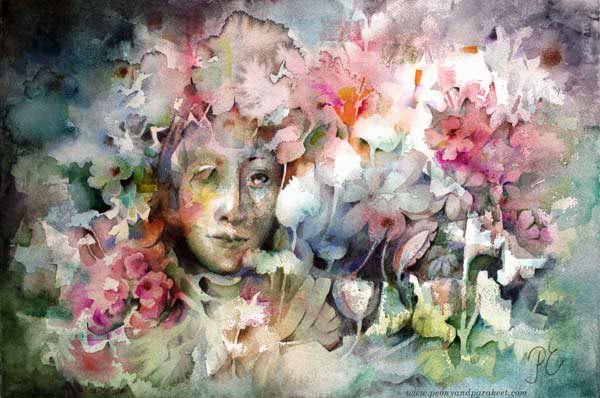
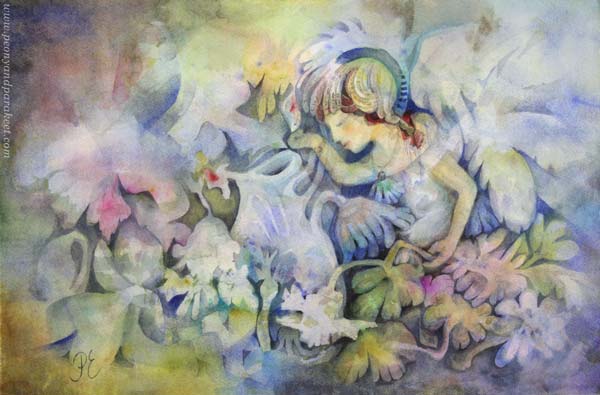
When painting a watercolor, a character can appear by accident. It’s fascinating to see who comes up as the round shapes of the plants encourage the spirit to emerge.

Even though nowadays I mostly paint with oil, I still want to step into wild nature with a brush and listen to my intuition. Watercolors have taught me a way to first splash freely and then finish with intention.
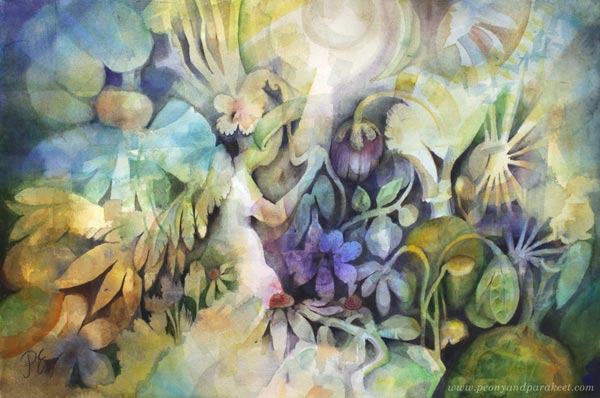
Magical Forest with Watercolor Fairies
I have also made a watercolor course about this kind of intuitive nature painting: Magical Forest.
Magical Forest combines light with hope, trees with spirituality, water with flow, and wilderness with curiosity.
Flower or Fairy?
In this work on Aquabord, I first thought that the weird purple flower could be enough of a character. But after looking at the flower for a while, I felt that someone was squatting under it.
And it wasn’t a shy spirit either, but quite lively.
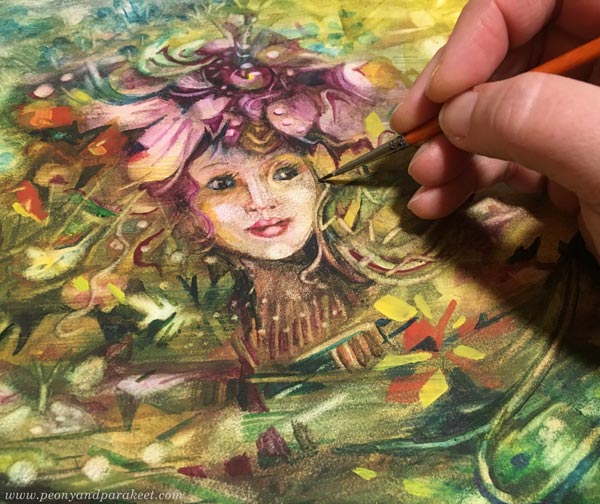
I even painted hands for her.
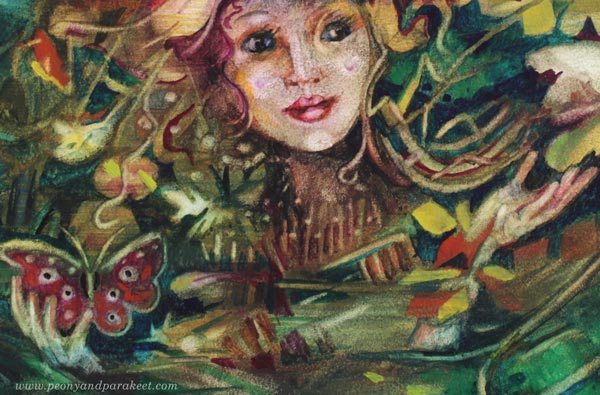
The butterfly flew there too as if by accident!
What Makes a Fairytale?
In my opinion, a watercolor painting with a fairy tale character can leave a lot of guesswork. The mystery is allowed! There may be abstract shapes that only describe the atmosphere rather than anything else.

When the shy watercolor fairies started appearing in my art in 2019, they represented the part of me that is needed for making art. Now my artist fairy is more confident and cooperative and is not afraid to appear when called.
Easter Sale – Magical Forest Over 40% OFF!
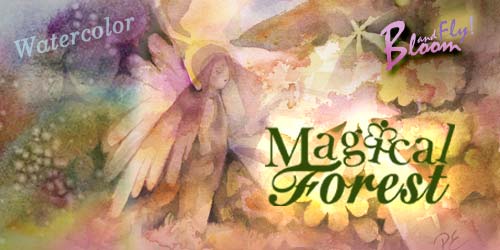
To celebrate Easter and watercolors, Magical Forest is now over 40% OFF!
The sale ends on Monday, April 10, at midnight PDT. >> Buy Now!
Why Draw in Black and White?
I have often asked myself: “Why draw when you can paint?” And as someone who loves colors, it hasn’t always felt appealing to omit them. Still, one of the biggest things in my artistic development has been to find a connection to my childhood through black-and-white drawings.
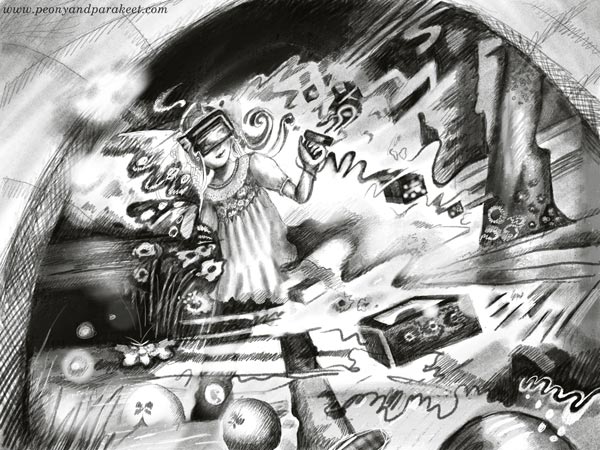
In this week’s blog post, I want to inspire you to draw things you love in black and white. If you want to practice ink drawing with me, see these courses: Animal Inkdom and Magical Inkdom!
My Way to Drawing in Black and White
It’s been over thirty years since my father’s death. He was quite distant, but I still vividly remember when he drew horses when I was a child. The horses were not noble and streamlined like in the picture books, but furry sympathetic characters. It was as if my dad really knew these animals.
So it was no wonder that when I participated in the Inktober drawing challenge in 2018, my drawing style borrowed a short hair-like line from my father. You can say that at that time, I fell in love with drawing. Nowadays, I still draw in black and white every time I want to visualize something through my thoughts. I now have an Apple Pen and Procreate, but I sometimes draw on paper as well.
See a quick 4-minute flip-through video about one of my sketchbooks!
See more pictures of the children’s book illustrations: The Beauty of Science – Illustrating a Children’s Book
Why Draw? – Move from One Idea to Many!
Drawing visualizes the invisible and makes us think deeper. First, the idea is wavering and could take any direction. But as the details increase, the big picture also grows. Therefore, it’s important for me to let the pen linger in small areas. I find pleasure in putting tiny pieces in place so that they are part of a bigger story.
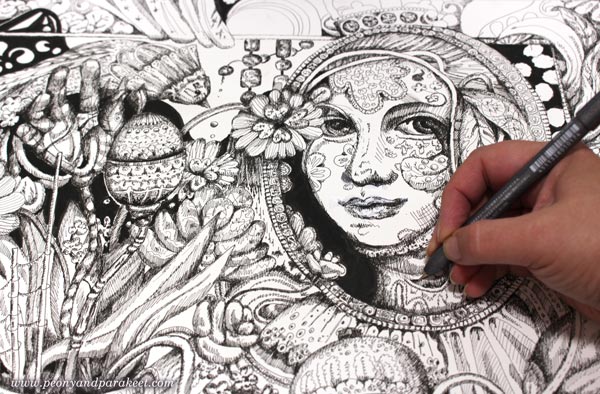
There are two good things about drawing with a thin black marker pen. First of all, the pen mark cannot be erased. You have to figure out how to make the wrong stroke a part of the drawing. It has often happened to me that the core of the picture was created while correcting a mistake. Another advantage is that when you don’t have to worry about colors, you can focus on shapes and patterns in peace. And of course, you can always color the drawing afterward, for example with colored pencils or watercolors.
Why Draw? – Connect Your Art with Your Origin!
I believe that anyone who has drawn for a while will develop an understanding of why they draw. I have a feeling that I was created to express things through ornaments. For me, an ornament is not just a picture, but a whole language. When drawing ornaments, I’m on the border between writing and illustrating, and feel that I am doing something important. As if I belong to those authors to whom poetry appears as pictures.
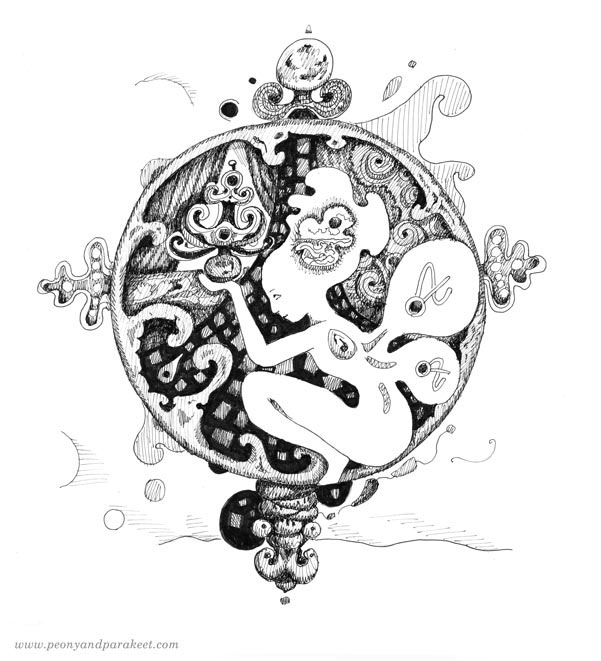
It’s confusing, but this connection between drawing and writing seems to have arisen in me when my father drew a horse. Of course, I didn’t know how to break it down like that as a child, but I now think of my father’s horses as ornaments that summarized the origin of our family. It wasn’t the most elegant possible, but I still wanted to give it wings. Nowadays, every time I draw, I feel close to where I am coming from. I hope that by drawing you too will find wings for your origin!
What would you like to draw? Leave a comment!