Painted Paper Collage – 6 Tips for Intricate and Fun Art
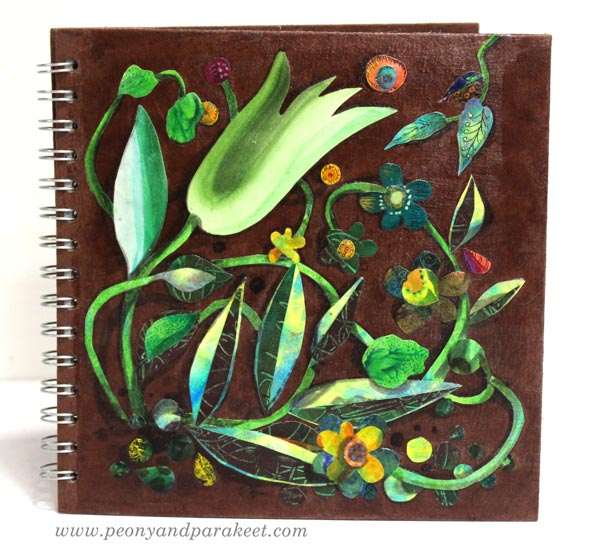
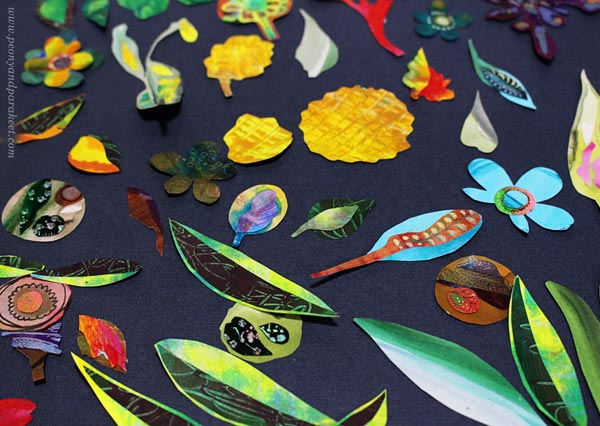
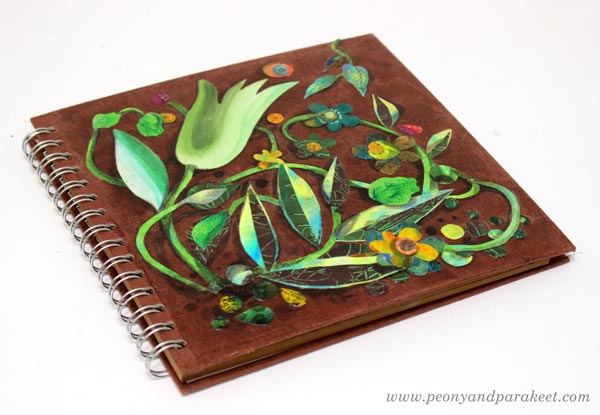
Here’s an 8-by-8-inch sketchbook that I decorated with painted paper collage. Even if all my art is not collage art, I love it. Painted collage art often replaces traditional sketching so that I paint and cut papers to grow the ideas that don’t feel mature enough for bigger work.
In this blog post, I share some tips that are handy for this kind of creative play.
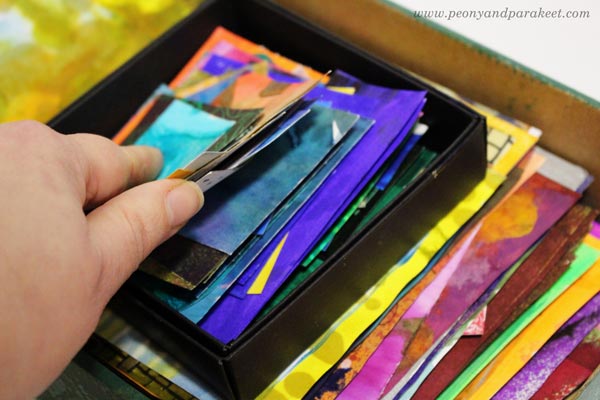
Tip #1 – Organize Painted Papers by Size
I have a box for small paper pieces and another for bigger ones. I keep the papers rectangular in shape so that they are easy to browse.
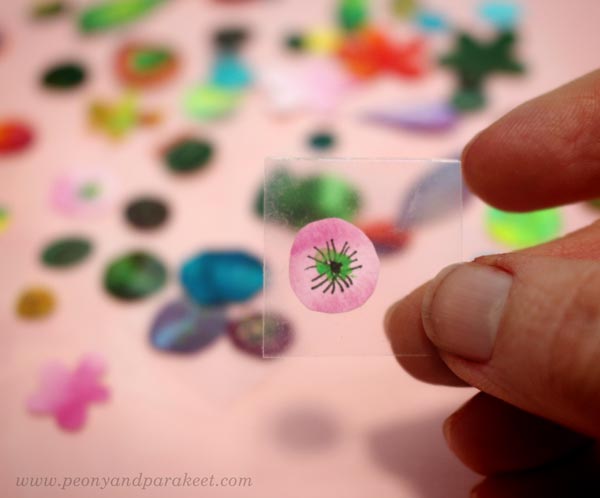
Tip #2 – Add a Lined Adhesive to the Tiniest Pieces
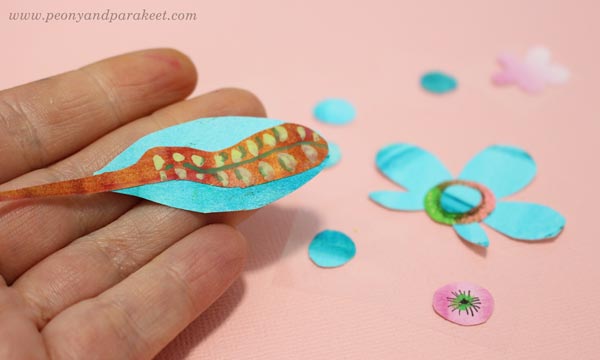
I like to make intricate collage art so I have tiny collage pieces. Small hand-cut pieces are difficult to handle and get lost easily. Thermoweb has clear adhesive dots called Zots (affiliate), that come with two liners, and they are perfect for both storing and attaching small paper pieces.
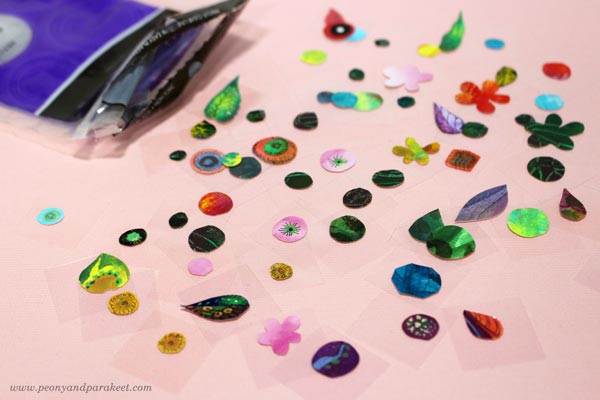
Zots are very flat compared to many glue dots, and they have two liners. Just remove the first one, attach the piece, and then remove the second liner when gluing the piece on a collage! Here you can see a close-up picture. This is the smallest size of Zots.
Tip #3 – Make Clusters
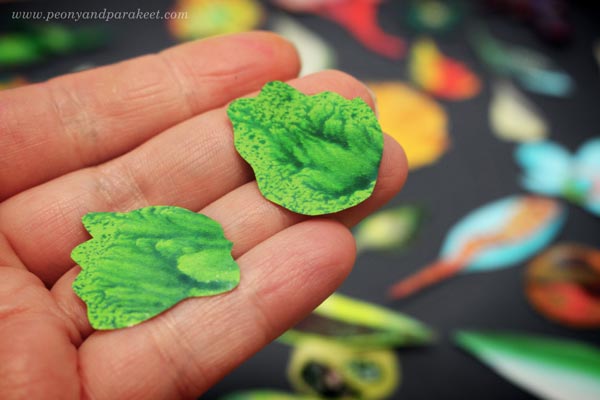
Attach small pieces on the bigger elements and treat each piece as a small artwork!
I also like to decorate clusters by painting and drawing.
However, I sometimes have elements that are so beautiful that they don’t need anything on them.
Tip #4 – Group and Layer!
When composing the painted paper collage, use connecting lines and intersecting shapes. They make a more elegant and coherent composition than if the elements don’t touch each other.
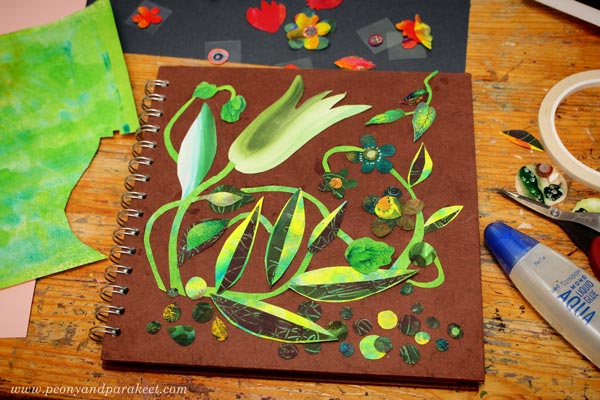
Tip #5 – Add Shadows
For the sketchbook cover, I used grey Faber-Castell PITT Artist Brush Pens (affiliate) to color shadows on both the elements and the background.

Shadows add depth and make the elements look less separate from the background.
Tip #6 – Sealing
I like to attach the collage elements first with glue dots, double-sided tape, or some paper glue and then use gel medium for sealing. This way, my fingers stay fairly clean when I am building the composition. At that stage, I attach the elements only partly, and they get glued when I am sealing the work.
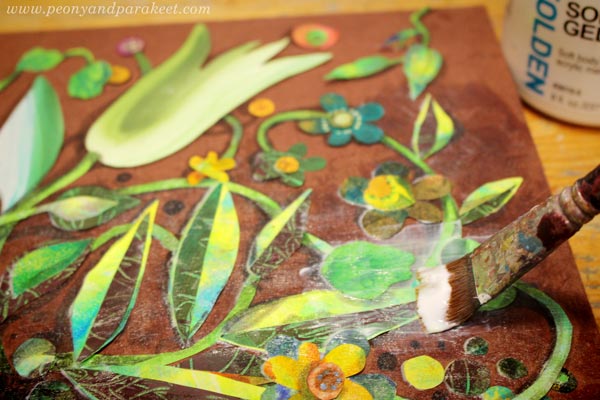
For sealing, I use several layers of gel medium (Golden Soft Gel Gloss (affiliate) is my favorite), especially for the items that will be touched regularly.
Painted Paper Collage – More Ideas
- For those who want to start by making some papers:
Choose Kiwi, Arboretum or Romantic Doodles - For those who like to play:
Dolls in a Gallery – Paper Collage Step by Step! - For those who need to dig deeper as artists:
Draw Your Innocent Little Secrets! - Class recommendations:
Collageland
Inspirational Drawing
Modern Mid-Century
I hope you found these tips both practical and inspirational!
Doodler’s Sampler Step by Step
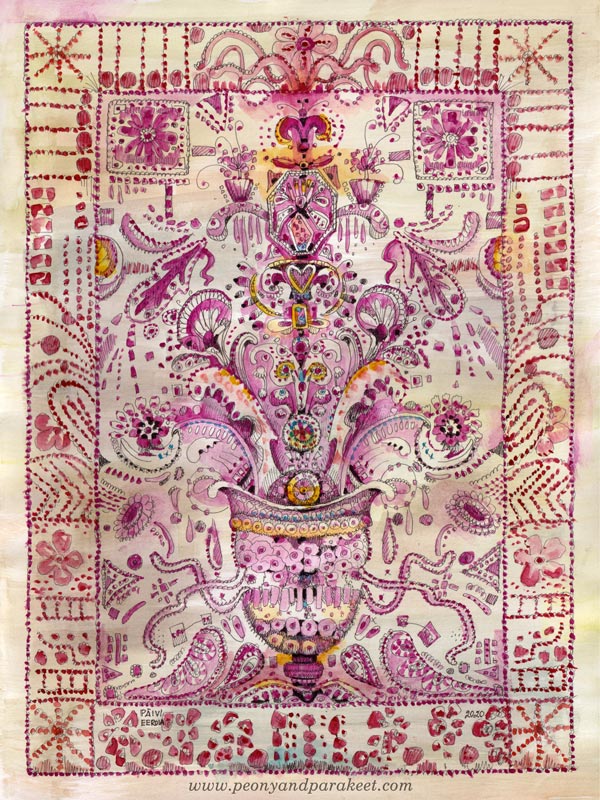
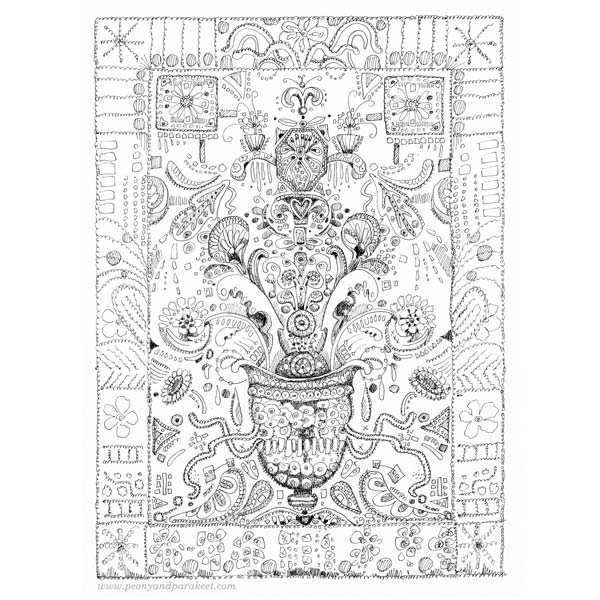
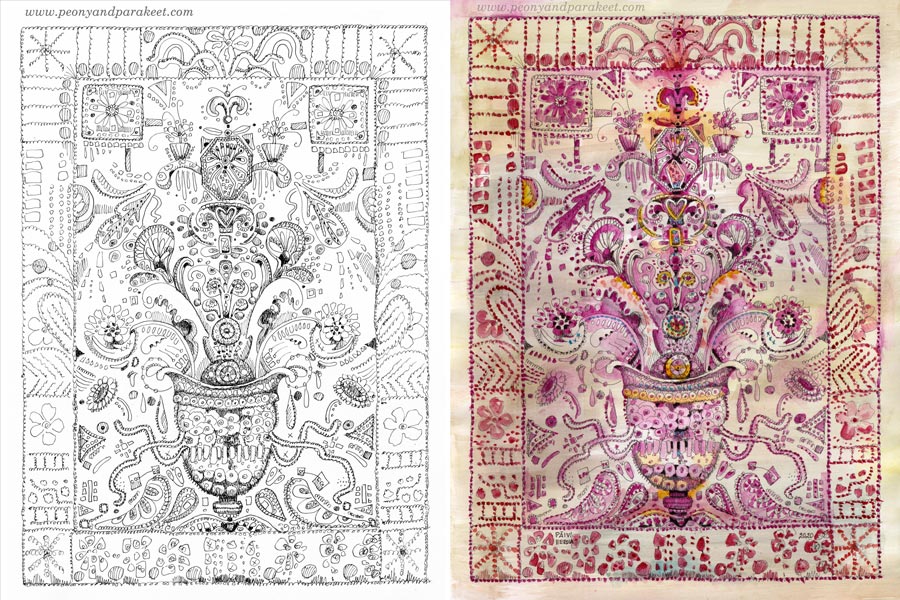
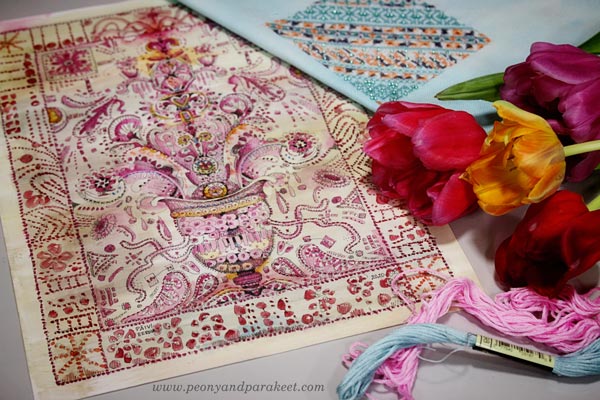
I have always loved antique embroidery, and it inspires my art too. This week, I invite you to treat your pen as a needle and doodle the look of the precious hand-stitched fabric. My drawing – I call this Doodler’s Sampler – is 9 by 12 inches but you can make a smaller or bigger piece with these instructions. The best paper for this is Bristol paper. It’s smooth and nice to color with watercolors.
Step 1 – Draw a Grid
Because we aim for ornamental stiffness, a grid helps to place the elements. Use a pencil so that you can erase the lines before coloring. Start by outlining a space for a frame. Then divide the rest of the paper so that they help to place the main elements.
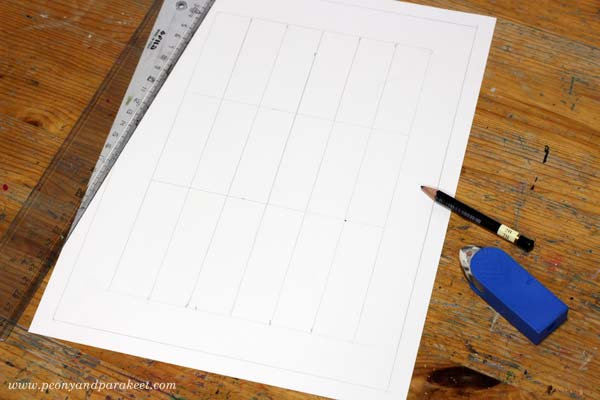
I wanted my Doodler’s Sampler to be symmetrical, so I drew a vertical centerline, and then divided the two halves into three parts. Another idea that I had was to have a vase of flowers. So I drew horizontal lines that mark each third, and the lowest third is reserved for the vase.
Step 2 – Sketch the Structure
Old samplers are filled with decorations but at the beginning, it’s enough to sketch the places for the biggest elements and their shapes.
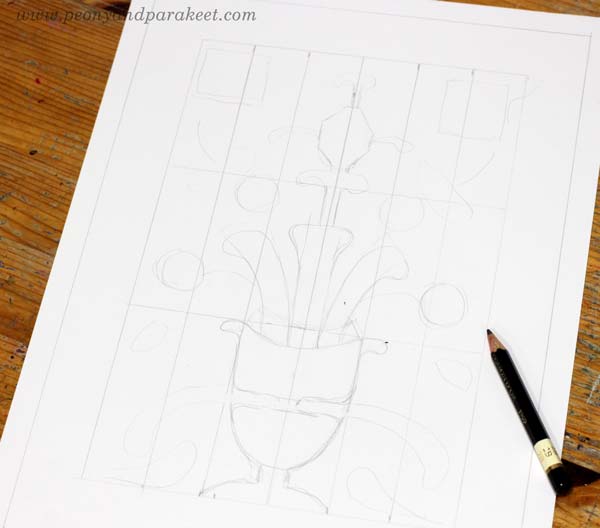
I wanted to have something rectangular on the top corners, the vase on the bottom, plant-like organic shapes coming out of the vase, and then an angular jewel-like thing on the top of the ornament.
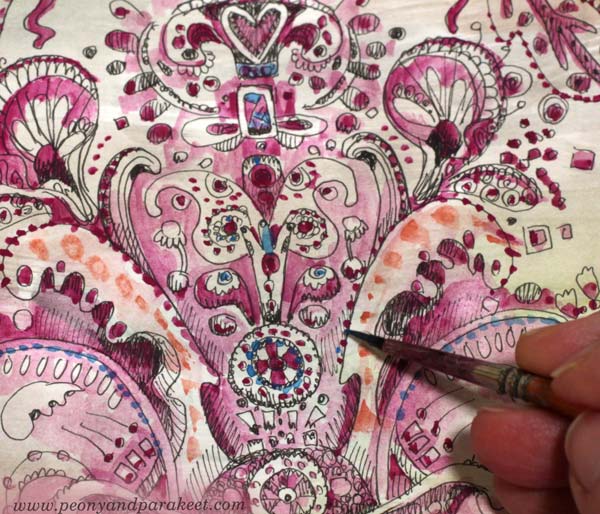
Step 3 – Doodle and Decorate
Pick a thin-tipped drawing pen, that has permanent ink, and start doodling! Make more shapes and fill them with circles, rectangles, flowers, hearts, anything you can think of!
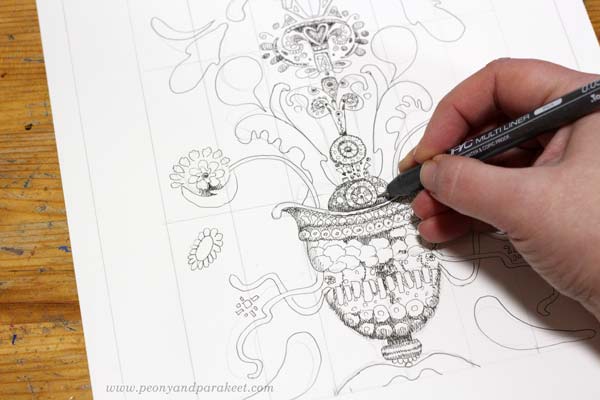
My pen is Copic Multiliner, tip size 0.05. I add shadows to my doodles so that they don’t just outline the shapes but there are darker parts too.
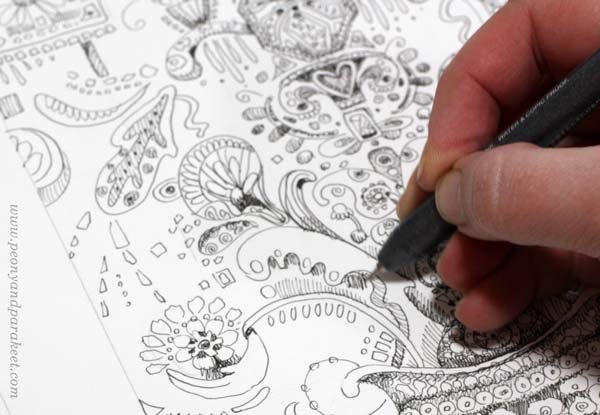
I make the decorative border simpler so that it doesn’t take the power away from the centerpiece. Trembling lines look more decorative than straight ones.
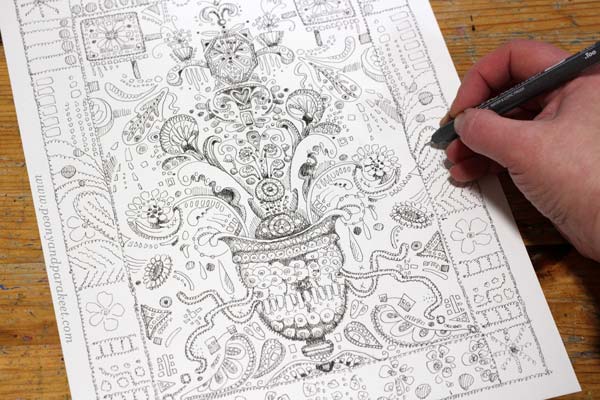
Here’s my Doodler’s Sampler after Step 3, ready for coloring.
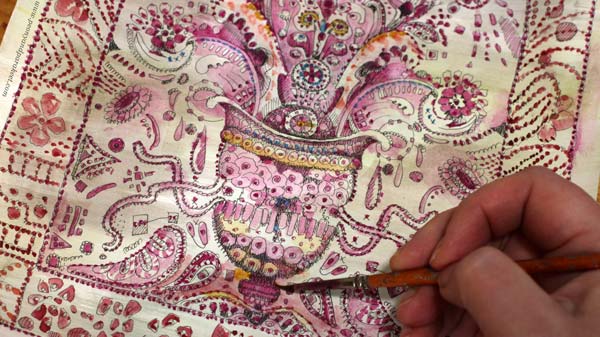
Step 4 – Color the Background
You can use any supplies for coloring, but in my opinion, the softness of watercolors complements the sharp black lines best. Start the coloring by adding some color to the background.
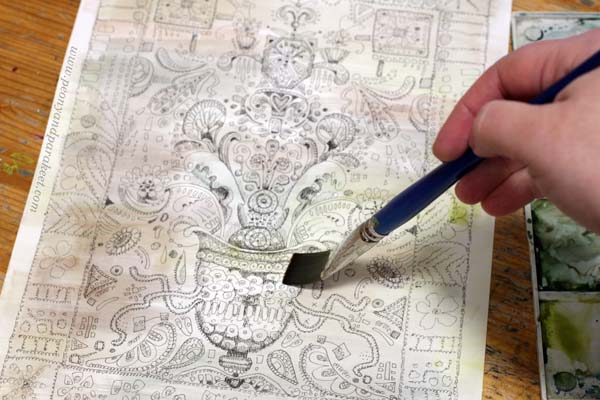
I use very little pigment and many tones so that the background looks like old antique linen.
Step 5 – Color the Doodles
Pick one main color for the sampler. My choice is cool carmine red. When coloring, add more decorations like dots and other decorative shapes. You can also color around a shape instead of inside the shape.
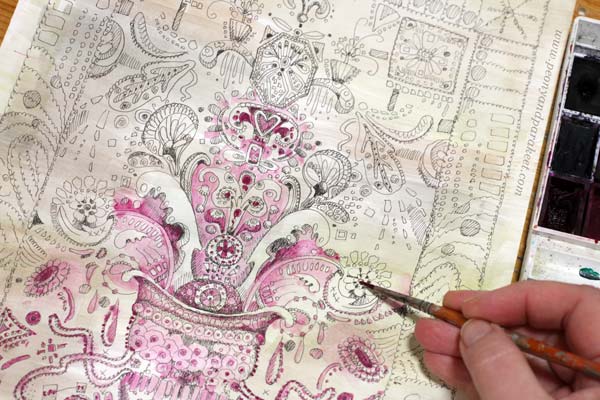
Pick slightly different tones for the frame. I use warmer red and a little bit of orange.
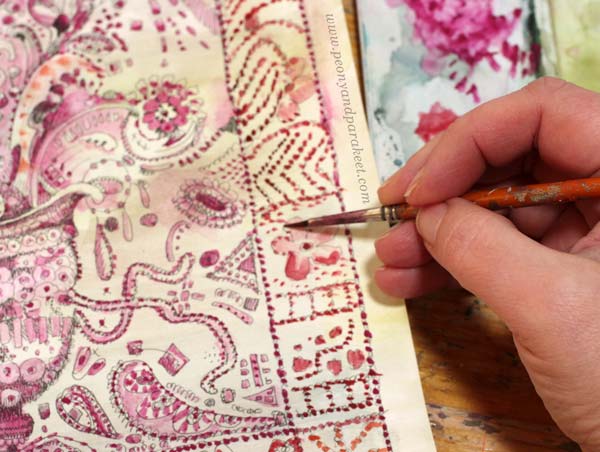
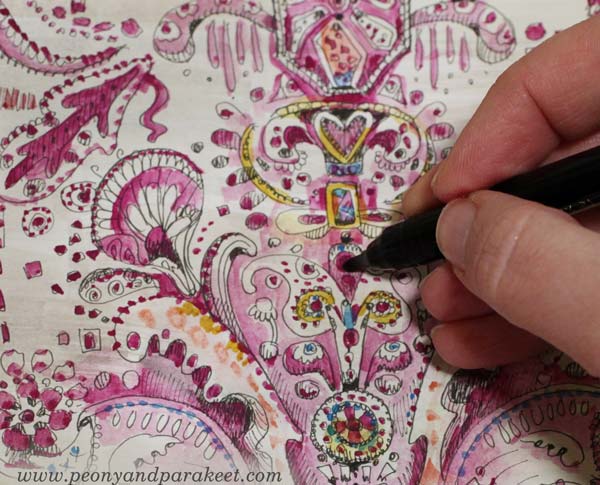
When you have colored the sampler with a very narrow color scheme, make it more lively with some new tones.
I added blue and yellow, but very sparingly.
You can also highlight the main elements by making the darkest areas pitch black.
Here are the black and white version and the colored version side by side. Click the image to see it bigger!
Doodler’s Sampler – For the Love of Flowers and Hand-Stitching
Henri Matisse has said: “I don’t paint things. I only paint the difference between things”. I think that to me, it goes like this: “I don’t paint things. I only paint the similarities between things.” So here’s for the love of flowers and hand-stitching!
Draw more with me – Check the courses Animal Inkdom and Magical Inkdom!
Happy Valentine’s Day!

When like-minded hearts gather together, life feels wonderful.
What starts from a simple circle can grow wings,
and then support others.
Isn’t that what creating is all about?
Happy Valentine’s Day!
Start drawing your world of fantasy! – Subscribe to my weekly emails and get a free mini-course!
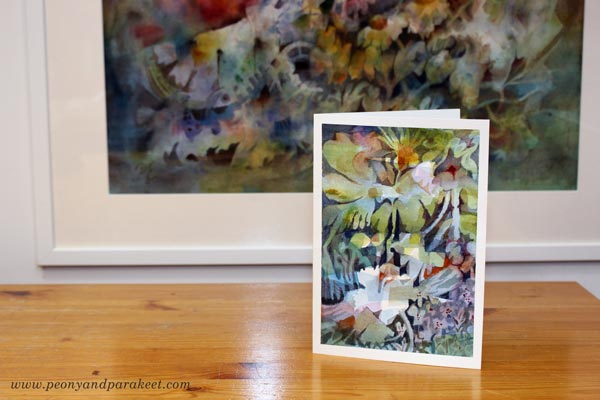
Expressive Watercolor Card – Free Video Tutorial

This week I have a video tutorial for you. We’ll paint an expressive watercolor card that connects several artistic approaches together.
Fine Art, Illustration, or Design?
Visual art is often divided into categories like fine art, illustration, and design. I am not a one-category artist, but interested in all of them. I need to do fine art to let go and feel free. Illustrating connects me with the outside world and other people. And I have started creating surface designs again because simplifying is a game that keeps fascinating me, and I love to develop products.
This week, let’s create a card – you could also say “a product.” It has a clear structure, so “a design,” but it can also be an illustration with a message. My card is about a house filled with plants, and I think I am illustrating my home. Visitors sometimes comment: “Wow, you have a lot of houseplants!” Almost every room in our house has plants, and their welfare constantly worries us, especially during winter when there’s less daylight.

But this card is not an illustration at all when thinking about how it started. The way it’s created makes it fine art. I painted freely and didn’t have any pre-defined images or ideas for it. However, I had a method that can produce many kinds of images. So, the method gives practical guidelines for painting, but the result can be different each time.
Expressive Watercolor Card – Paint With Me!
Watch the video and start painting!
In the video, I use the negative painting technique a lot. Even if you can use any technique that suits you, negative painting is the best technique when you want to make lines and shapes more elegant and the painting more finished. Dive deeper into this wonderful painting technique in the class Magical Forest.
Magical Forest – Dive Deeper into Expressive Watercolor Painting

Learn essential watercolor techniques like negative painting and layering, and express with light! In Magical Forest, we paint magical nature sceneries with flowers, trees, water, and fantasy.
Hop along! The class ends as late as at the end of April, and you will get the published lessons right after the registration. >> Sign up here!