Scrap Wood Collage

After working day and night with Folk Bag Workbook, it was time to relax. But honestly, I am not very good at doing nothing, so I decided to put my mind in rest by finishing the scrap wood collage. It is a project I have been making with my husband. I talked about the project first time in one of the video blog posts.
Background of the Project
While renovating the studio, we ran out of the ceiling panels. (You can see the hole in the ceiling on the video.) My husband had a box of wooden pieces collected from the past woodworking projects. We decided to use them to create an artwork together.
We had been talking about a project like this for a long time. My husband is an avid woodworker and I love to draw and paint. We are both extremely interested in art and design, so we thought this would be the perfect project for combining our strengths.
Planning
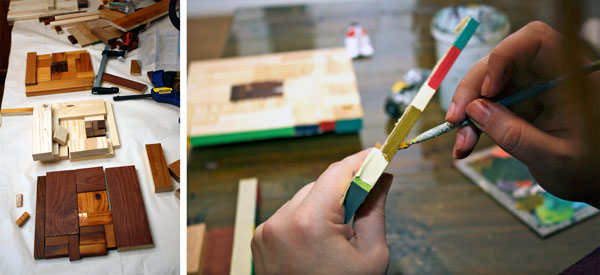
When the project started I drew some sketches and we discussed about them. I focused on the concept of how the wooden pieces should be arranged. I knew I wanted to include paint too, but was not too concerned about it yet. We agreed to create a sort of log cabin quilt type design and organize the wooden pieces by color. My husband drew the size of the artwork on the big piece of paper so that we could understand the proportions more accurately.
Making the Blocks
When we began to make the blocks, it dawned on us that I was too impatient to glue and adjust the pieces. And my husband had not much ideas about how the pieces should be composed visually. So I designed each of the block by organizing the wooden pieces on the table and my husband glued and finished the blocks. As every block is unique and most of the small wooden pieces are different sizes, my husband had a lot of work!
When all the blocks were glued, I wanted to add paint on them. I did not want to cover the wooden surfaces but add some color to the edges. As the theme of the studio is 1960s, I mixed colors from that era and painted each of the edges in different color.
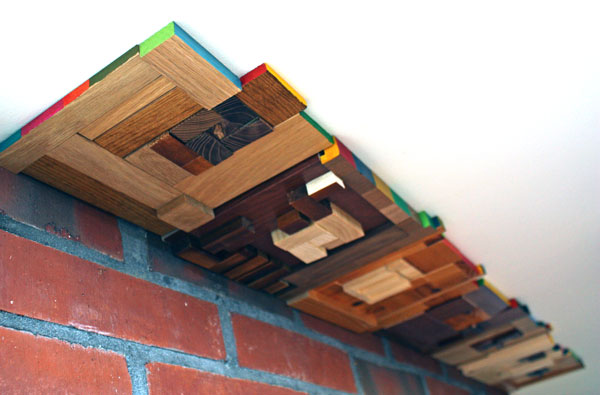
Attaching the Blocks
After the blocks were painted, the artwork was ready to be put in place. My husband had made a wooden panel where he glued each of the blocks.

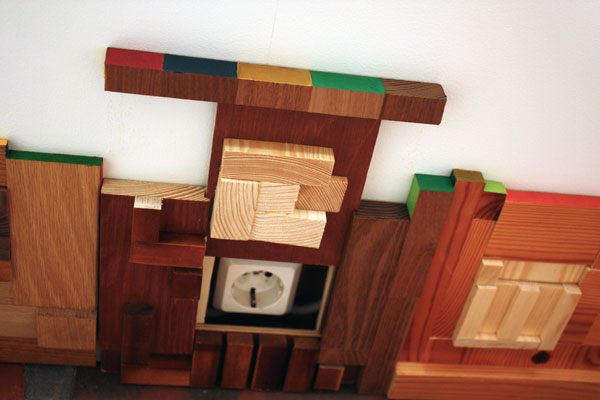
A Special Feature
If you watched the video carefully, you might have noticed that there is a power plug on the ceiling. The artwork is designed so that there is a flap in one of the blocks that can be slided away!
Lessons Learned?
All in all, this was a great project! This is what I learned here:
1) Let the creativity correct the mistakes.
We could have just ordered few more ceiling panels but we did the exact opposite!
2) Make it meaningful.
Many of the scraps carry memories themselves. And we created more memories by working together.
3) Search for new territories.
My approach for wood was totally different from traditional woodworker’s. The artwork was designed like a modern quilt even if it has been made from wood. For me, various wood species represented various colors. The wood grains were combined so that they formed rhytmic lines and ornaments. I also wanted to create a texture, but not by carving like a woodworker had done, but by playing with the height differences of each piece.
The fourth lesson is:
4) It’s good when it looks like it’s alive.
The end result might look terrible if you look at it like a traditional woodworker. While we made the project, my husband had some problems to get over the fact that every wooden piece does not fit exactly and there will be so much variety on the artwork. But in the end it all looks alive. I love the uneven, colorful edge. Combined with the texture, it all looks very organic even if there are clear, graphic blocks.
While creating this, I began to think of wood as a new art supply. Then I realized that most of the things in the world can be seen as an art supply! Mind-blowing, isn’t it!
P.S. Soon after we finished our artwork, my husband saw a woodworking video about making a wall-decoration from scrap wood. Does it differ from ours? Leave a comment and tell what do you think!
How to Imitate Glass with Paint
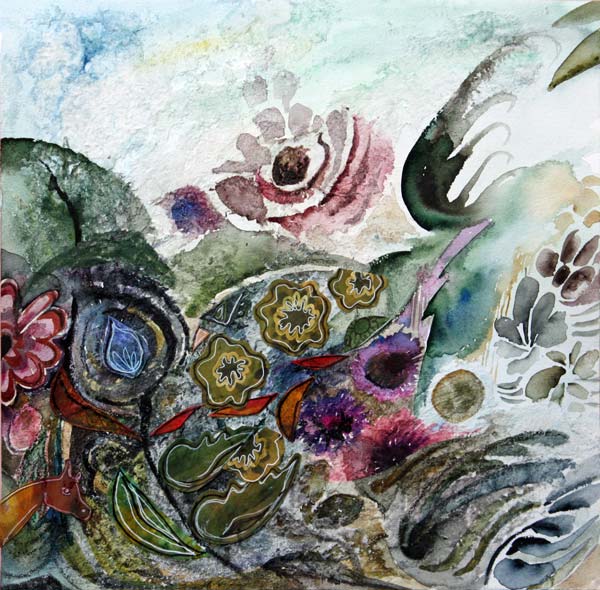
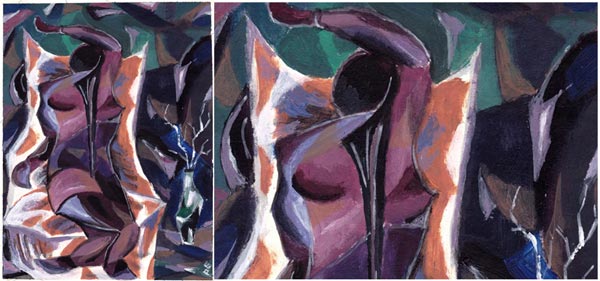
For this painting, I learned how to imitate glass. It is called “We Will Protect You,” and it’s about parents trying to protect their children. The parents have good intentions, and they do their best, but in the end, they have to let the child step into the world. I have painted two glass vases to represent the parents. The child sees the world through the parents, and even if they want to protect the child, they are fragile too.
Artistic Inspiration from Glassware
The idea for the painting began last Saturday when I went to the local library to get some ideas for the future blog posts. I saw the book called The Art of Glass. It was about Kaj Franck, a Finnish designer who was extremely skillful in designing glassware.
 Most Finns have Kaj Franck’s glassware. He didn’t design unique pieces only, but everyday glass as well. My most precious glass item from him is this red “Goblet” which was originally owned by my aunt. She passed away ten years ago, and the color of this Goblet reminds me of her vivid character.
After browsing few pages of the book, I knew I had to make something glass-related. It’s not the first time the glass has inspired me: see the collage inspired by Nanny Still, and I have also knitted a folk bag inspired by Oiva Toikka. Both Nanny Still and Oiva Toikka are Finnish glass designers as well.
This time, I wanted not only to find out how to imitate glass but to explain it to you too. Before beginning the bigger painting, I painted few circles on a small paper and tried to make them look like glass.
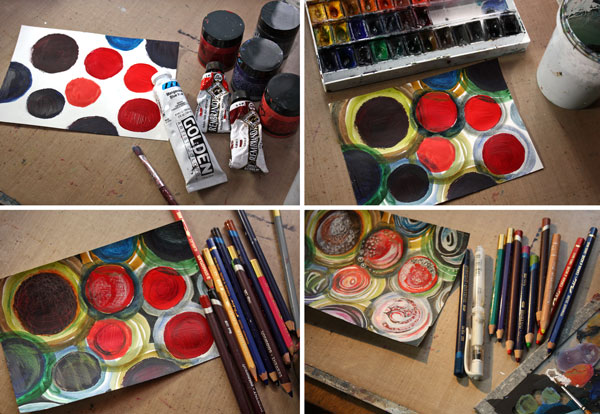
I used acrylic paints to paint the circles and then watercolors to add more circles around the previous ones. The shapes were softened with colored pencils. Then I added white with acrylic paint and a gel pen, and black with a PITT Artist Pen.

I made each circle a bit different. I was not fully satisfied with them, though. The center circles were too solid in color. I decided to start the bigger painting with watercolors as they are easier for making transparent layers.
8 Tips on How to Imitate Glass

1) Paint several transparent layers which intersect each other. Use a lot of water to create thin layers.

2) Use a lot of hues and shades of the same color. Mix colors to get new tones which have slight differences from each other. Use small spots of other colors too as glass reflects its surroundings.

3) Paint geometric shapes like circles, squares, half-circles, and triangles.

4) Add white with acrylic paint. When painting the white shapes, soften one side of them by adding water.
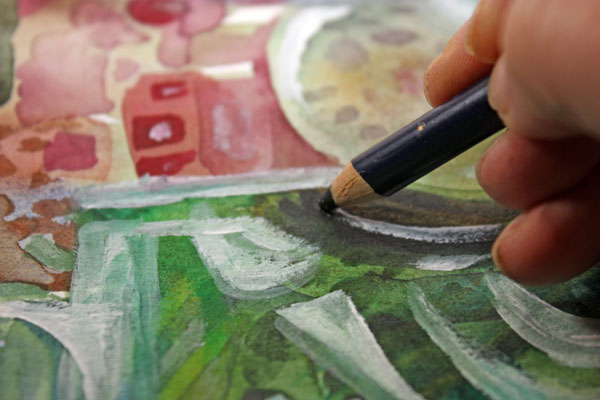
5) Use a black colored pencil to add dark near the sharp edges of white areas. Make the dark areas soft too.
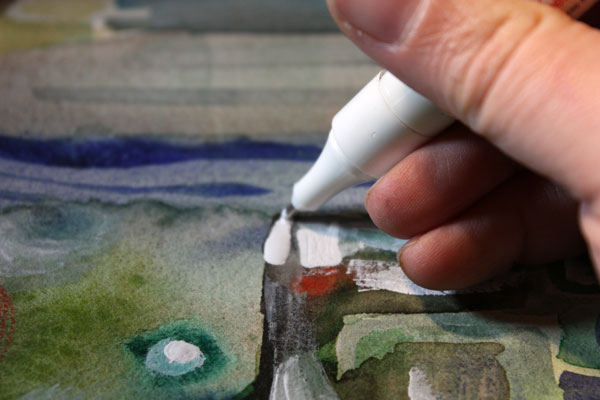
6) With correction pen, add brilliant white to highlight parts of the white areas.

7) Add jet black with a black marker (I used a brush tip PITT Artist Pen) to make dark areas pop as well.

8) Finish with thin lines using a gel pen and a black marker. It will make your glass look a bit thinner and more elegant.

What kind of glass do you like the most? Does mimicking materials interest you too?
Let me be your mentor in art: Subscribe to my weekly emails!
Gobelin Tapestry in Mixed Media
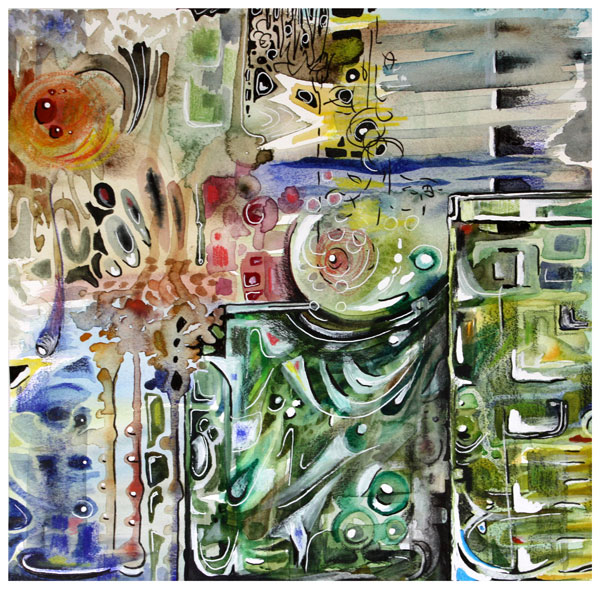
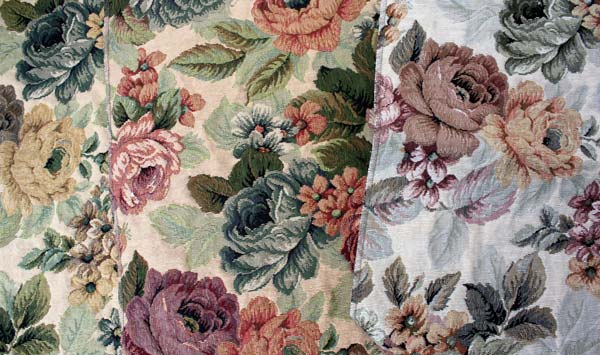
I like the sources of inspiration be quite distant. They should not instantly make my mind figure out the result. While packing craft supplies to empty a sewing room for renovation, I found some pieces of woven upholstery fabric. Those reminded me of a Gobelin tapestry, the woven wall hangings.
You could think there’s nothing more conservative and static than those, but I was immediately inspired by two things: 1) to show how beautiful muted colors can be 2) to create a dynamic composition that still reminded of textiles.
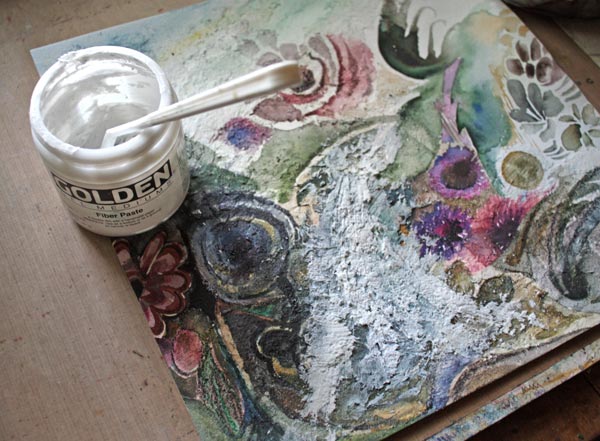
Fiber Paste in Mixed Media Art
To get into the spirit of heavy woven tapestry, I chose to use a lot of fiber paste to create a texture on a fairly smooth watercolor paper.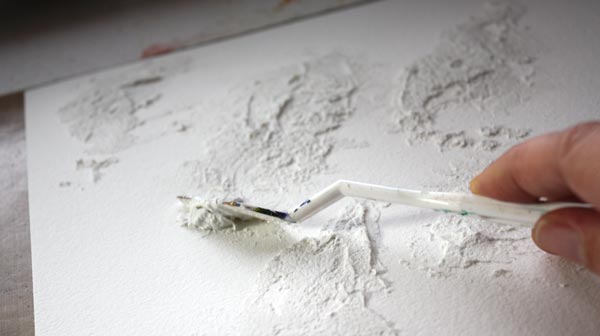
Now, the rational thing would be to spread the paste evenly. Or to spread the splotches evenly. But as I wanted to create a dynamic composition, I chose to add fiber paste mostly to the left side of the work.
With fiber paste, you can create interesting, uneven surfaces by using tissue paper or various tools to spread the paste. You can also use fiber paste for creating layers and attaching collage pieces (more about those later in this post).
One more good thing in fiber paste is that once it’s dried, you can paint with watercolors over it. I find the change in the surface texture somehow good for my creativity. It is impossible to paint accurately when working on fiber pasted area. That makes me accept the imperfections right at the beginning. Too much self-control can be destructive to the creativity. So, fiber paste is one of my medicines to let go!

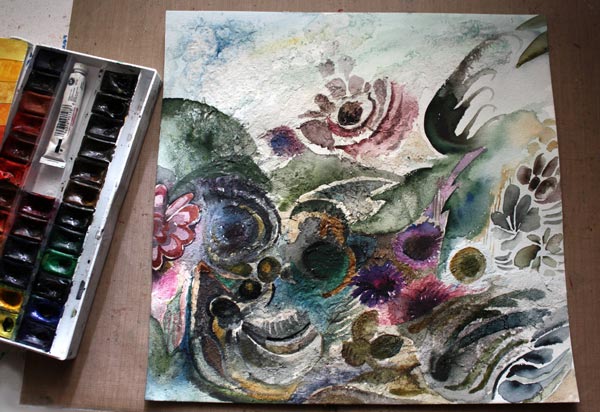
Watercolors
Here I chose to work with watercolors instead of acrylic paints because they are much faster when creating delicate color variations. I usually mix watercolors by dipping the brush to many color pans on the same go and letting them mix naturally on paper.
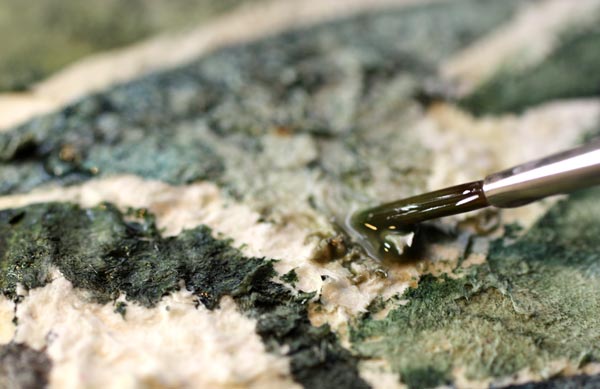
With watercolors, you can easily change the intensity of color. I often start with a fairly dry brush and intensive color. After a stroke or two, I then add plain water to dilute the color. This technique is shown well in the video where I paint watercolor postcards. On the fiber paste surface, you can use a lot of water for lighter shades.
Mixing Colors
I still remember my moment of mixing black with other colors. I was a teenager, and it was a warm summer day. Acrylic paints were quite new to me, and I wondered how they should be mixed to express the hot weather.
The dark shadows made me think of black. I remember the surprise of getting beautiful purples and browns. That was a moment when I realized that the power of colors is not just what I admire in other people’s work, I can learn it too. By mixing colors, I could express anything!
Just this year when I bought my newest watercolor set, I discovered browns. I wondered why there are so many brown shades in the set, but now I know: mixing colors with browns create beautiful hues! In this piece, I have mixed the colors from both browns and blacks.
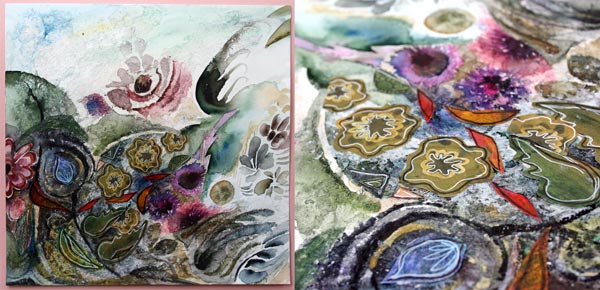
Collage
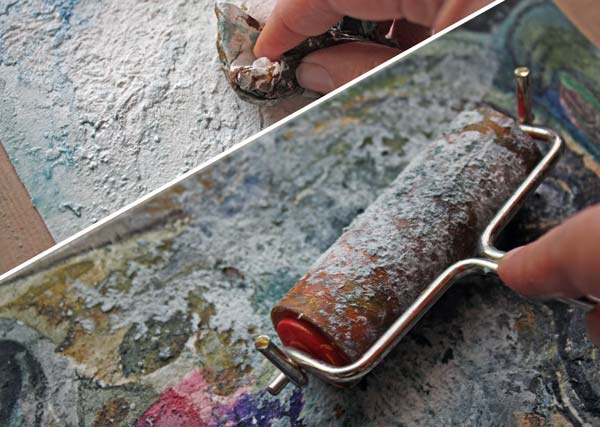
I was pretty happy with most of the painting – except the lower center area. The composition of the center elements did not work. To create something totally new, I used my most common method: to make it ugly and then try to save it. I took the jar of fiber paste and began to cover the bad areas with the paste.
“You have ruined it now,” said a bitter voice in my head.
Have you ever experienced the same? It is the moment where you can truly stop pleasing others and begin creating art.
I took the pile of hand decorated papers and started cutting. Fast!
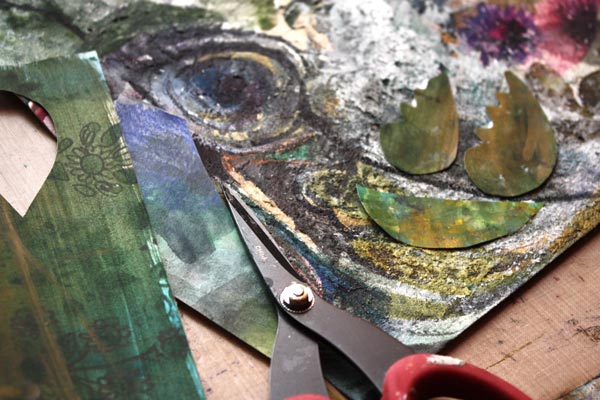
Some time ago, when I made those decorated papers, they were so ugly I almost threw them away. But now they looked like they were made for this muted color palette! And the fiber paste works as glue so it was easy to attach the pieces.
While cutting the pieces, I watched the fabric of the two chairs in the library room where most of the creating happen. I found the chairs at a recycling center a few years ago. I took them for renovation, so I was able to choose the fabric.
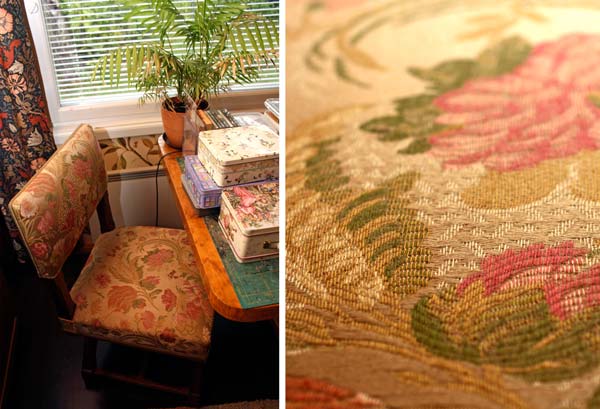
I love the fabric’s silky texture, romantic pattern and how well it goes with the wallpaper and William Morris’s curtains! Looking at that chair made me realize what I needed to add the feel of fabric to the artwork. To cut several similar flowers to represent a repeating pattern!
Finishing
After drawing some detailed lines with colored pencils and markers, the collage seemed to be finished. But then I remembered the original idea: Gobelin wallhangings. Don’t they often have deer in them? A small deer was added in the lower left corner to wonder about the blowing winds!
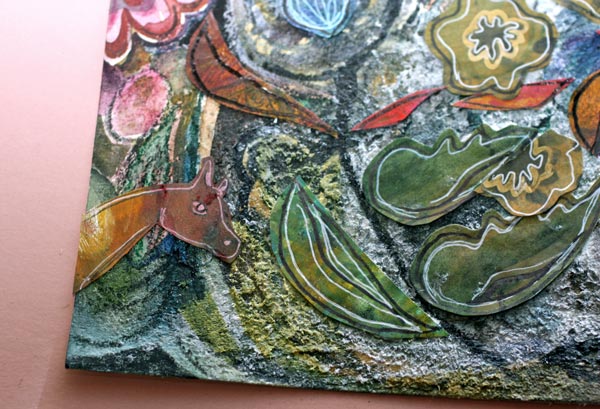
I have noticed that many mixed media pieces are made from commercial products. I want to encourage you to create your own elements and textures. Your art will be much more original and complete. No factory-made flower can express your emotions as accurately as the ones you make yourself!
Let me be your art teacher: Subscribe to my weekly emails!
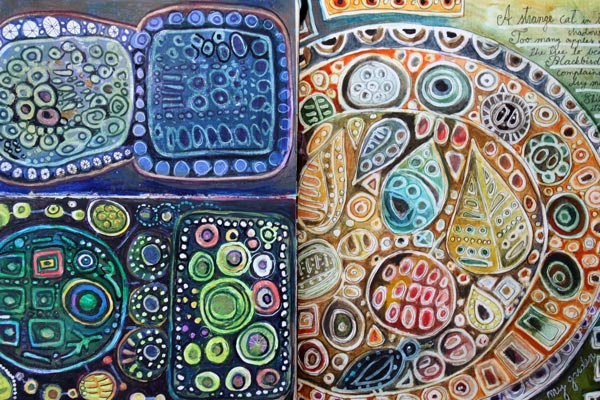
Imitate Ceramic Art!
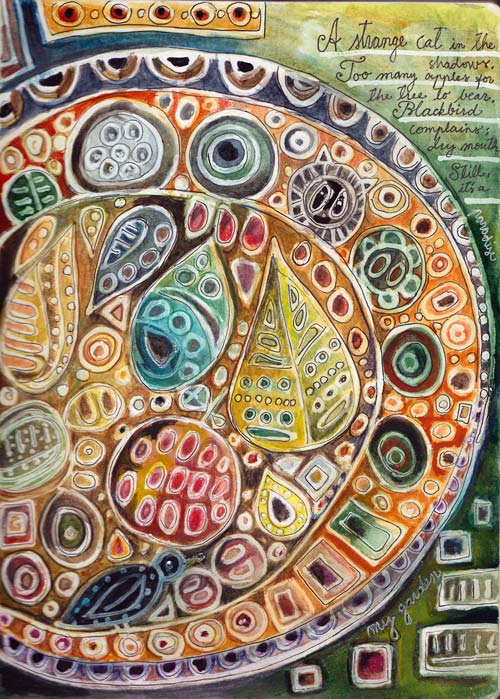
A strange cat in the shadows.
Too many apples for the tree to bear.
A blackbird complains: Dry mouth!
Still, it’s a paradise: my garden.
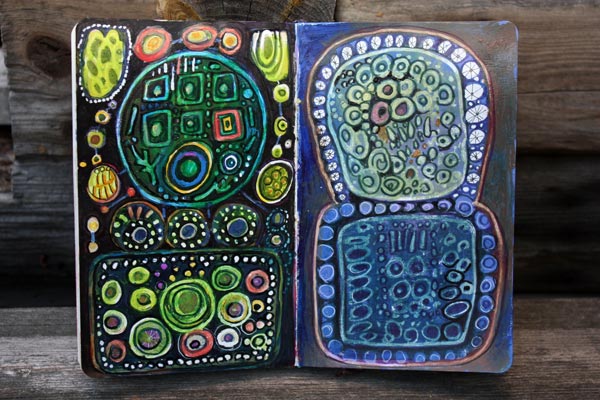
This is an art journal page where I wanted to achieve two things:
1) imitate Scandinavian ceramic artists of 1940-1960s
2) write a poem and illustrate it
Scandinavian Ceramic Art
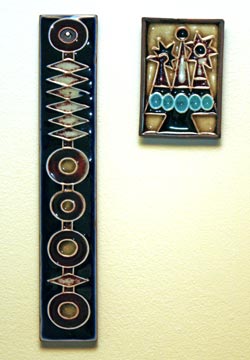 Let’s start with the artists: Annikki Hovisaari from Finland and Lisa Larson from Sweden. They are women who made beautiful ceramic art in 40s-60s. Annikki Hovisaari died in 2004 but Lisa Larson is still alive and she has a website too.
Me and my husband own a couple of Annikki Hovisaari’s work. We have bought those from antique fairs.
I found out about Lisa Larson in Scandinavian Retro magazine nr 1/2014. You can also see the best work of hers by searching from Google with the search term “Lisa Larson tile”
When I examined the work of these two artists, it was clear that a white correction pen would be perfect to imitate the lines. I made a couple of small pages by combining the correction pen with acrylic paints and PITT Artist Pens. However I was not fully satisfied with the outcome. These did not have the liveliness in color that I wanted to achieve.
But after making these I realized how I would use the correction pen and what I would combine it with: watercolors! Here’s how you can create your own ceramic tile look!
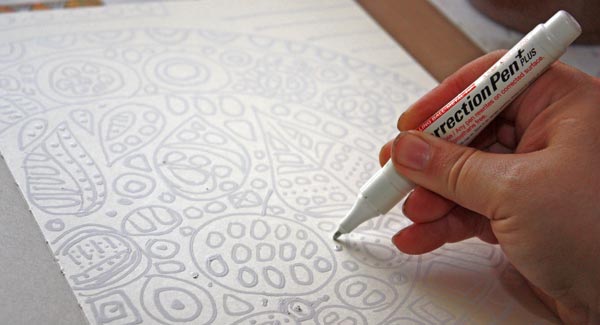
1) Doodle with correction pen
2) Use watercolors for coloring
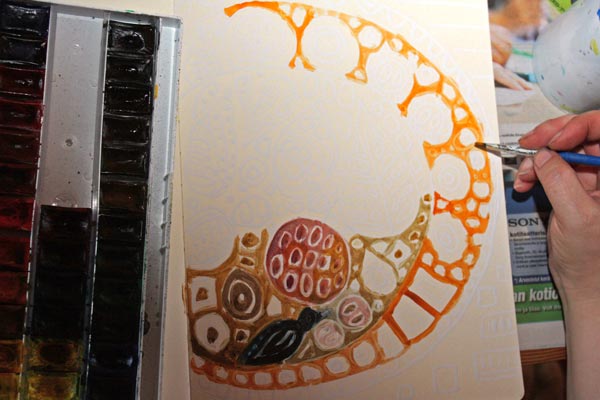
The correction pen works as a resist. You can watercolor over the white doodles. After painting add some water and wipe the paint off from the doodles.
3) Add contrast and draw thin black lines

When you are done with watercolors, don’t stop yet. Add color variation and contrasts to doodled shapes. You can also work with colored pencils when finishing if it feels easier. Finally, take a thin black marker and add thin lines in the center of white doodles or both sides of the doodles. These lines will make your work look sharper and more dimensional.

Here you can see the difference that finishing makes. At this stage, I have also added the poem. Actually, my process began by writing the poem. I have discovered that if I want more depth in journaling, it’s better to write it first.
Have fun with this simple technique!
More ceramic art inspiration and playing with simple shapes
>> Modern Mid-Century art journaling mini-course