Poetry Girl and Bosom Friends – Start Drawing Again!
Let’s get you out of the creative rut and have quality time with your inner child – the poetry girl in you! Join us for a course that will get you excited about making art again! >> Sign up here!
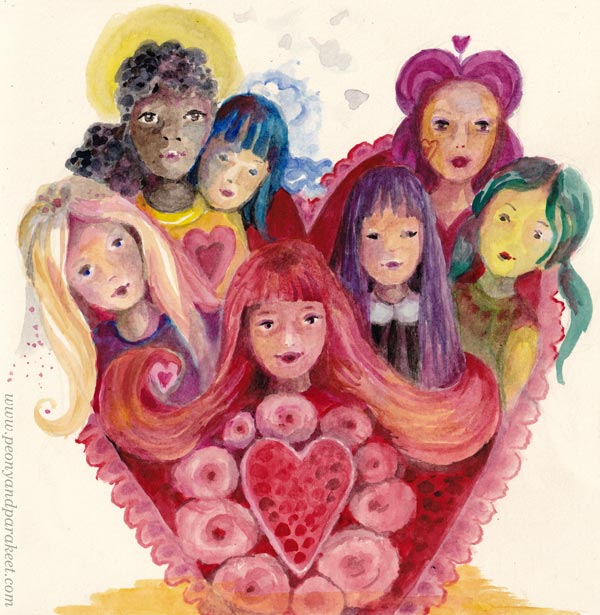
Poetry Girl and Bosom Friends
In Finland we have two lovely words: “runotyttö” and “sydänystävä” – “poem girl” and “heart friend”. Runotyttö means a dreamy young person – poetry girl – and sydänystävä means a close friend – a bosom friend. I think the best courses are like the bosom friends that bring out the poetry girl in you.
They make you see new possibilities, but they do it in a gentle and fun way.
>> Sign up for Hearts and Stories!
Here’s how we get out of the creative rut in the course Hearts and Stories.
Out of the Creative Rut – Step 1
First, we will restore the joy of drawing simple shapes.
Out of the Creative Rut – Step 2
Second, we will go for an adventure that travels from one small picture to another.
Out of the Creative Rut – Step 3
Third, we will find a connection to fantasy through characters.
Out of the Creative Rut – Step 4
Finally, we put everything together so that we are excited to continue creating.

Art is a mood and a direction. It shows where you are, and suggests where you want to go.
Join us for a course that will get you excited about making art again!
>> Sign up for Hearts and Stories!
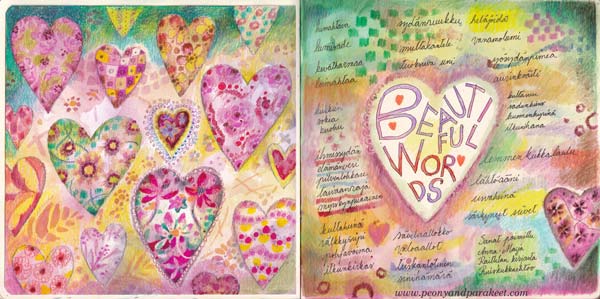
Art Journal as a Storybook
This week, we are looking at an art journal as a storybook, full of fairy tales that are not borrowed but our own.
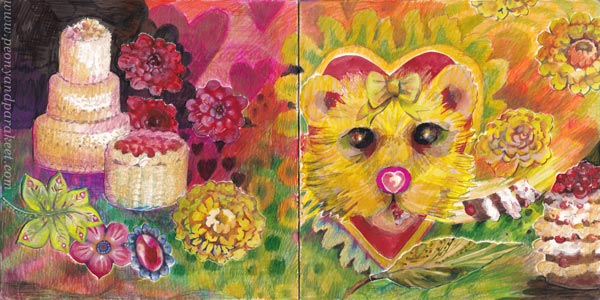
With this video, I want to inspire you to create whimsical art journal pages that illustrate personal stories. In these pages, mundane things become more fantastical, and there’s no pressure to draw realistic sceneries, real persons, and such.
I say in the video: “As a child, I drew lions without thinking if they were realistic enough. I loved lions, so I drew them, it was that simple. When I cherish the inner child, I don’t expect realistic perfection, neither do I try to control the story.”
Creating a page in your storybook journal can be a creative adventure that gets you hooked on creating.
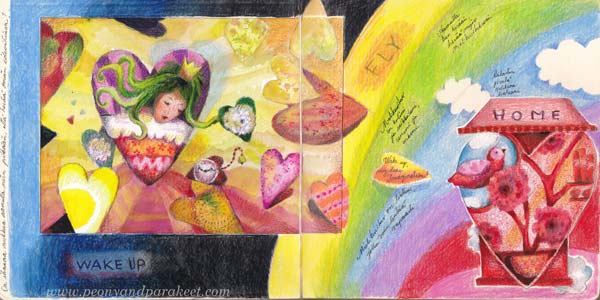
Art Journal as a Storybook – Watch the video!
In the video, I use watercolors, colored pencils, and fel-tip pens and create a spread in my Dylusions Creative Journal. I start with creating the central heart on a separate paper ( Fabriano Accademia drawing paper, thickness 200 gsm/94 lbs), and then pick one of my boxes of joy to find more hand-drawn collage pieces.
I don’t start with the background, but glue the pieces first, and then combine them by coloring. This vice-versa collage process is fun because we can make odd images work together by drawing and also make them to tell a story.
I also like to start with a simple shape and work from a small detail to a bigger picture. I think this way of creating is exciting and adventurous, and it’s always a joy to see what comes up.
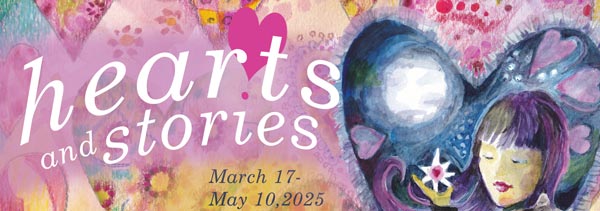
Hearts and Stories – Sign Up Now!
Let’s turn your art journal into a storybook and make the most out of simple shapes!
Hearts and Stories will begin on March 17, 2025. >> Sign Up Now!
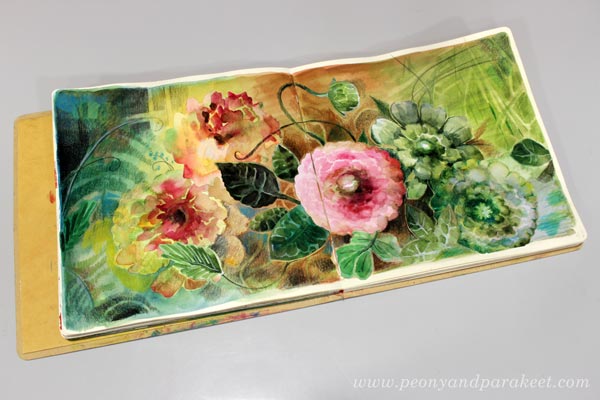
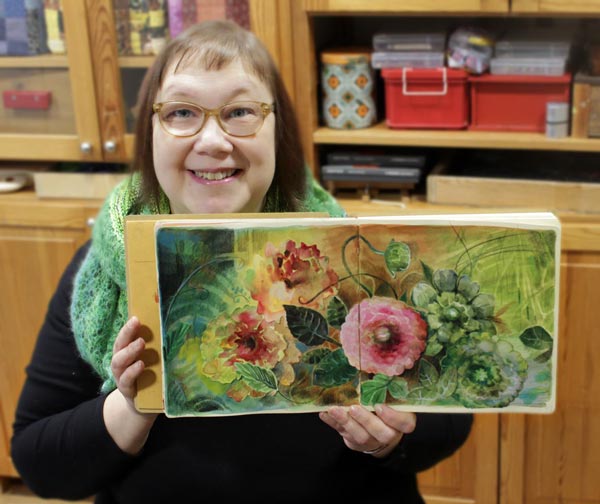
Expressive Watercolor Flower Collage
This is a sequel to the previous post “Flower for Your Art Journal” where we painted a watercolor flower step-by-step and used it as a collage piece for an art journal spread. This post has more ideas. Now we will paint more flowers and leaves. I also share some tips for artistic expression so that your collage will be more than just a stiff collection of flowers.
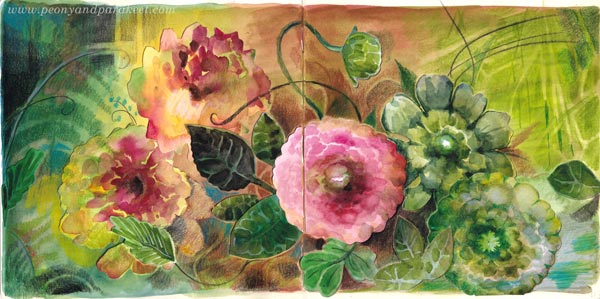
I have created this spread in Dylusions Creative Journal Square. The paper that I have used for collage flowers is Fabriano Accademia Drawing Paper (200 gsm/94 lbs). My watercolor set is a mix of artist quality pans from different brands. I have finished the spread with colored pencils. You can see these in action in the video of the previous blog post. The previous post also has the basic step-by-step instructions for painting a layered-looking watercolor flower. Let’s now look how you can do more and expand the basic idea!
Get More Variation – Grow Flowers More Naturally!
Instead of painting a separate flower by outlining it right in the beginning, grow a flower from the background!
Paint from the edges to the center.
Add more layers.
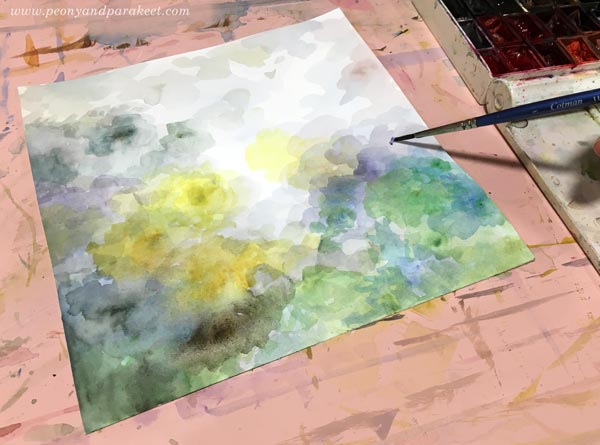
While you wait for each layer to dry, you can paint more basic flowers as instructed in the previous blog post.

When you can almost see a flower forming in the center, you can start painting petals on it.
Maybe you can also find smaller flowers near the big one, as I did.
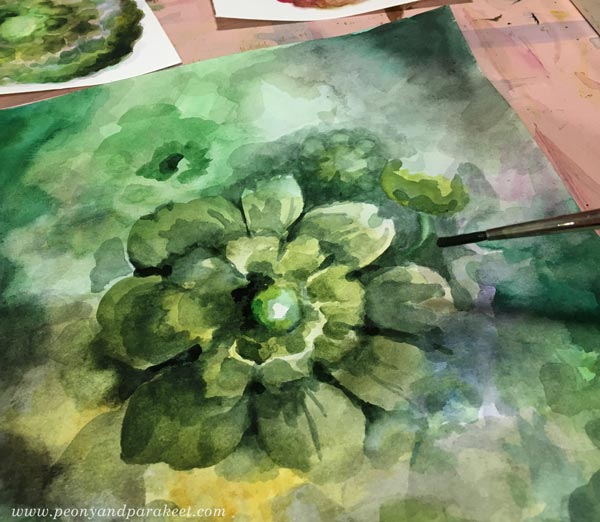
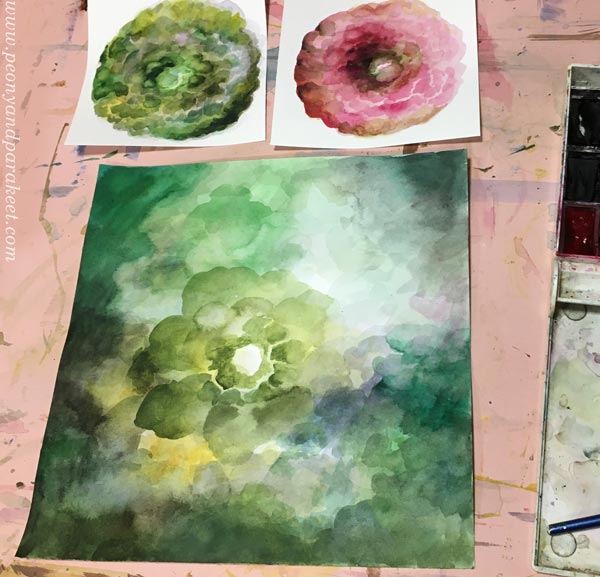
Cut out the big flower but keep the background too. We will use it for leaves.
Add finishing touches to cut flowers with colored pencils.
Get More Variation – Paint Leaves!
Use the background for leaves.
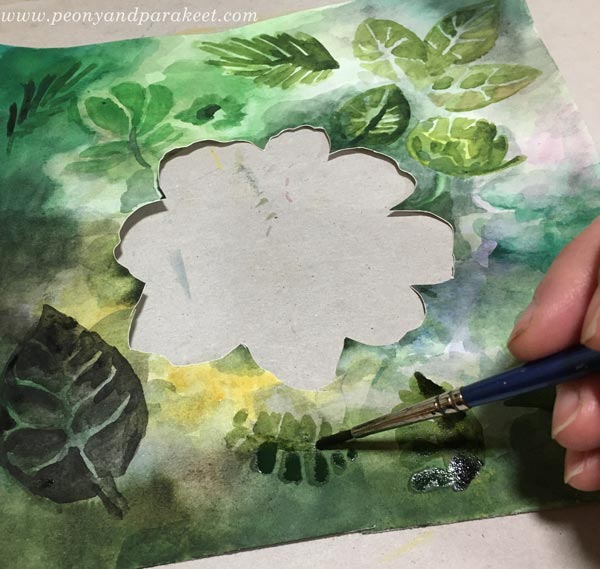
Leave some background visible between the brush strokes to get veins. The thinner the veins, the more elegant the leaf looks!
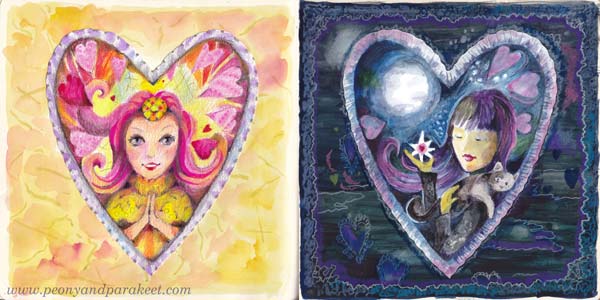
Let’s Pause and Talk About Colors
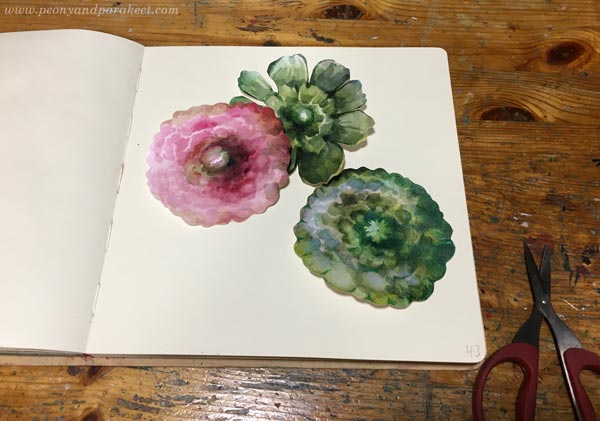
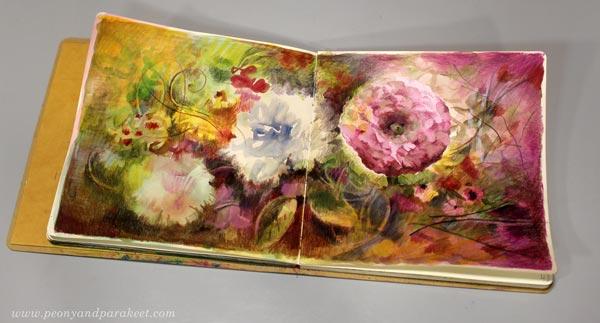
Ï only made one pink flower for my collage. Other flowers have different colors. If you look at the finished piece, the pink flower really pops up because it’s so different. The green flowers may look unnatural when you have them as collage pieces but in the final piece they look like cousins of the green leaves and the result is natural.
When you want to build expression, some flowers have to be less important than others. That’s why you can use any color for both flowers and leaves. For example, you can have blue flowers and blue leaves. These are secondary elements to the focal point.
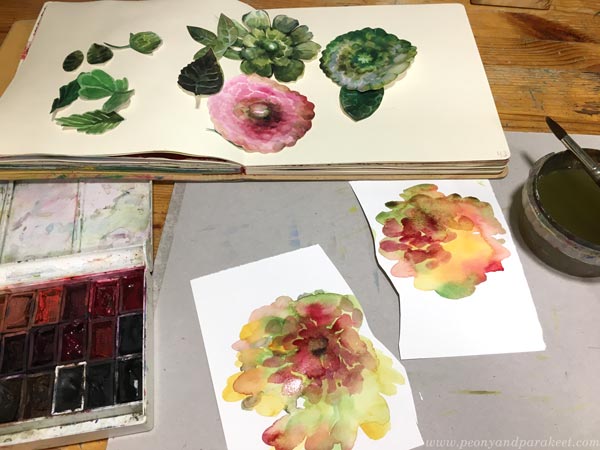
Get More Loose – Let Watercolors Make Some Flowers!
Put most of your energy to make the main flower, as beautiful as you can. You can then paint other flowers very loosely. Namely, some flowers can be more in the background and because flowers are very 3-dimensional things, their outline is often asymmetric. Think about a peony, for example! It has many layers of petals and they point in different directions.
With a fairly broad brush and quite a lot of water, paint multicolored spots and call them flowers.

You can add some brush strokes on the spots to make the flowers a bit sharper. However, these loose flowers are much less detailed, see my selection below.
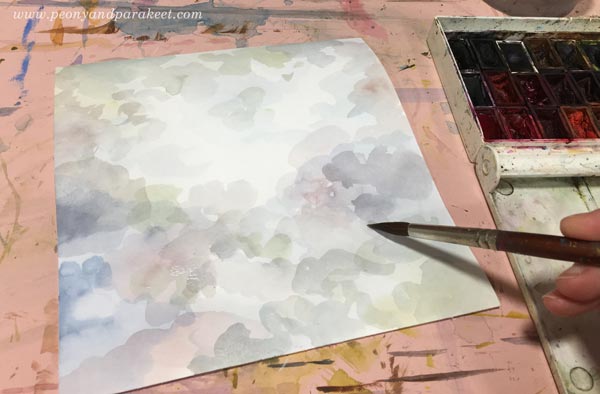
Before attaching the flowers and leaves, add color to the background.
Get More Expressive – Paint a Multicolored Backround!
Backgrounds with only one color are boring, and not only for the viewer but for the maker as well. Different colors form different areas and when attaching the flowers you have much more fun deciding where to put which flower.

I let my background guide me: yellow flowers in the yellow area, green flowers and leaves where the similar tones are, and the pink flower in the center that has the warmest tones. This creates the effect of lighting – the flowers and the background are exposed to the light of similar tone and that makes them look less separate.
Watercolor Flower Collage and Colored Pencils
With colored pencils, you can easily add curvy stems and other delicate lines and darken the surroundings of the focal point so that it catches the eye right away.

Notice that you can also push some flowers further back by coloring over them with background colors.

My blurry and loose flowers get green tones. And I also add yellow to the background to push it visually closer to the flower.

Drawing curvy stems makes the collage flowers look less stiff.

You can also add more subtle details to the background by coloring over it with very similar colors that it already has.
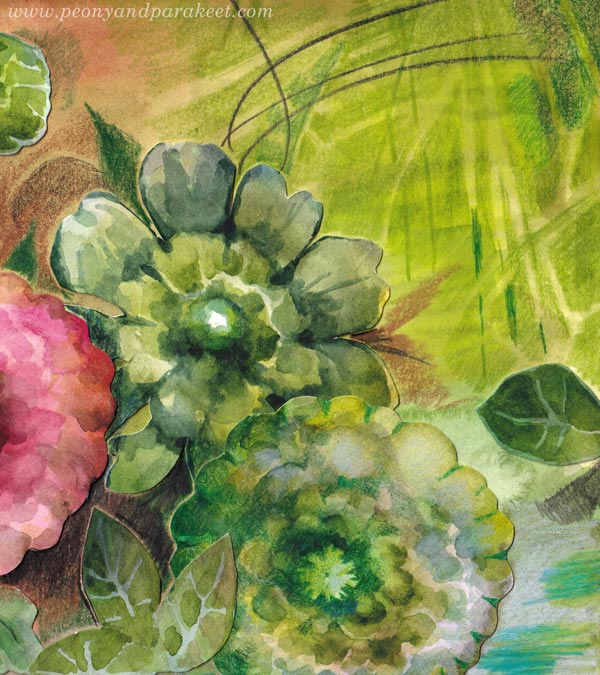
Some green details are a little lighter, some little darker, and that’s makes them visible but not too much – the pink center flower has no competitors.
Next-Level Watercolor Flower Collage with Tension
I know that using dark colors is hard for many. These times need light and you want to make bright art, I get it. But light needs darkness to shine. I always finish my work so that it has the tension between the so-called good and the so-called bad. It has sharp and bright details, traditional beauty, safe and tame areas. But also dark colors, unclear, sometimes even scary-looking wilder parts. This tension makes the collage natural because life is like that.
I hope this post inspired you to create more watercolor flower collages!
Flower for Your Art Journal – Step by Step Video
Let’s pick watercolors and colored pencils and make a flower for your art journal! Scroll down to watch a step-by-step video!
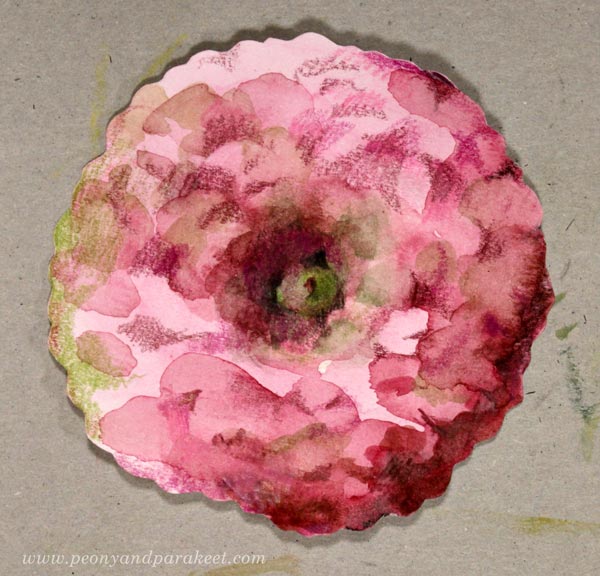
This flower can be a rose or a peony or any round and layered species. For me, it’s not so important which flower it is, but what kind of personality it expresses. Here I aimed for a soft but unapologetic character. Every flower you create will become a bit different, and soon you’ll have a collection!
Flower for Art Journal Page – Watch the Video!
The instructions for the flower and all the inspiration for using it on a page is in the video below! We’ll start with watercolors to make the foundation for the layered look and then add more sharpness with colored pencils. Some patience is required because you need to let the watercolors dry between the first steps.
In the video, I encourage you to adjust the center of the flower, the flower’s sould. Find a look and personality that appeals to you!
Including the Flower in Art Journal
In the video, I also show how you can use the flower with almost any background and make a spread for the flower in the spirit of Freely Grown.
I hope this week’s video and the last week’s blog post about picture prompts inspire you to art journal and create art in general!