Get Closer to True Artistic Expression – Draw Your Innocent Little Secrets!
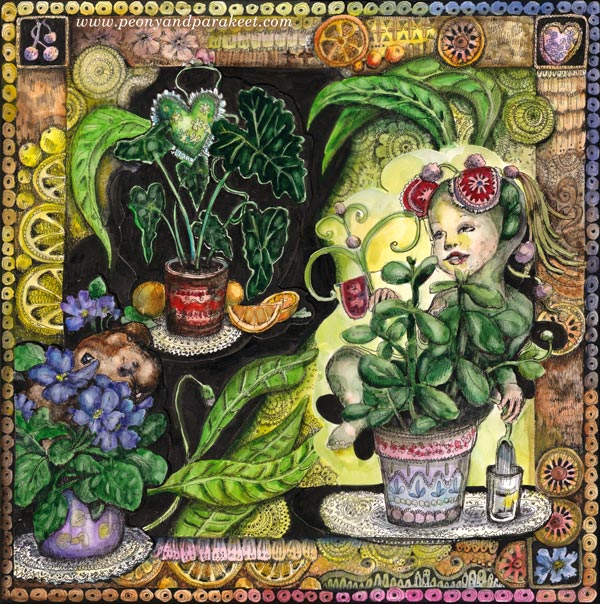
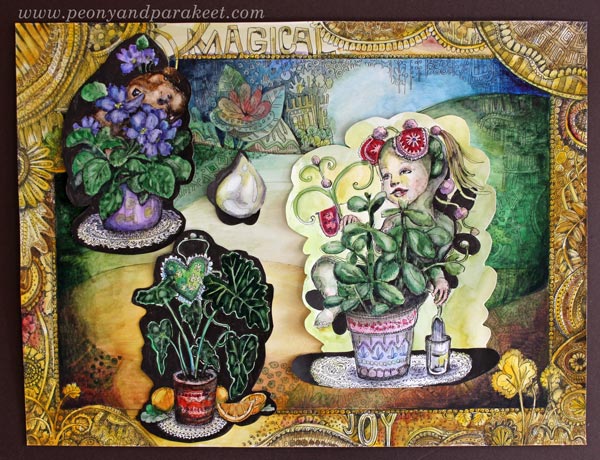
Here’s my latest art project, “The Secret Life of Pet Plants” – an illustration that I have composed of hand-drawn collage pieces. It’s about the love for house plants – the topic that’s close to my heart but that I haven’t touched much lately. I also wanted to include little secrets that I haven’t revealed in my art.
These little secrets are often pretty innocent stuff that we have labeled with words “too childish” or “too weird.” They can become creative blocks and drain our energy if we try to avoid them. Really, life is too short not to get them on paper! We can get more serious after they are out – if we ever want to get back, that is! I think I stay on this track for a while – making art that I have always secretly wanted to see. It feels good to be close to this kind of true artistic expression.
A Couple of My Innocent Little Secrets
One of mine is my secret admiration for traditional (and often a little bit tacky) cross-stitch designs. They often have decorative borders and look more like a collection of motifs than a real scene.

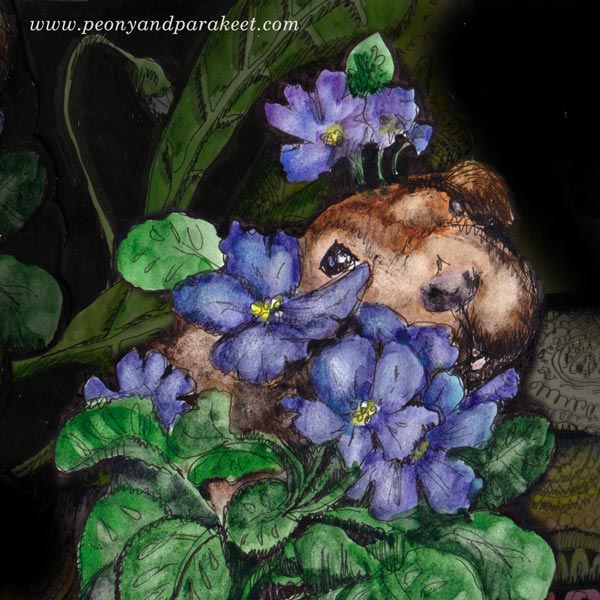
Another one is that, to me, plants are like pets with personalities. We have a lot of plants, both outdoors and indoors, and I feel a deep connection to many.
Here are the steps for an illustration made from hand-drawn collage pieces.
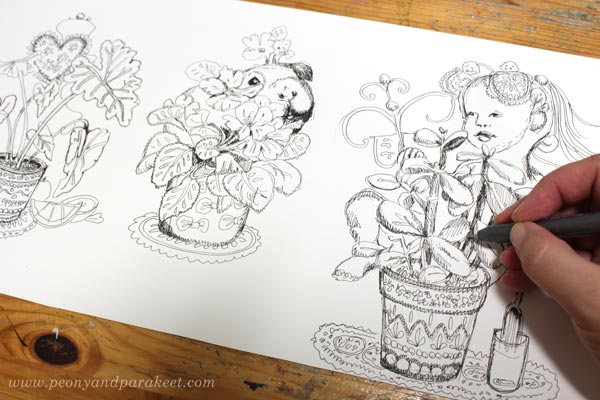
1) Make Small Drawings
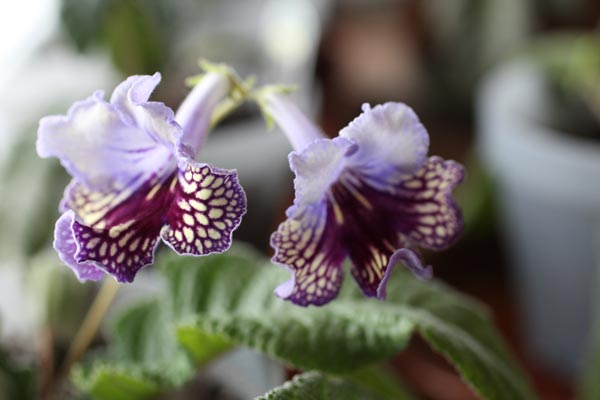
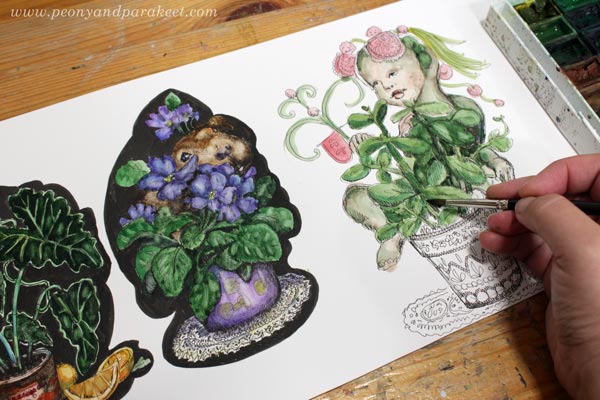
I started the process by drawing and coloring the main elements separately.
I love using watercolors with smooth Bristol paper. The color is easy to layer and also to wipe off if needed.
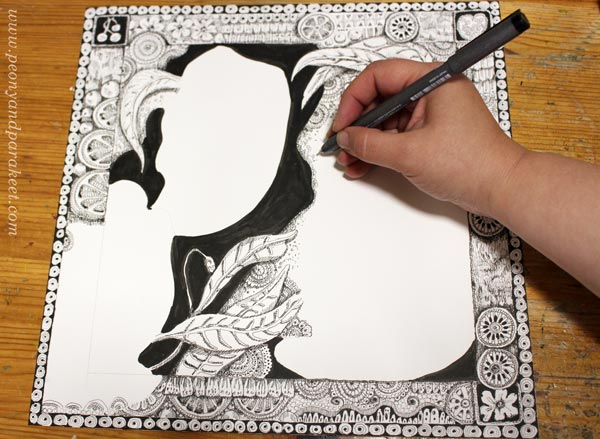
2) Draw the Background
I placed the colored collage pieces on a background that I had made for the class Magical Inkdom and tried how they would work as a composition. I also drew a water drop just in case I needed a small element for balance.
Then I drew a new background and marked the areas where the elements would go.
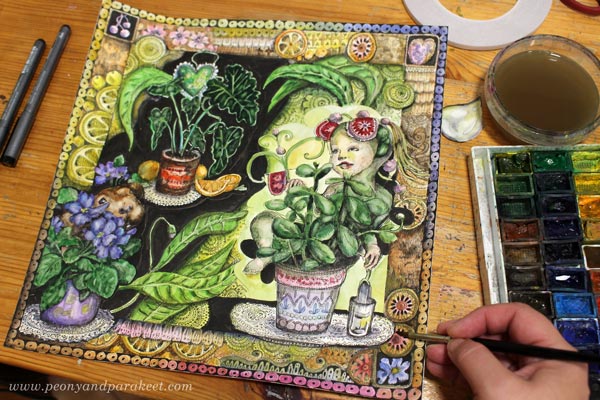
3) Attach the Collage Pieces to the Background
I usually attach collage pieces with gel medium, but this time, I used double-sided tape. It is easier to control, so I didn’t have to worry about having the medium in the areas where I wanted to add more watercolors.
4) Display the Little Secrets!
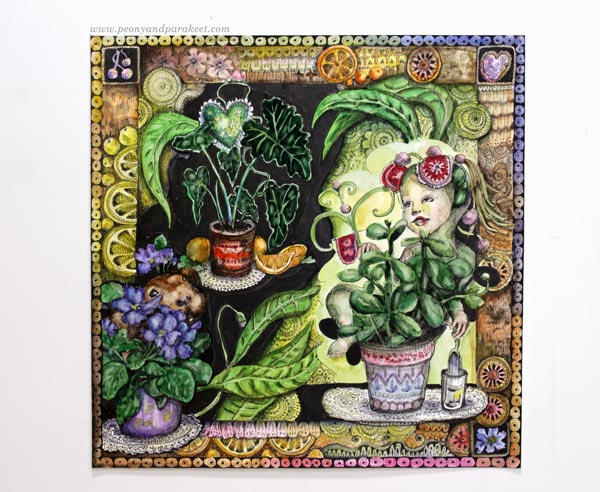
One wall of my studio is white so that I can photograph my work easily. But when I want to display the recent pieces, I don’t leave them on the wall but place them on the side table under a clear plastic plate. I love how this piece fits with the ones I have made for Magical Inkdom. It truly feels my true artistic expression at the moment.
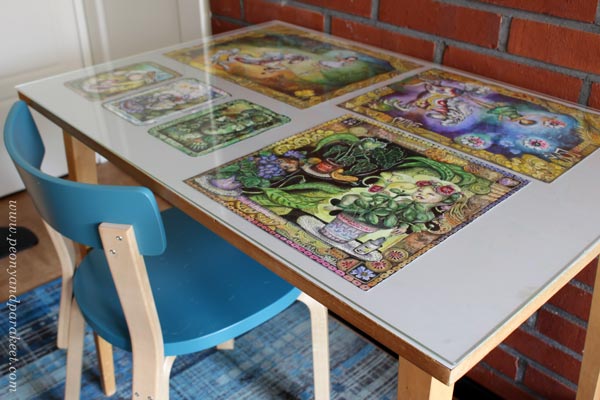
With the African violet that looks like a cuddly guinea pig to me, I want to wish you a happy and creative weekend!
Come to draw fantastic art with me – Sign up for Magical Inkdom!
Right after the registration, you will get all the lessons published so far, and you are good to start drawing! >> Sign up here!
Drawing Tutorial – Let’s Draw a Magical Crystal Ball
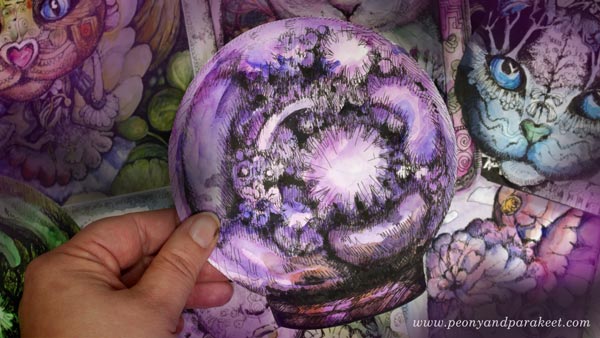
To celebrate my upcoming new class Magical Inkdom, I made a free tutorial about how to draw glass and create magical glowing effects. In the video, we will draw a crystal ball with a black ink pen and color the ball with watercolors. I hope you enjoy this little project and I hope to see you in Magical Inkdom too!
Magical Inkdom begins on July 8, 2019 – Sign up here!
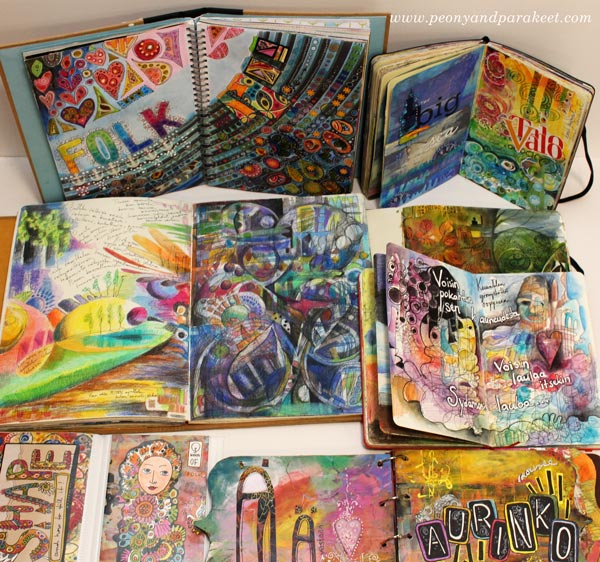
Revamp Art Journal Pages So That They Spark Joy!
Here’s an art journal spread that I just finished. First, it was just a couple of old black and white drawings that – like Marie Kondo would put it – didn’t spark joy. But I used the old floral drawings as an inspirational foundation for the revamped spread. How and why revamp art? Keep reading!
Why Revamp Art?
The more confident I have become in creating art, the more I have begun to see the potential in my old art. Busy sketches, not so beautiful messes, and clumsy paintings and drawings all show the level of inspiration that still satisfies me. It’s the level of execution that I want to change. I want to tidy up some messes and add more expression and depth. I am certain that Marie Kondo would approve the idea of working with the old art journal pages. Isn’t it quite minimalistic compared to buying new journals all the time?
Revamp 1 – Change the Topic of the Page
Maintain the composition but change the topic of the page!
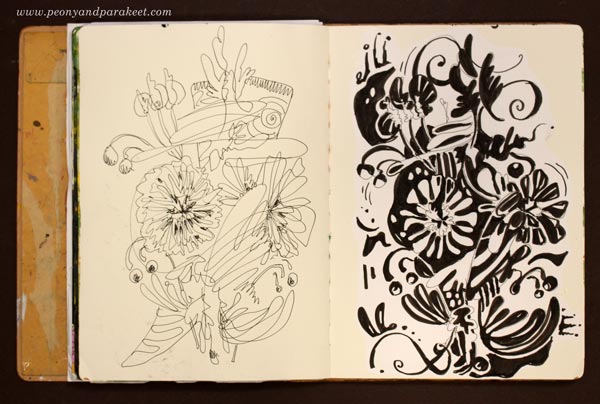
Here’s the spread before I started re-working it. It has a couple of carelessly drawn floral clusters.
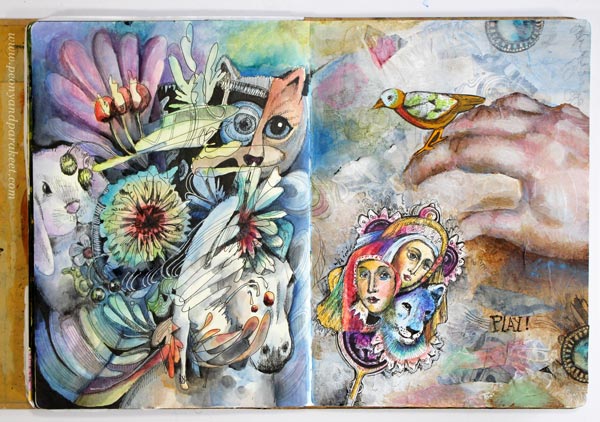
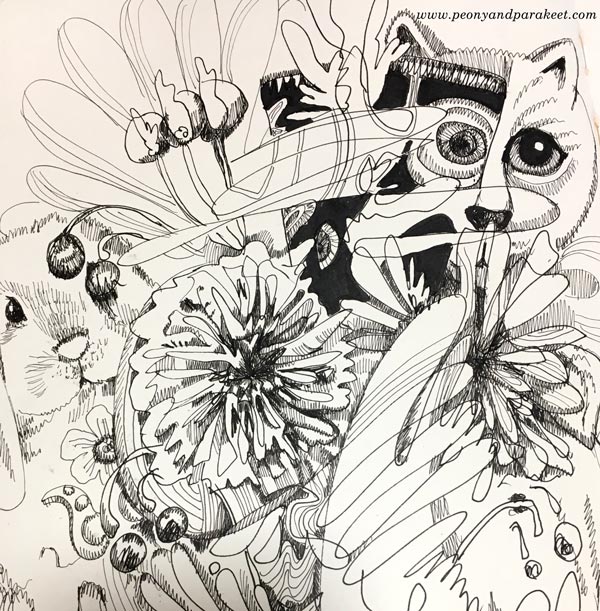
I changed most of the flowers of the left page to animals, added more details and shadows, and made the lines and shapes neater.
Then I used Derwent Artbars to color the line drawing.

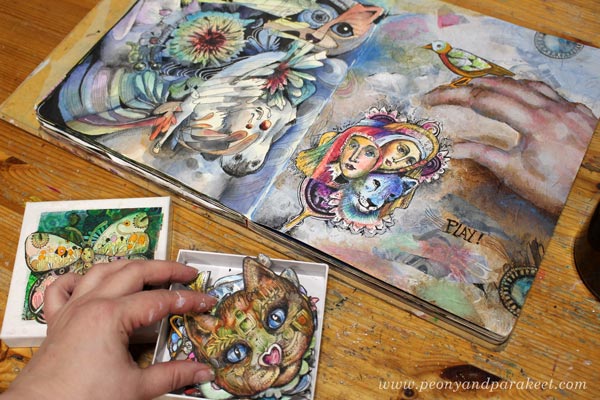
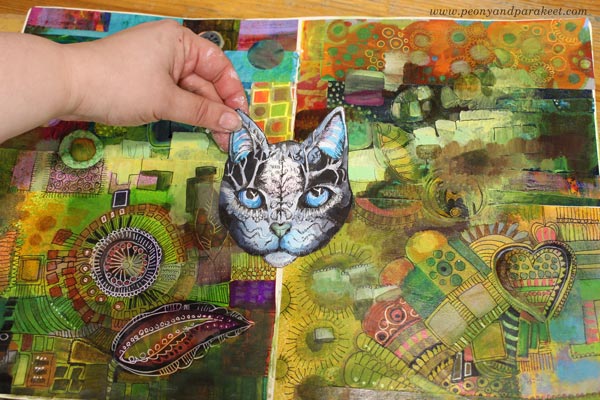
Revamp 2 – Tear the Page and Make Collage Art
I made some more drastic changes to the other page. I ripped parts of the black and white drawing that had been glued there. Then I went to my boxes of joy – the boxes that hold my hand-drawn collage pieces – and picked this motif.
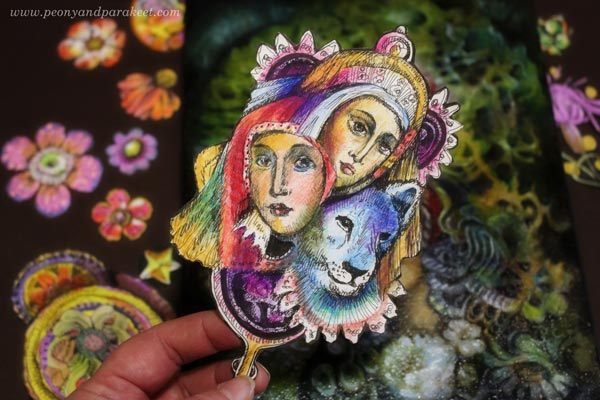
The background was painted with white acrylic paint. I worked in layers, glued some of the ripped pieces and doodled carelessly, then added more paint.
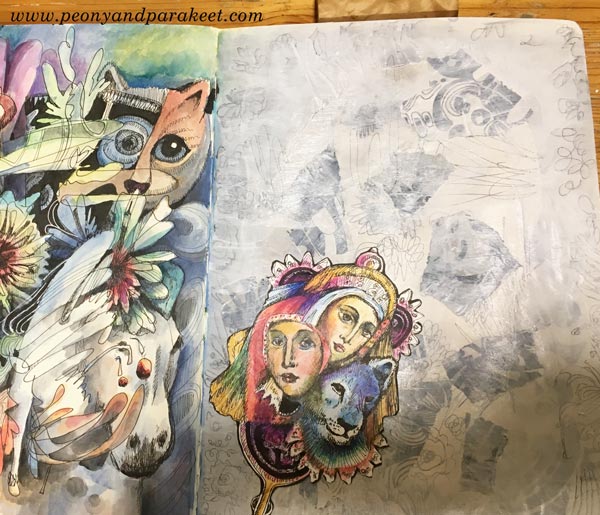
Revamp 3 – Paint Over a Part of the Page
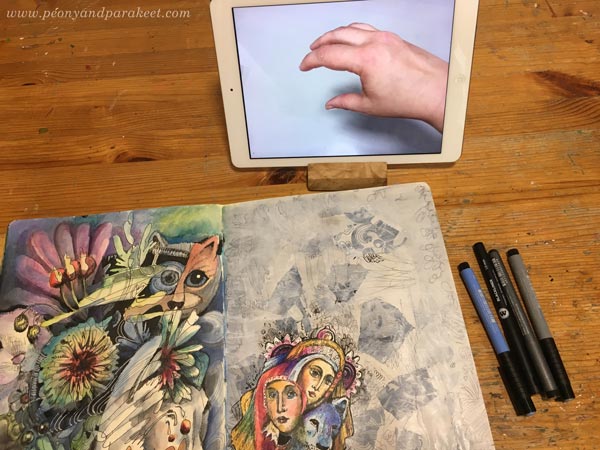
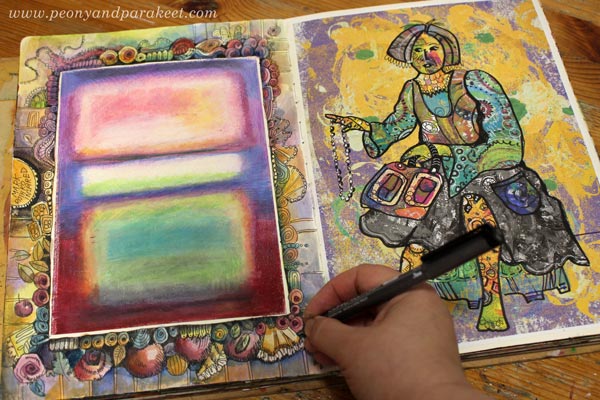
I wanted to include a hand showing how I currently play with my art. I took a quick photo and used it as a reference.
See how similar a page from my first art journal from 2010 is!
Have you documented your creative play? How you do it and how it makes you feel?
Revamp 4 – Cover a Page with a Piece from the Archive
Before I finished the spread above, I re-vamped another spread. This one only had some doodles on the right page, and then a drawing inspired by Mark Rothko glued on the left one.
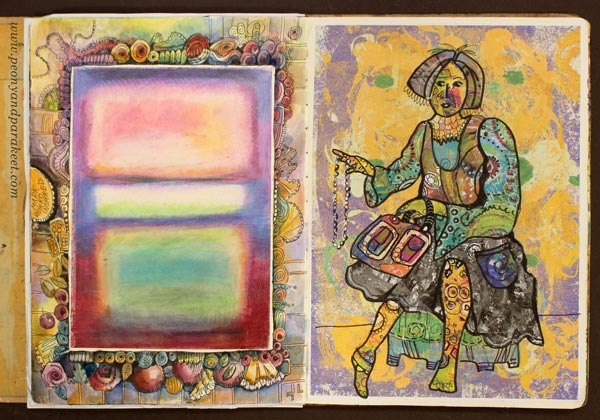
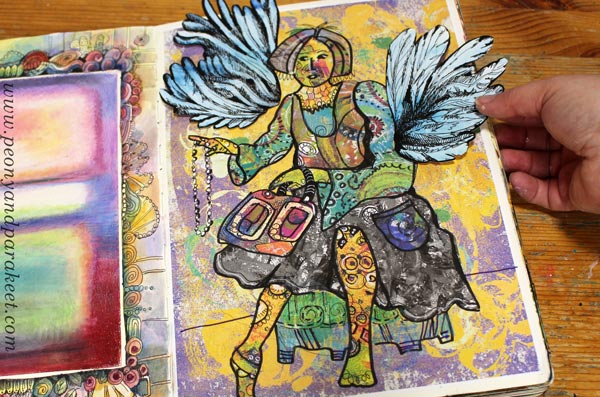
I found an old hand-drawn collage and glued it on the right page. In 2010, the collage was disappointing to me. I wanted to find my style and as a fashion illustration, the image looked clumsy.
However, it seems now that I wasn’t able to translate the message of the image correctly. Now, the piece makes me smile – there I am, sitting and handing the things that have always been inspirational to me: jewels and bags! I just wasn’t able to draw them like I did last October so I didn’t realize that they are the key elements for my visual voice.
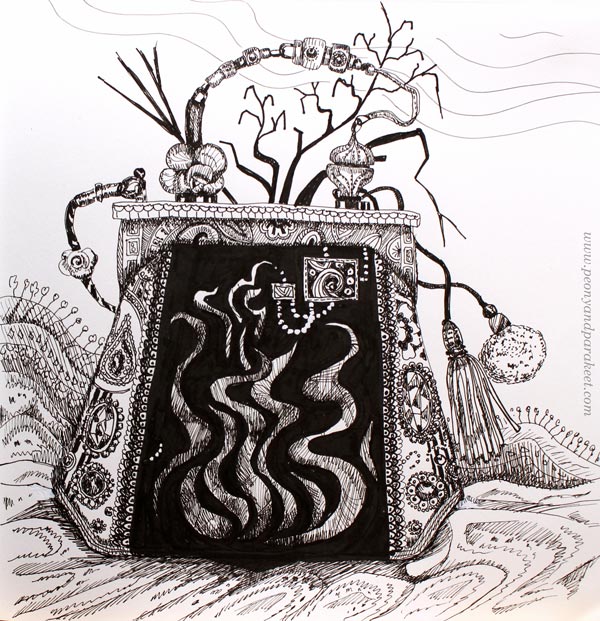
My collage was saying: “You should draw more bags and jewels, Paivi!” What does your old art speak to you now?
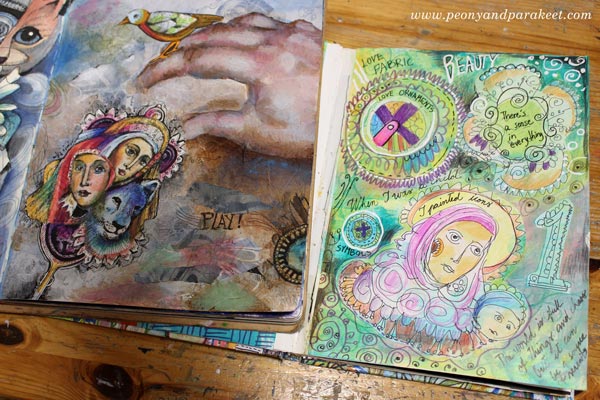
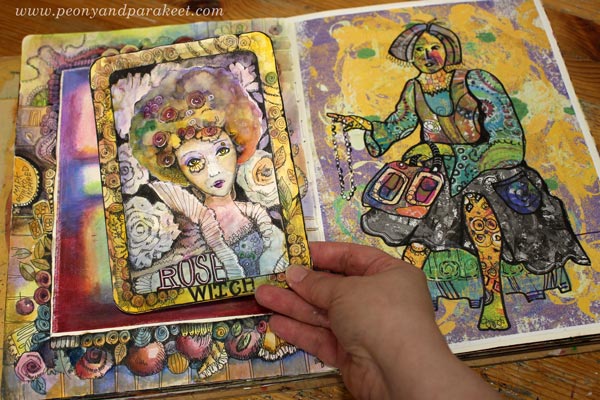
Revamp 5 – Add a Decorative Frame
During the years, I have made quite many of Mark Rothko inspired drawings, see this blog post! I love detailed drawings, and no matter how skillfully I would try to replicate Mark Rothko and other minimalists, I was never satisfied with the result.
I wanted to hug the idea though and make a decorative frame around the old abstract.
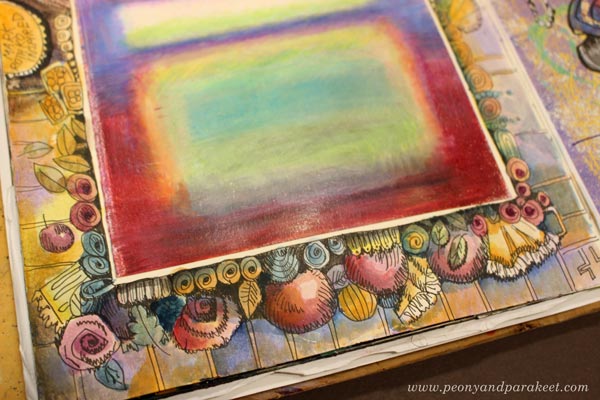
This way I am saying that the level of inspiration is there – Mark Rothko really makes me want to create whenever I look at his paintings. But the level of execution that I enjoy and am best at is something totally different.
This spread really sparks joy to me now, and I also couldn’t resist playing a bit with the collage pieces.
Isn’t it amazing how similar the style can be after so so many years, and after spending so long time trying to figure it out!
Here’s to Mark Rothko!
I am loving playing with the old art journal spreads, building the bridges between the years. If you separate inspiration from execution, does it make you look at your art in different eyes?
The Idea For This Blog Post Came from These
a) One of my notebooks mixes writing and drawing so that randomly scribble, doodle, and write there. It’s a private journal, and I didn’t want to publish its pages but the more full it has got, the more I have realized that when the sketches and writings are not organized chronologically, and I can revamp the pages repeatedly, they naturally produce new ideas.
b) Mackie d’Arge, a wonderful fellow artist from the USA, has shown her beautiful art in my art community Bloom and Fly. She has made many pieces by rebuilding and revamping her old artworks. It has given me the idea of looking at the potential of my old art and what could be made from there.
c) My classes Animal Inkdom and the upcoming Magical Inkdom are all about playing by drawing. I have wanted these classes to be fun, so they have made me include humor, fantasy, and play in my artistic process as well. They have made sure that my boxes of hand-drawn collage pieces stay filled even if I would “shop” there all the time! In Magical Inkdom, we will also draw decorative frames. >> Sign up Now!
Zebra Madonna – Drawing Fantasy Art
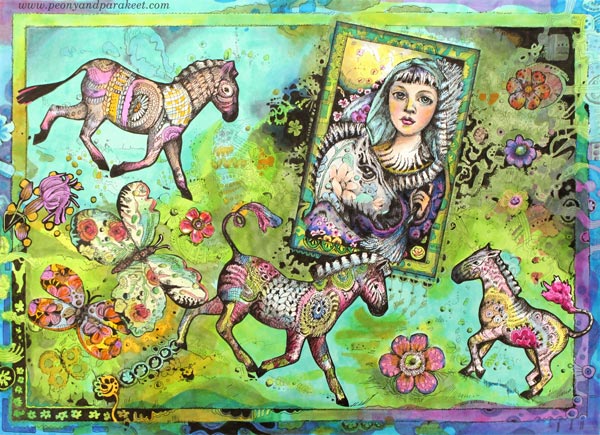
This fantasy art piece is a hand-made collage called “Zebra Madonna”. It’s made mostly with Copic markers, some elements have been colored with colored pencils. It’s hand-drawn from start to finish, mostly for my class Animal Inkdom where I show easy ways to draw and color wonderful wildlife animals like flying butterflies and running zebras.
Time Flies When You Are Having Fun
It often happens to me that I am going to draw just something small, but then end up making a bigger project. Jane Austen has a novel called “Sense and Sensibility”, but my inner conversation is not very romantic.
Sensibility says: “I have an idea.” Sense says: “Don’t!” Sensibility says: “I want to do it. Now.” Sense says: “It’s 2 AM, no way! Go to sleep and wait for tomorrow.”
What was I drawing in the middle of the night? A small drawing of a girl with a zebra. The girl is a bit like zebra herself, and the zebra looks almost like a unicorn without a horn.
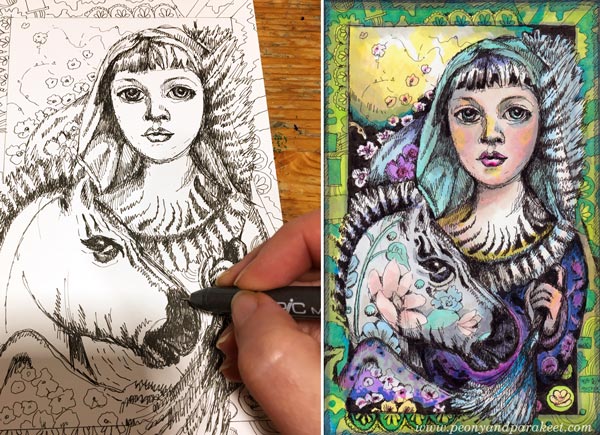
I started with a black and white drawing, but because coloring is fun too, I couldn’t resist. Time flew, and I was having fun.
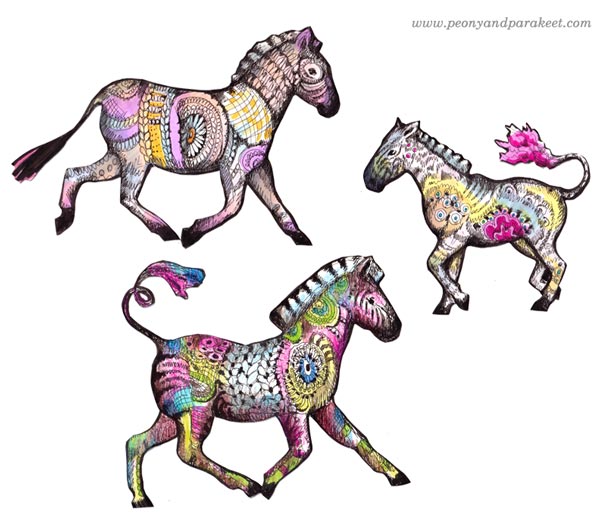
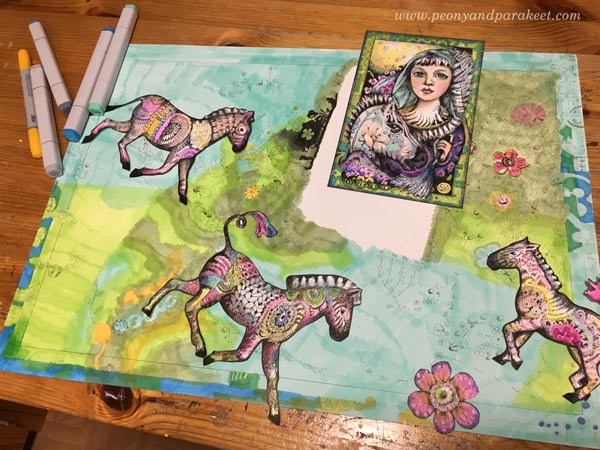
For Animal Inkdom, I drew a lot of collage pieces as samples, and then many in the videos. So I have two boxes, big and small, that have all kinds of fantasy creatures. It felt like the zebra of the small drawing started calling his fellows, and these three came out!
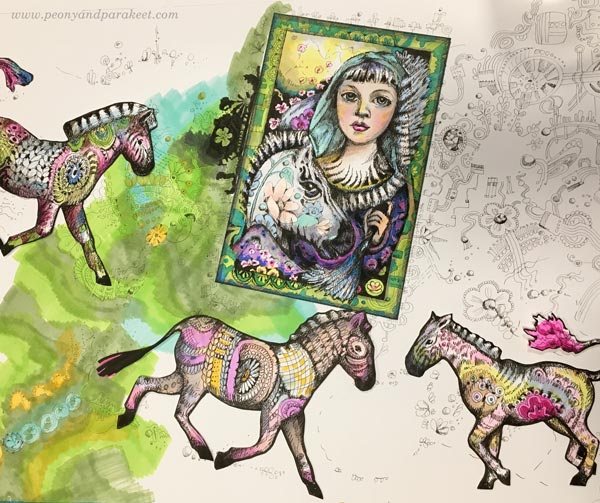
Even if my zebra madonna was framed and all, I wanted to make a new image where the other zebras could join her. I cut a big piece of Bristol paper, approximately 14 x 20 inches. This is when I went to sleep! It was apparent that I would need quite a lot of energy to fill it with markers and doodles.
Self-Doubts
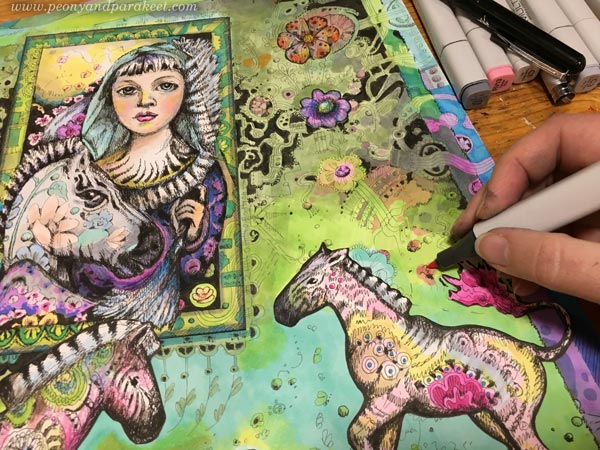
Next morning, I woke up determined to continue the project. I wanted to “paint” with markers – use several layers so that they would blend. I also wanted to draw with a very thin pen, Copic multiliner 0.03, so that most of the background would have subtle patterns. At this point, I wasn’t so sure if these were good ideas. Drawing took a long time, and markers weren’t so quick either.
I was also hesitating to use the zebras. Of all the animals that I had drawn for Animal Inkdom, they were my favorites. I reminded myself that because I had developed an easy way to make them, I could draw more at any time!
Before starting to ill the background, I had marked the places for the elements with a dashed line. Still, there was quite a lot to color. Here you can see how uneven the coloring is when there’s just one thin layer. I needed more layers!
It’s typical that at some point my Sense is starting to say: “This wasn’t a very good idea.” I am at the rock bottom trying to figure out how the project could be finished quickly because it doesn’t seem so fun anymore.
New Inspiration for Fantasy Art
My way to cope with what I call “the ugly phase” is to focus on a small area and start listening to an audiobook or a podcast. I also get inspired by colors, mostly by … black! It makes other colors shine, and my collection of black pens is growing steadily. I find it difficult to express any fantasy without black!
Fantasy art can be just fantasy and play, but I usually have a deeper thought in my mind. Despite the happy colors and fantasy feel, the message that I have in mind often has dark tones
Fantasy Art – Zebra Madonna in Detail
Here’s the finished piece again.

And because it has a lot of details, here are some pictures of them.
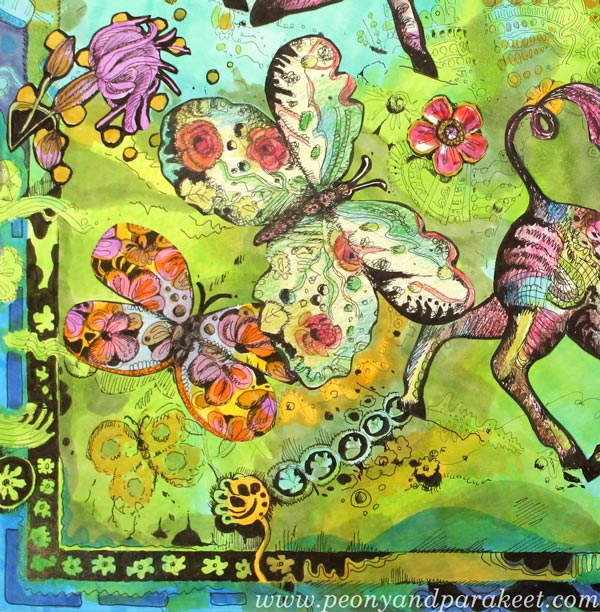
The butterflies are also from my class Animal Inkdom. I think they fit perfectly to the color scheme. I also added the third butterfly on the background. It’s just a careless drawing but it adds depth because it looks to be further away than the two colorful collage elements.
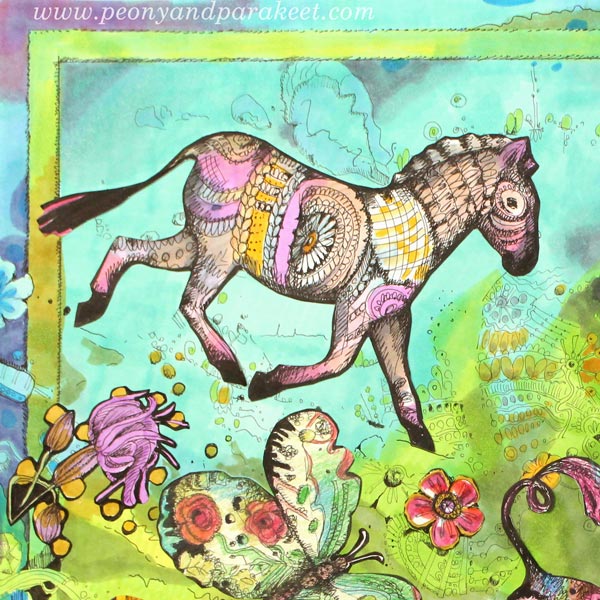
One of the zebra is flying with the butterflies, and if you look carefully, you can see his wings that I doodled vaguely.
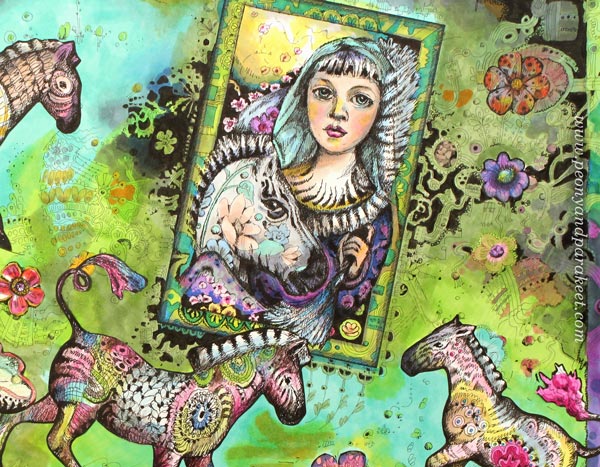
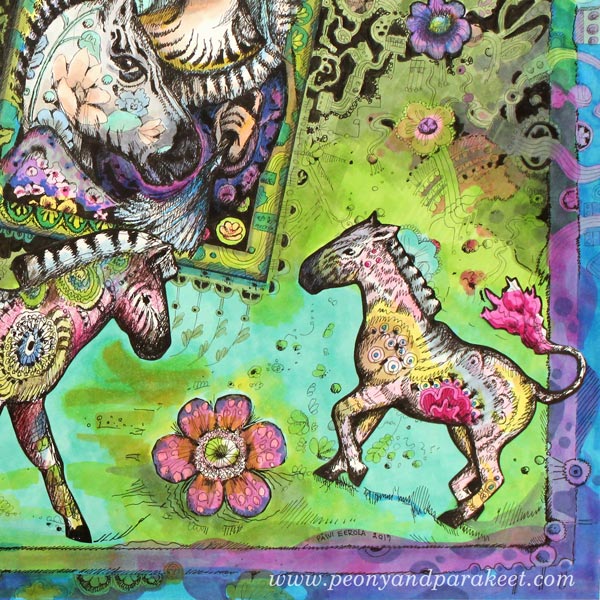
I like how the black continues the framed image and gives more depth and contrast. The right upper corner has a grey layer so that it doesn’t take the attention away from the central elements.
Drawing and Playing in Animal Inkdom
Come to draw and decorate animals with us in Animal Inkdom! You will get the published lessons immediately after the registration, and you can start drawing right away. Sign up for Animal Inkdom here!