Frugal Crafter’s Guide To Hand Decorated Papers
Sometimes I just want to overlook all the expensive materials and make art frugally. When watching a video about embossing powders I got the idea of using color pencils as a resist for watercolor. So, if you are filled with ideas but hate to see instructions that require special supplies or a wide range of supplies, this frugal version is just for you!
You only need
- paper
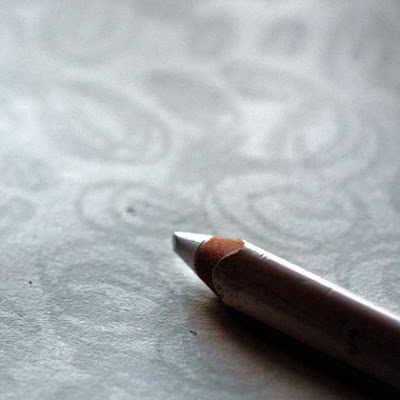
- at least one colored pencil (basic one, not water soluble)
- watercolors
Frugal Version – Here’s What You Do
1) Grab a paper! I prefer quite thin (90 g/m2, 43 lbs) and smooth papers, but you can choose whatever you like or have.
2) Start doodling with the color pencil. You can use any color(s) you like but using white makes the result especially interesting, I think.
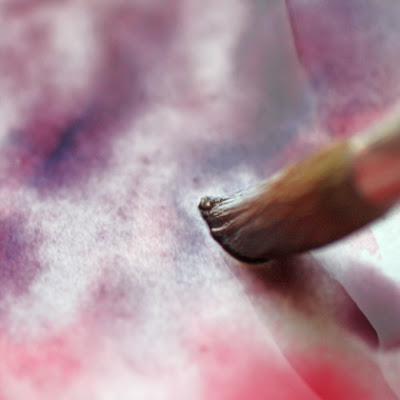
3) When you have filled the paper with your doodling, paint the paper with watercolors. Paint over the doodling! Use a lot of paint as we will wash some away in the next phase.
4) Let dry. Seriously. This is the only step where the patience is required.
5) Wash the paper with water. The idea is to get the color pencil strokes appear again. You may have to use the fingers to remove the color if you want a nice pastel background.

5) Let dry!
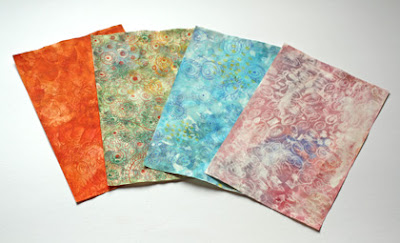
6) Here’s my example. You can use papers for collages, cardmaking, bookcovers, all kinds of papercrafting!

Here are some of my experiments showing various colors of pens and paints.
Let me be your art teacher: Subscribe to my weekly emails!
How to Make Paper Flowers
 Once you have made your own patterned paper, why not turn them into adorable paper flowers!
I just love the way they go along with the papers. Once you have developed your own style, anything you do can be combined together. As I have said, the best shop for papers and embellishments is the one you can set up for yourself!
So take out your hand decorated papers (I have quite a pile of them) and start making flowers! In addition to papers, you will only need correction pen, black marker (I love PITT artist pens), some embroidery floss, glue (Tombow is my favorite) and scissors.


Pick three papers that work well together. Remember to ensure there’s enough contrast between them.
Cut three circles, a small one, a medium one and a large one. My largest one is about 3 inches (7,5 cm) but you can make them in various sizes. Just be sure the smallest circle is big enough to add details like button holes.
If you have made your papers drawing layered circles, you have your circles ready to be cut. I cut the circles free hand as I am not so fussy about making them accurate.
 After cutting the circles, take the biggest one and draw the shape of the flower with the black marker. I like my flowers to be asymmetrical. I think they look more artsy that way!
Cut by following the marker line so that the black marker line remains visible. The line frames your flower and make it look more dimensional.
You can also change the shape of the second circle if it feels right. I often find myself adjusting the shapes of the circles during the process.
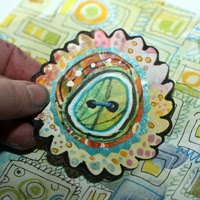
Make the smallest circle to look like a button by drawing circles with the marker and the correction pen. Then add holes with the marker. Big holes look better than small ones.

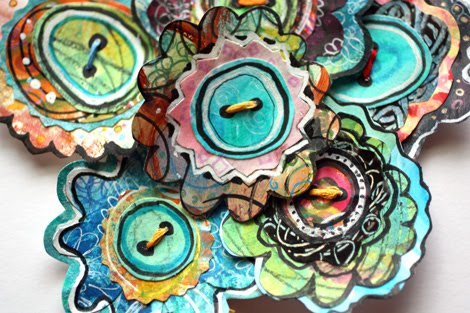
Now you have the three parts of the flower ready to be attached. Glue the parts together. Then take your needle and sew the buttonhole. After this phase I often add details with the marker. Here I have added little dots around the button and circled the second circle. As I love adding layers to my work, I finally glued the flower to another paper (blue one in the picture) and cut it out.
 Here’s the finished piece. Have fun with your papers!
Let me be your art teacher: Subscribe to my weekly emails!
How To Make Your Own Patterned Paper
While preparing to move to a new house, I have tried to avoid big projects. So I have done quite a lot of paper crafting recently. One of the easiest and quickest things to do is to make patterned papers. I use Canson sketch paper (90 g in thickness) and whatever paints and pens I possibly have.
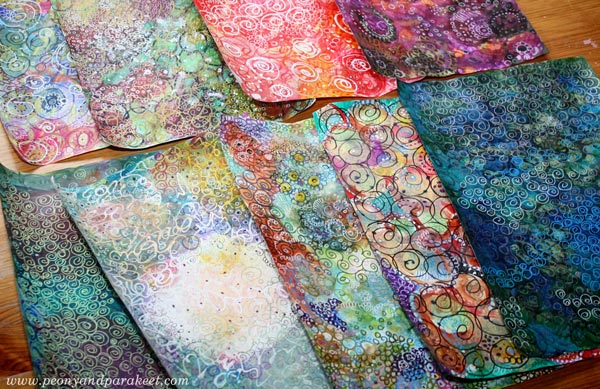
Sometimes more really is more, so I call these “More Is More” papers! I am going to use these for my art journal pages. Before cutting them, I scan them so that I can use the same paper digitally or print a copy of it. That way I always have some patterned paper available.
Here’s one of the easiest ways I know to make really rich and colorful patterned paper. Besides the paper, you will need watercolors, marker pens, gel pens, and colored pencils, a correction pen, and a relaxed mind. Don’t worry about the mess you make; it will look lovely in the end!
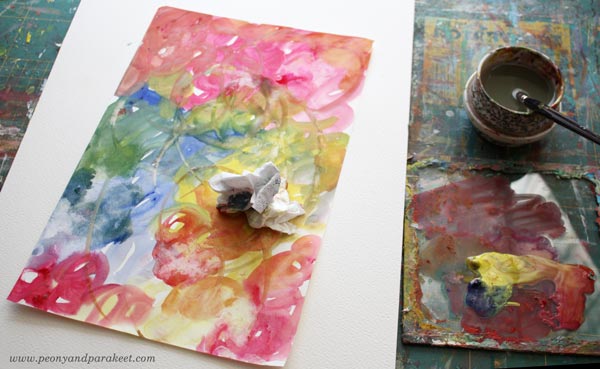
1) Paint the background with watercolors.
Use circular strokes. Don’t think.
Dry the excess water with tissue paper here and there to create some lighter areas.
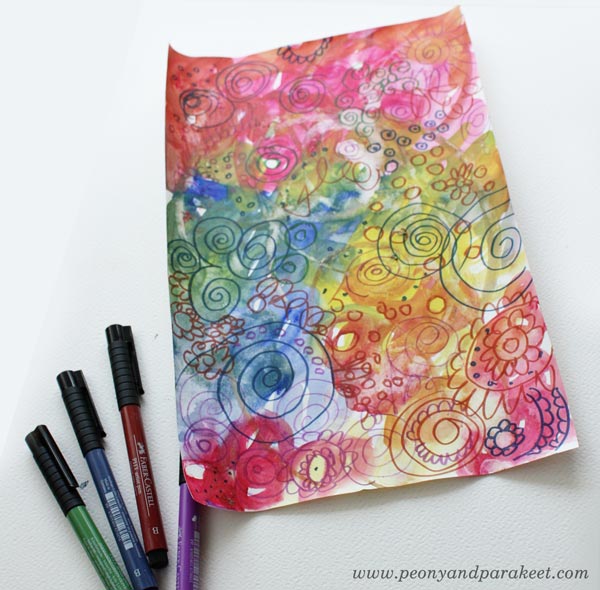
2) Doodle with markers.
I love to use PITT artist pens here. Any medium marker will do.
I like making circles and swirls, but you can doodle whatever comes to your mind. Relax the hand and keep the pressure light.
3) Continue doodling with gel pens.
Change to gel pens and make detailed doodles. I use Sakura gel pens.
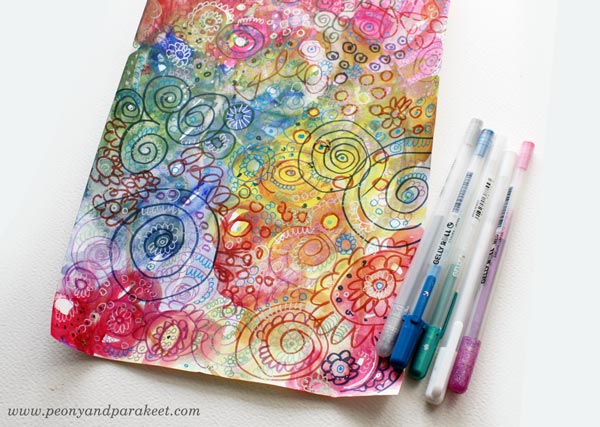
Some might think that this is the last step, but no way! More is more, remember!
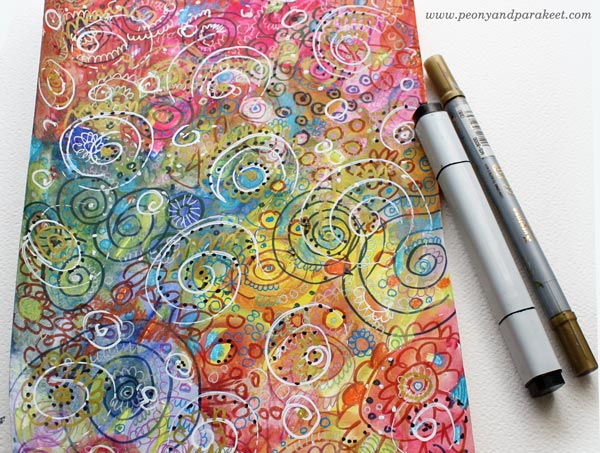
4) Color small areas with colored pencils.
If you look closely there might be areas where colors are grayish or not so perfect. Take your colored pencils and work on the problem areas. Do not worry about going over the doodling. The layered look is what we aim for here.
It looks like this now. Finished? Oh no!
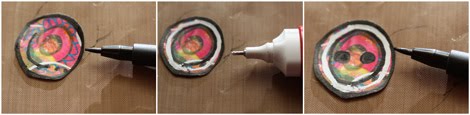
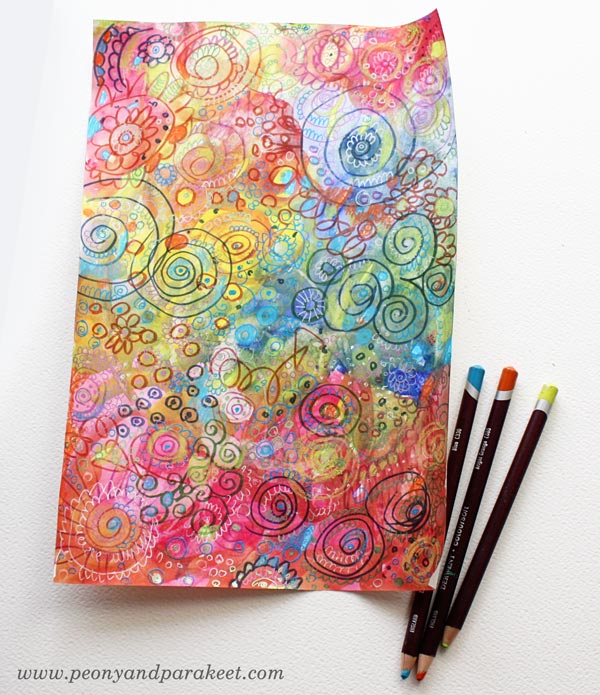
5) Doodle with a correction pen.
One of the best pens you can buy for patterned papers is a fine point correction pen. After you have colored all the white areas, you can make the white to come back with the correction pen! Now doodle over the paper, here and there…
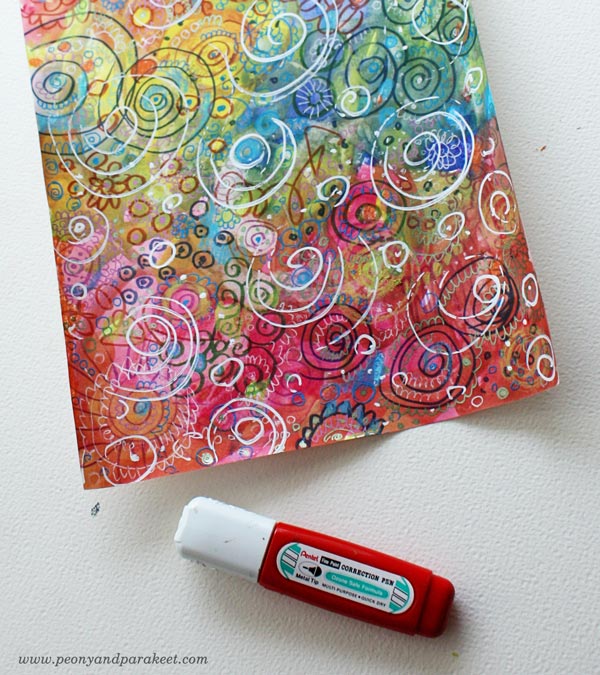
6) Add contrast and shine.
Take a black marker and make pretty dots near the white areas.
Optional: If you have a gold metallic pen you can doodle mindlessly to add some extra shine.
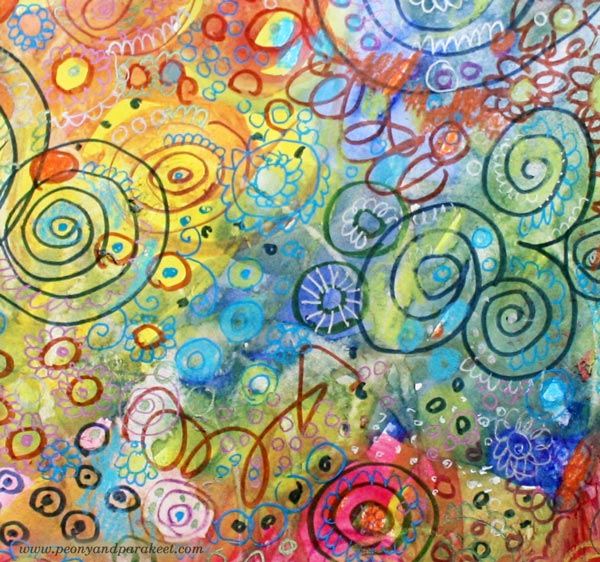
More is really more, isn’t it? You can stop at any step, of course, I couldn’t!
Bonus: More Patterned Paper
Frugal, Kiwi, Arboretum, Spring Flowers, Romantic Doodles
Class – Create Handmade Collage Art in Collageland!
Collageland is an art class for you who loves patterns and decorative textiles but wants to save time by creating with pens and paper. Watch the video and buy now!
In Collageland, I welcome you to my studio filled with doodles and ideas. You’ll make handmade papers and motifs and start building your handmade stash!
>> Buy Now!