Oil Pastels and Spicing Up Your Art

This week, I show you how to use oil pastels with other art supplies. I also talk about spicing up your art, especially by choosing subjects that are so personal that they make you tremble a bit!
Early Memories of Oil Pastels
Making art can be compared to cooking. Sometimes the food tastes good because the ingredients and the way are processed go well together. That was how my mother cooked. Her food was delicious because it was fresh and made with care. Even if our family wasn’t wealthy, the time that she put on cooking, made the meals worth remembering. I still don’t know how she was able to include the thick layer of blueberries into her pie. When there was a local art competition for children with the theme “home,” it’s no wonder that this is what I drew.
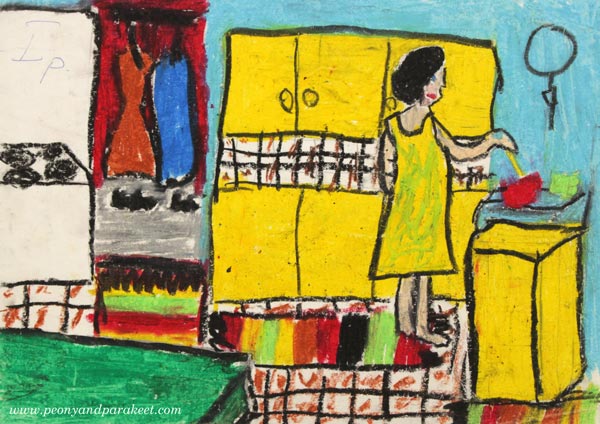
I remember struggling with the oil pastels, definitely not artist’s quality, but the drawing won the first prize. It was a little unpleasant that the organizer has written the prize in the drawing, but now it just adds a nostalgic flair to it.
My mother wanted her children to step away from cooking and caring for the home. She wanted me to get a good education and declined to teach me how to cook. I grew to question what women and men are supposed to do and felt rebellious in that respect. As a result, I went to study engineering and worked in a field that had mostly men.
QUESTION: What memories do oil pastels or other early art supplies bring to your mind?
Sennelier Oil Pastels – First Experiment
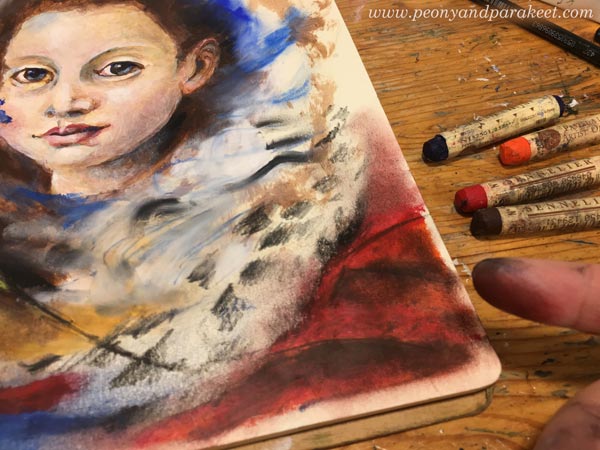
I bought a small set of Sennelier oil pastels for mixed media art. I didn’t want to spend money on a bigger set until seeing if I like them or not. My first experiment was to draw a portrait on a small sketchbook.
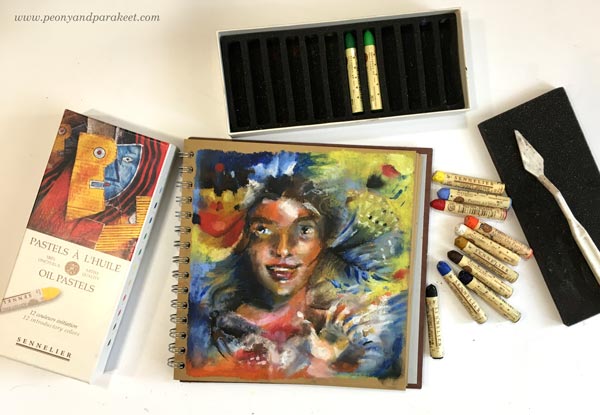
My mother used two spices mostly: salt and pepper. When creating art, salt and pepper are the lightness and the darkness of colors. You need both, but not too much. As beginners, we often think that we don’t need any salt and pepper. That the fresh ingredients – bright colors – will do the trick. But you need some paler and darker colors, not too much, but enough to harmonize a busy painting.
For the first experiment, I thought that making a basic portrait with salt and pepper would be enough. But creating just a pretty face often lacks expression, so I added a hand because oil pastels and fingers go together. No matter how hard I tried to use a palette knife for blending, I ended up enjoying the waxy feel of oil pastels on the fingertips.
The first experiment made me remember why I had tossed away my old oil pastel set over 10 years ago. Oil pastels are messy! Later in the evening, I made a big mistake of not wiping the table carefully and then placing my cross-stitch projects on the very same tabletop. I had to wash oil pastel marks from the fabrics, and that was very upsetting!
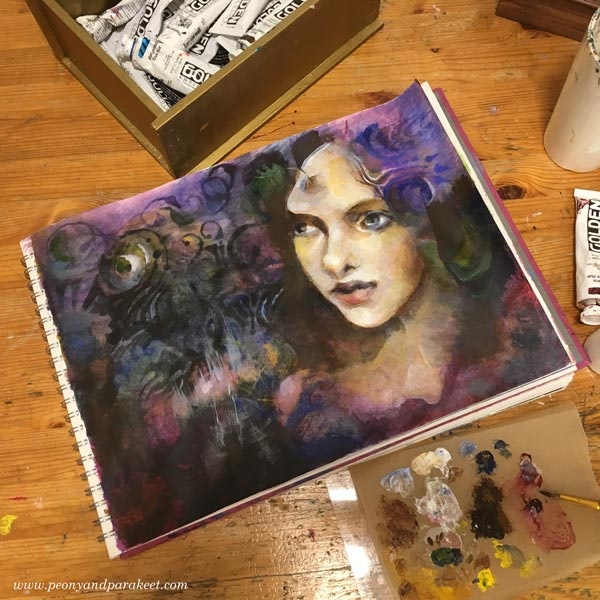
Woman’s World – Oil Pastels with Graphite Pencils
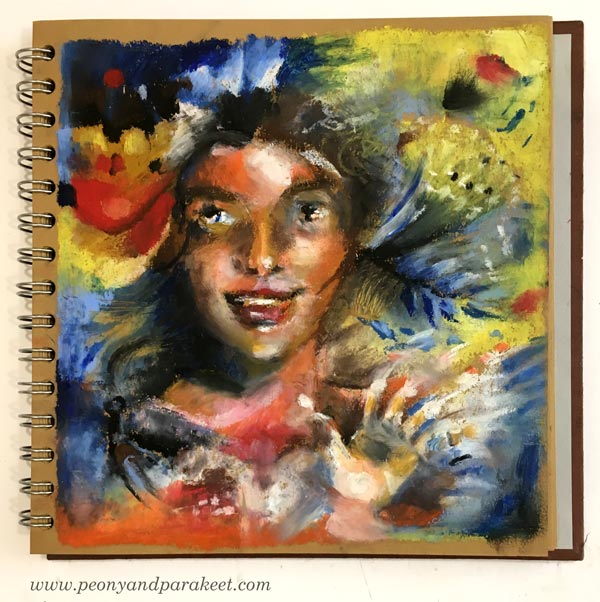
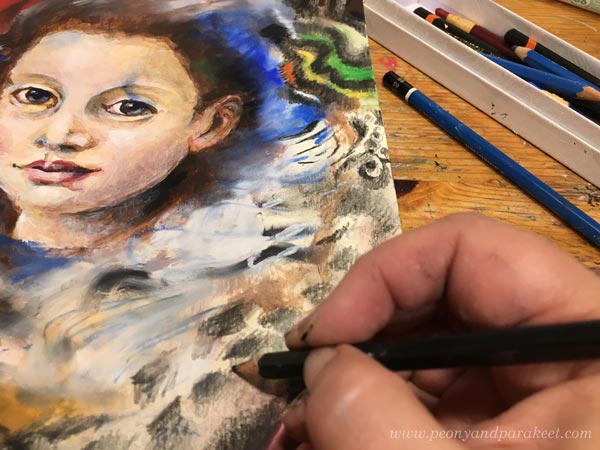
I wasn’t ready to give up oil pastels but headed for the new experiment the next day. This time my idea was to use a sponge for blending and combine oil pastels with graphite pencils. They have called me more and more these days. Maybe it’s because my friend Eeva Nikunen uses graphite a lot and I have one of her drawings on the wall. I am not so much into using graphite alone, but I love using it with watercolors, so why not try it with oil pastels as well!
Making of this sketchbook page both excited and scared me. It went deeper than the first page and expressed thoughts that I don’t usually reveal to the public. I support women becoming equal with men, and often think even more strongly: it’s now the time of the history when we women can take power. I believe that it will liberate men too. Many young women say that they are equal already, but my experiences haven’t been quite like that. And when thinking back to the past, even when narrowing the focus only to the field of art, women have been neglected for centuries. So it can be woman’s world now if you ask me.
When creating this piece, I realized how much I had been used salt and pepper only: making images that are aesthetically pleasing, but that could be spiced up with the message.
QUESTION: What thoughts do you have that you haven’t expressed in your art?
When you think about “what to put in the background” next time, maybe perfect the face a little less and spend more time with a message no matter “what others think.”
Girl Power – Oil Pastels with Acrylic Paints
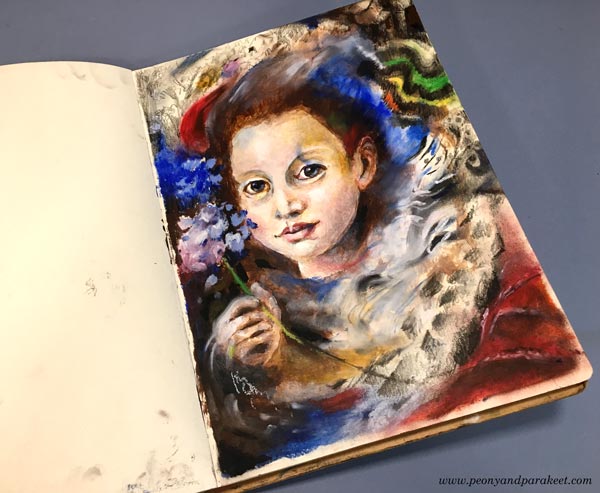
When I processed the theme – the power of women – further, I wanted to send encouragement to today’s young girls. Most girls that I have met are very smart but also polite and gentle. I wanted to express my appreciation for them.
This time, I wanted to try acrylic paints with oil pastels, and I also had a perfect reference image in mind. It was a miniature portrait of Europa Anguissola painted by her sister Lucia Anguissola. There were six sisters who all became painters in the Renessaince age, but only one of them, Sofonisba, continued her career. I saw the portrait of Europa a couple of years ago, and it’s sweet and amazingly detailed for a small painting.
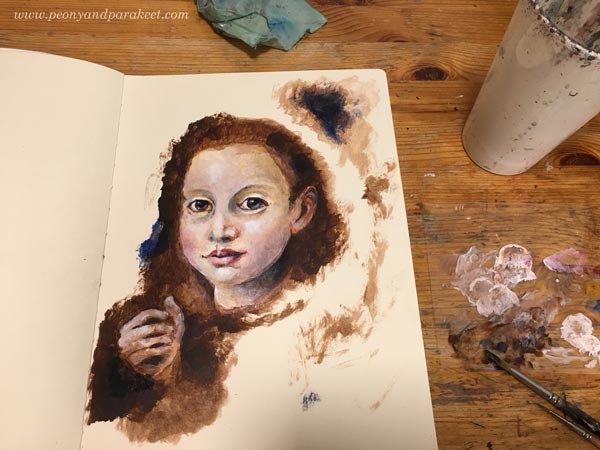
This project was created in my Dylusions Creative Journal. Acrylics were my choice for the face, and I started very traditionally, making an underpainting with umber and white.

Again, I didn’t want this piece to be just about the face, so I added a hand too. Here you can see how far I worked with acrylic paint only.
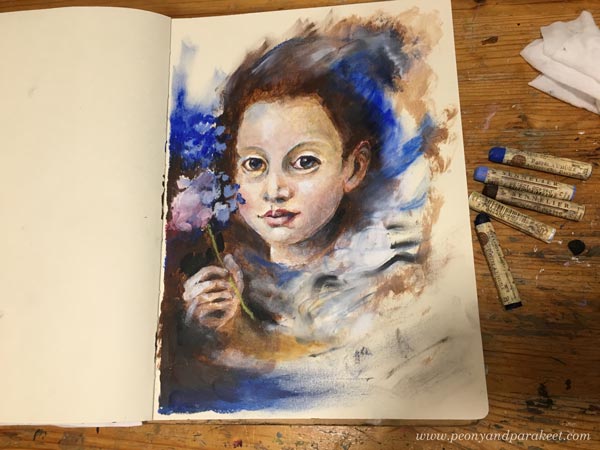
Now to the oil pastels. After experimenting blending with a palette knife and a sponge, I gave up and used my fingers only. But I had a new weapon: baby wipes! They are very handy for removing paint both from the fingers and from the table top. After getting used to having a baby wipe in hand, the messiness of the media doesn’t bother anymore!

I love blending out the color when working with oil pastels. It feels enjoyable and natural. I am excited to try these techniques with oil paints as well.
Here’s one technique that I discovered: First, lay several colors carelessly on paper. It’s like throwing the ingredients into the pot!
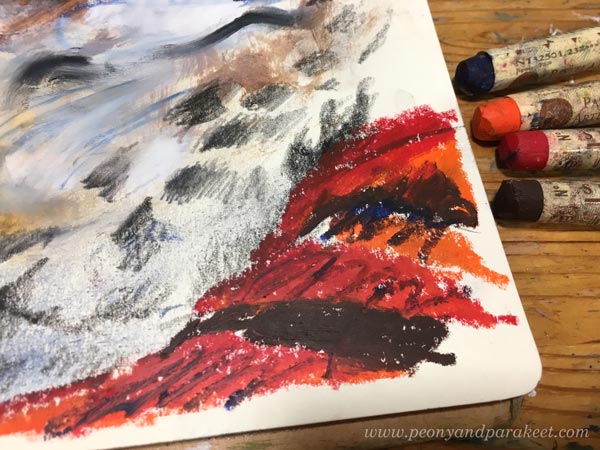
Second, mix the colors with a finger – beautiful – not the finger but the art!
I also wanted to add some pencil strokes too. Loud and bold oil pastels look very appealing when they meet the quiet power of graphite drawing.
So this one is for young girls: “I wish you all the luck and all the power. Europa Anguissola abandoned painting when she got married, but you don’t have to. You can be anything, and we support you!”
Who do you want to send greetings through your art?
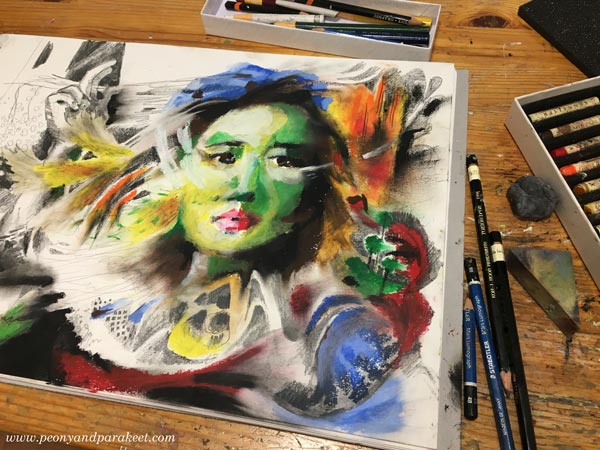
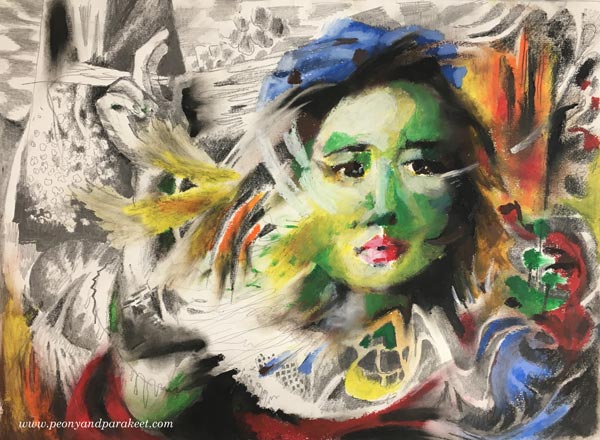
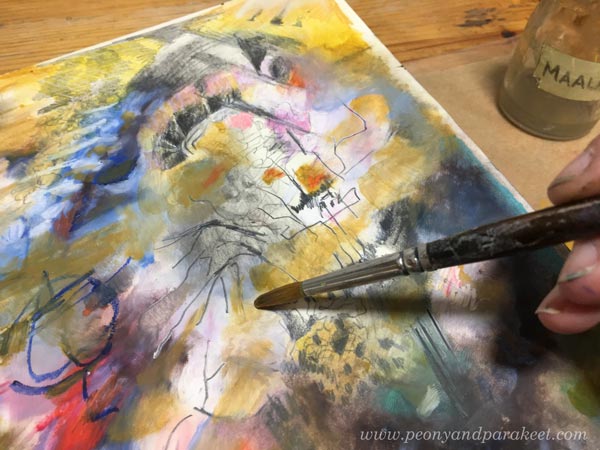
Free Like a Bird – Oil Pastels with Turpentine
The true test for the oil pastels: how do they work with abstract art and intuitive process. This time I used colored pencils and graphite as well.
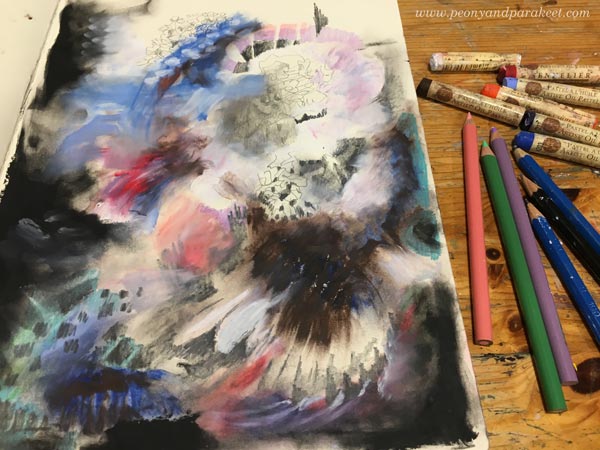
In the middle of making this abstract piece, a new problem came up. I wanted to spread a thin layer of paint, and tone down some areas. I got the idea of thinning the pastel with the medium that I use for oil painting. The painting liquid has poppy oil, Dammar varnish, and turpentine. After googling, it seemed that turpentine could thin oil pastels. So I rubbed some color on a palette, added few drops of the painting liquid and started painting.

The liquid worked very well. Of course, the odor of turpentine can be unbearable for many. Working in small amounts, and keeping the lid closed reduces it a bit, though.
Here’s my finished piece: “Free Like a Bird.” It’s what I hope for everyone, regardless of the gender.
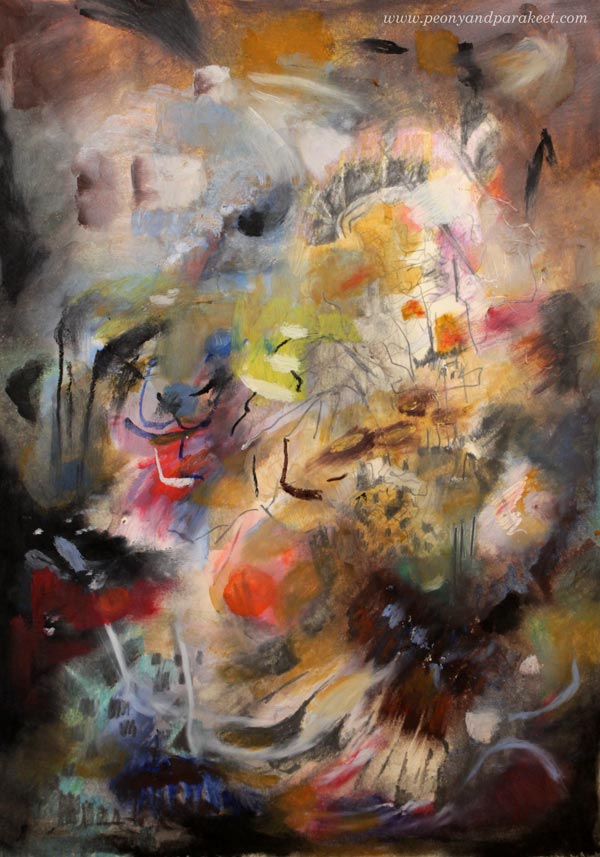
If you compare the images of this blog post, the abstract piece leaves more room for interpretations. Recently, I have felt more and more drawn into creating abstracts, and letting go of delivering a pre-chewed message. Cooking without a recipe can be much harder than you would first think. Making a vast selection of foods, learning to use pepper and salt, helps. But first and foremost, art is not just a matter of learning how to cook a meal. It’s also the matter of choosing what you want to serve to the world. And no matter how clumsy the execution, the subject can be the most significant spice.
The Exploring Artist Begins on Sept 10 – Sign Up Now!
The Exploring Artist is a 12-week group coaching program for artists, between Sept 10 – Nov 30, 2018. This coaching is for you who wants to get clear about your artistic passion and become more open about your art, for example, share your art in social media, blog about art, sell your originals and prints, teach classes, etc.
In The Exploring Artist, you will get coaching as a part of a small and tight-knit group. I will personally help you to put your passion into words and visual insights. We will work together to discover what you want to change in your art, where you want to move forward and how to do it. >> Sign up now!
Recent News and a Sketchbook Tour Full of Ideas!
My short blogging break is over and to celebrate that I have a full sketchbook to show you!
The Last Page of the Sketchbook
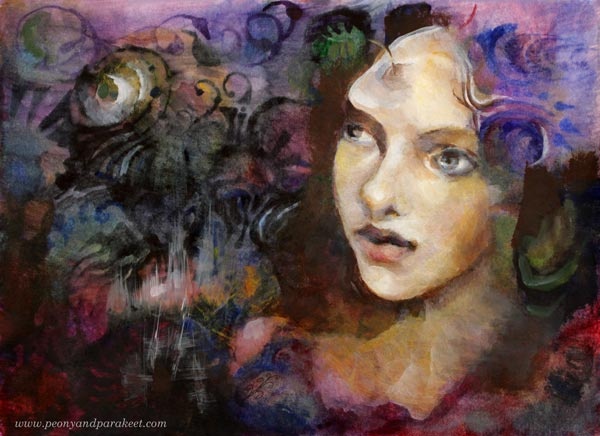
This morning, there was one page in my big A3-sized sketchbook that wasn’t finished. It was a very ugly one! Even if I covered it with a layer of dark colors, it didn’t please my eye at all.

But then I got an idea to highlight just some of the elements and paint a young woman on it. At the same time, I had the opportunity to play with the ideas that I am gathering for the new class.
I am often fighting against time when I am creating. When I make videos for the classes, I have only 1-3 hours for each project. My principle is that class videos are for guidance and inspiration and nobody wants to watch me paint for a day or two. Even if I speed up most parts, I usually include so much background information and art theory that I have to limit the time that I spend with painting or drawing. And often for blog posts, I have the same couple of hours even if it’s a bit easier if I don’t record the process or try to build a pedagogical package. So when painting this one, I would have liked to continue for a longer time, but I kept telling myself that the sketchbook is not where you make a detailed painting! Anyway, it’s detailed enough to get the idea.
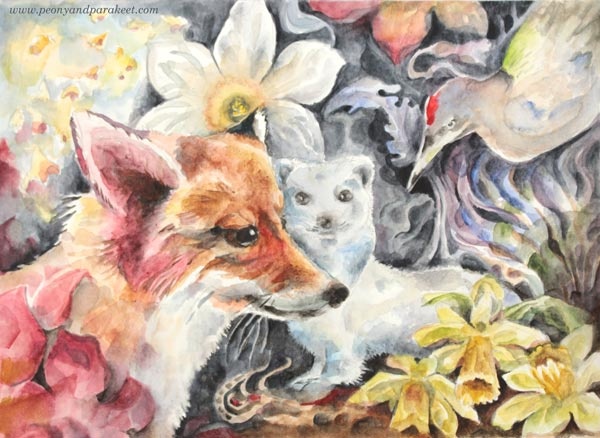
Foxes and Inspiration from Natural Science
During the summer, foxes seem to have appeared in my art. This one is just a quick graphite drawing, but it’s something that really speaks to me: making new creatures and celebrating the potential and diversity of nature.

Here’s another one with a fox:
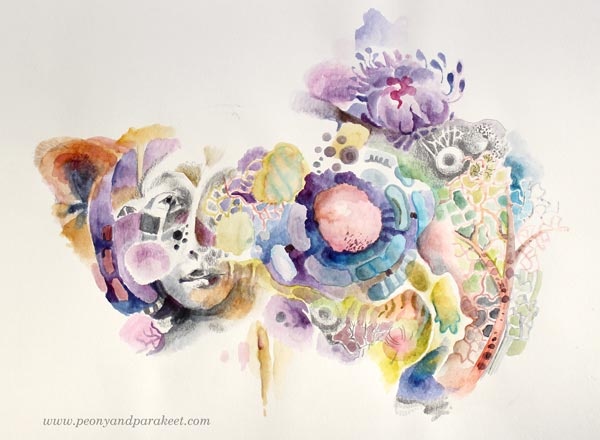
This sketchbook page is inspired by the microscopic world, and even if it’s a loose portrait, it also has a fox ear!
I also have a tiny painting in progress that has a fox, but I will show that later in the fall.
Ready for a Sketchbook Tour? – Here We Go!
I have made a quick flip-through video of the full sketchbook. The sketchbook is from Pink Pig. There’s also a glance of the summer’s big project on the video – our Japanese garden!
Plans for the Fall
Here’s what will happen here at Peony and Parakeet during the fall – come along!
1) July-September: Watercolor Journey, you can still sign up, and if you love watercolors this really is the class to take! (When you sign up you will get immediate access to the material provided so far.)
2) Sept 10 – Nov 30: The Exploring Artist – a soul-searching coaching program for any artist who wants to get clear where to head next! There are only 12 seats available so sign up fast!
3) Oct-Dec: a new class with a working title “Portrait Revolution” as a part of my art community Bloom and Fly.
I hope that you have reserved some time for creating and will join me! And as always, the best way to stay up to date is to subscribe to my weekly emails!
Summer Greetings and Summer Sale!
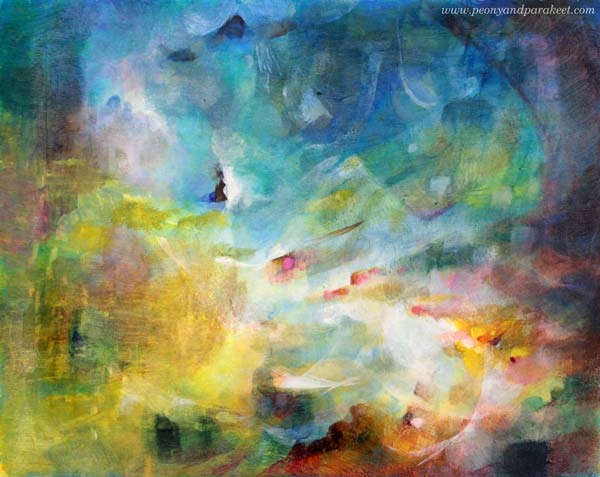
This painting is called “Light Chaser.” We Finnish are all light chasers to some extent. Winters in Finland are very dark. The darkness combined with cold impacts the mood. For tourists, freezing wind with all shades of black can be an exotic experience, but for us who have to endure it for months, it’s agony. In Helsinki area where I live, we sometimes get very little snow, so it’s even darker than further up.
So when the summer comes, it’s a welcomed relief, and we are pampered with light. Thereäs daylight almost around the clock. It depends a bit how far north you live, but here in the south, the sunrise was at 4 AM and the sunset at 11 PM. And in addition to that, the weather is warm, flowers are blooming, and everything is lovely.
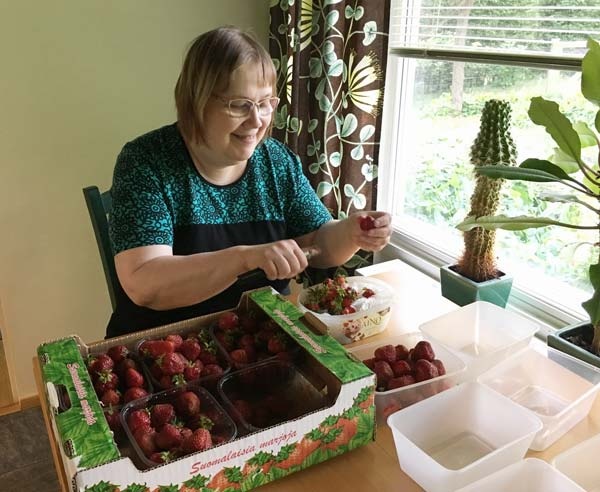
I also want to mention Finnish strawberries, very sweet and delicious. If you ever come to Finland, make sure that you will taste them!
Summer Break
I haven’t taken a break from weekly blogging for years. I love my work and want to put most of my energy into it. However, this year I have a summer class Watercolor Journey, and we also have a big garden renovation going on. And to be honest, it’s time to live a little too. So I have decided to take a short break from blogging, three weeks.
To make sure that you keep on creating, I have a summer sale!
From today to July 29th, all self-study classes are 20 % off. You will see the reduced price when you go to pay for the class. >> Shop here!
Thank you and see you in August!
Gelli Plate Meets Fine Art – Monoprinting Ideas for Art Lovers
Old paintings are full of nuances and flow that we often don’t see when focusing on the subject only. This week, I am a rebel and use a Gelli plate for bringing up those elements. The Gelli Plate, like any mono-printing tool, is a bit clumsy for adding details. But also full of potential because you can easily produce repeated motifs that are not exactly similar. It enables you to add diversity and uplifting rhythm to your art without extra efforts.
Gelli Plate Meets Fine Art – Watch the Video!
This video is a replay of a live broadcast where I am sharing my secrets about the process.
I also include the images and the summary here in this blog post so that you can more easily refer back to these instructions.
Project 1 – Expressive Portrait on White Background
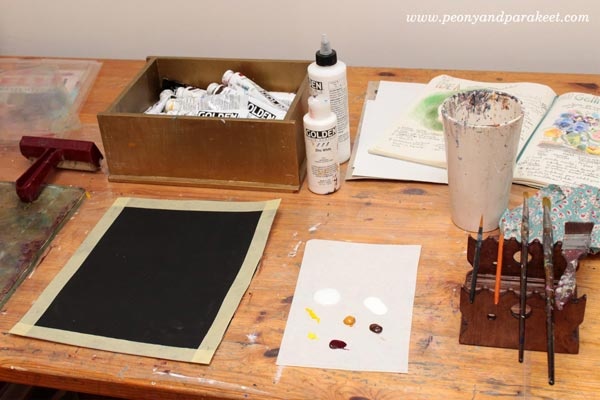
Supplies: Gelli Plates (mine are 8 x 10 and 3 x 5 inches), watercolor paper, brayer, brushes, any blunt stick, acrylic paints, glazing liquid (or gel medium).
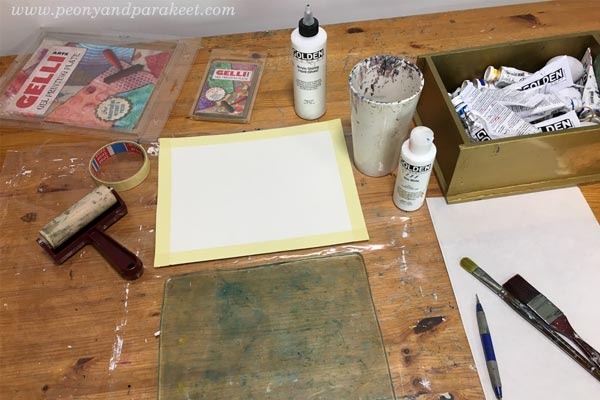
This project started by intuitively adding layers with a Gelli plate on a white watercolor paper.

My only intention was to make a mess that has enough diversity so that I could see something appearing.
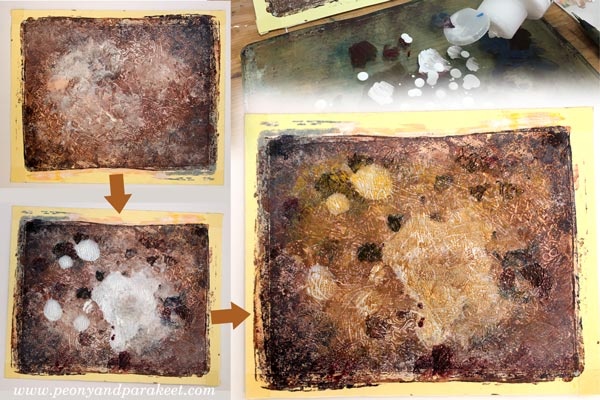
The big spot looked like woman’s face to me, so I made a stencil by quickly sketching one on paper.

I added more elements and shadows, so that worked one area at the time.

When the big elements were in their places, I changed to a smaller plate and added more details.
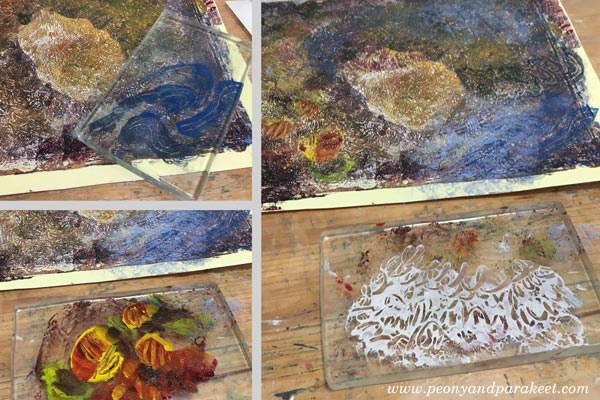
Here’s the monoprint before I changed to painting with brushes.

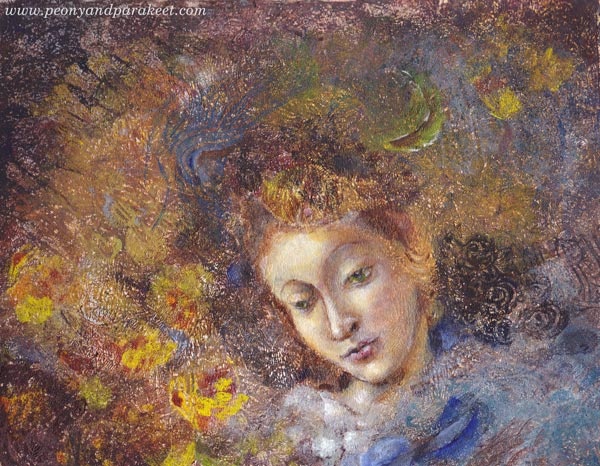
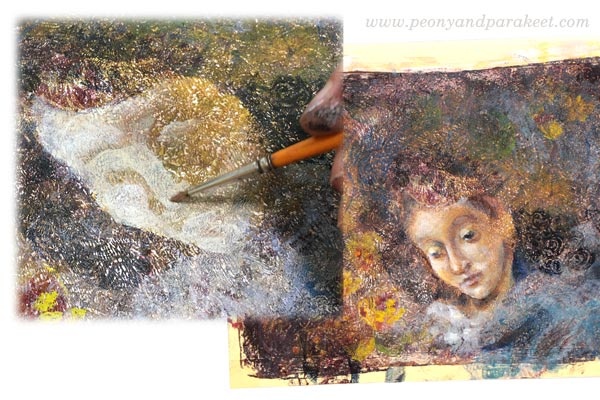
Using Botticelli’s Madonna of the Book as a loose reference, I painted the face and some details with fine brushes and thin layers.
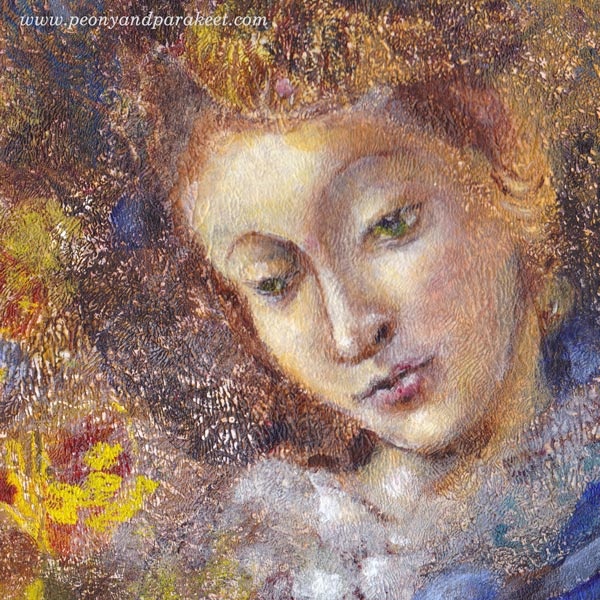
Here’s the close-up of the face. I realized that the eyes look to a bit different direction, but I didn’t want to change that because this piece is called Nostalgia. I think it’s a mixed feeling because then we are admiring the past, but at the same time, being sad that there’s no way to travel back in time.
Here’s the full painting again.
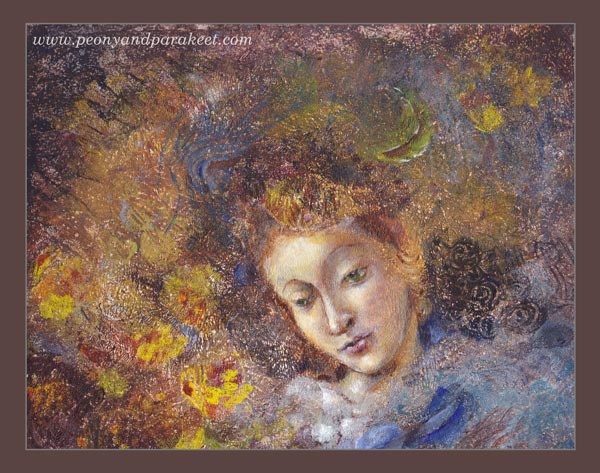
Do you like this one? The original piece is for sale in my shop!
Project 2 – Floral Still-Life on Black Background
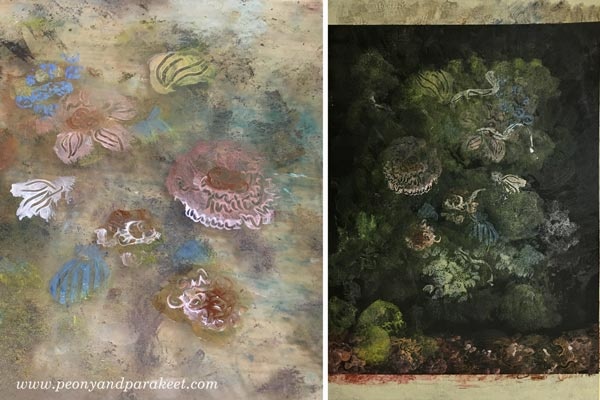
This piece started by adding a layer of black gesso on a watercolor paper. I had a clear goal from the very beginning – to create a floral still-life honoring Dutch Golden Age paintings from the 17th century. I also wanted to use Gelli plates only and see if it’s possible to create a detailed piece by mono-printing only.
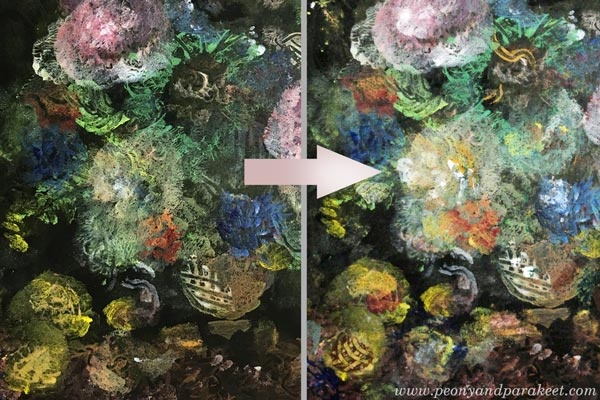
The first layers were very subtle and translucent. The idea is to build depth by slowly increasing the brightness of the mono printed layers.

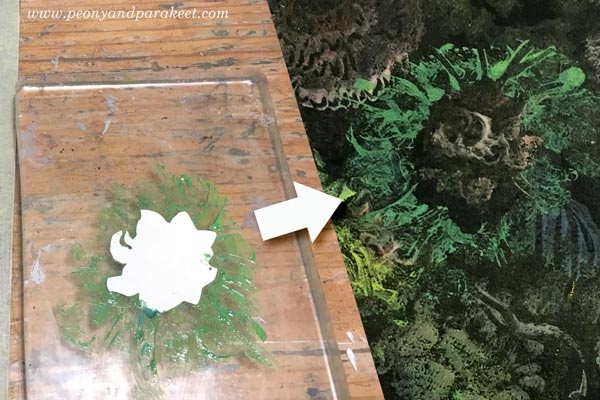
Like in the previous project, many layers only had few elements. I like how detailed they look when adding lines with the stick on the plate.
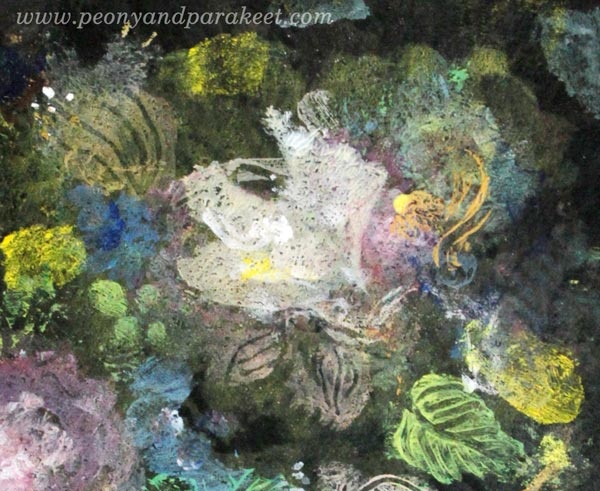
I also made a paper stencil for this project. At this point, I changed to a smaller plate.
I used paler and darker tones of pink to make a flower. It’s also handy to stamp the same flower several times.
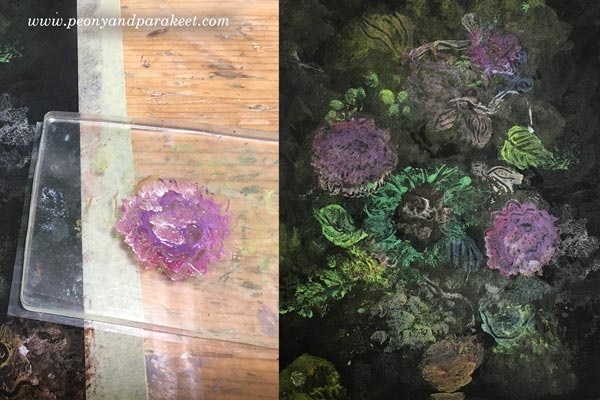
Dots and splashes of paint all add up. I also like to use cotton cloth for making a sharp edge to a free-form shape.
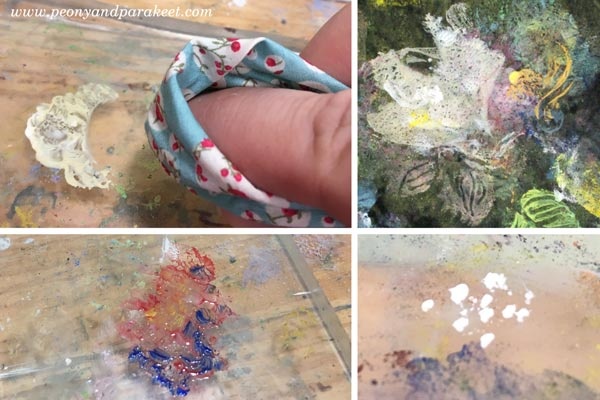
When using a little too much paint, it forms “skins” that look like intricate leaves. It was also fun to add a surface pattern to a vase.
I used dark browns and black to tone down some elements, and white to highlight others.
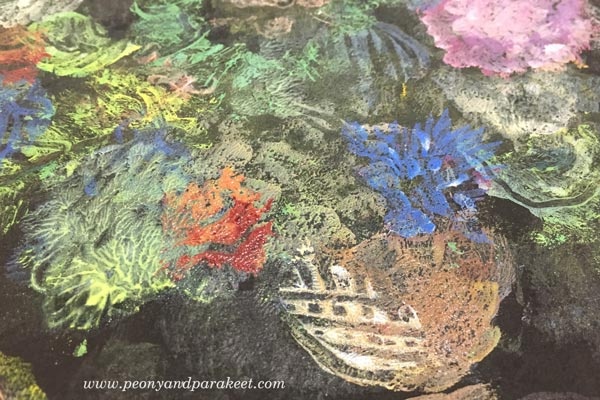
Here’s one of my favorite details:
Another one, showing how the vase glows.
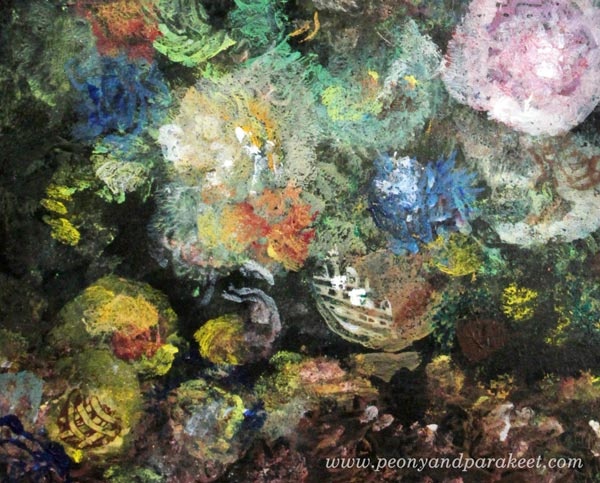
Here’s the finished piece in full size:

What next?
Continue to create with Paivi: Subscribe to my weekly emails
Learn the basics of mono-printing and create your visual wonderland: Buy Collageland
Stop the stiffness – let Paivi help you to move forward: Join Bloom and Fly
Subscribe to Paivi’s weekly emails – Get a free mini-course Loosen Up!