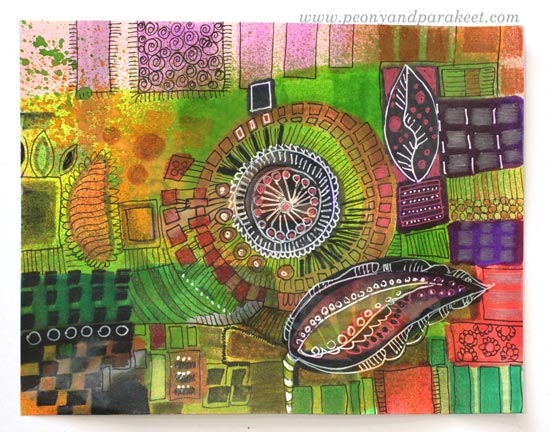
Hand-Drawn Collage Samplers
I have been browsing my art archives lately, and it has been surprisingly inspiring. I have lots of art journals and a big box of paintings and drawings from my teenage years. Even if I have experimented with many techniques and themes, it all looks very similar now. Everything fits together and gets my approval. Painting “Icebreaker” gave me a new kind of confidence, and with that confidence, I am now blogging about a playful idea that I got from cross-stitching – hand-drawn collage samplers!
These samplers are composed of hand-drawn paper pieces so that they look like cross-stitch samplers. They have ribbons, many identical ornaments, tiny floating elements, and some symmetry. There’s also stiffness and order so that it looks like the elements are on a grid.
Cross-stitching is one of my hobbies, and even if I try not to think about art when stitching, I just couldn’t resist this idea! Here’s how I applied cross-stitching to collage art.
Print Tiny Scans of Hand-Drawn Collage Pieces!
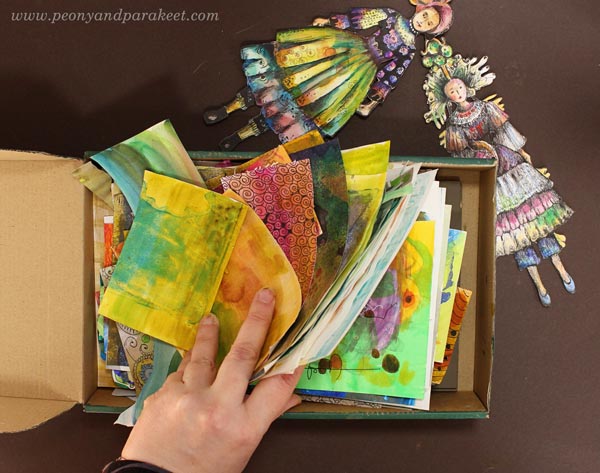
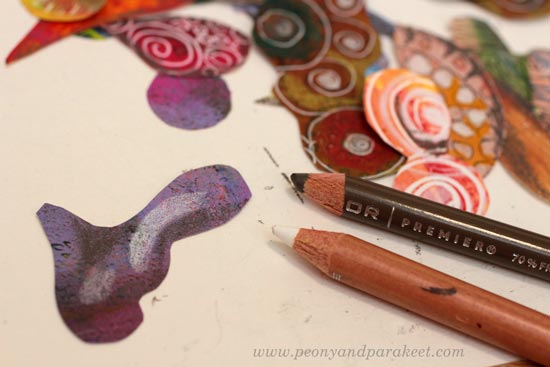
It’s essential to have tiny decorations to make the collage look ornamental. I solved the problem by making collage sheets of scanned hand-drawn pieces. These collage elements were drawn for the classes Animal Inkdom and Magical Inkdom, and there are some jeweled flowers from the free mini-course for subscribers too.
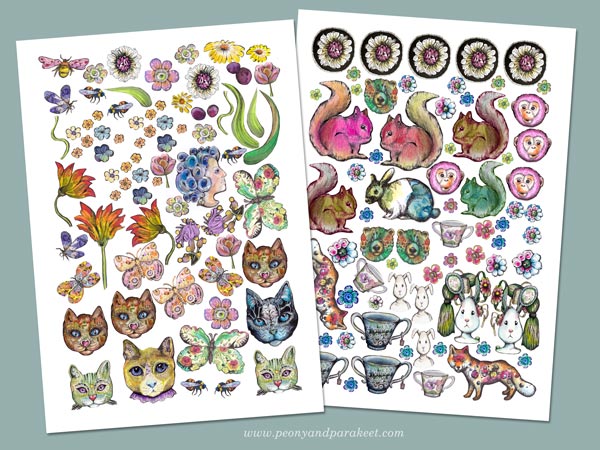
The original size of these pieces is much bigger than in the printed sheets.
Use All Kinds of Hand-Decorated Papers!
Samplers have a variety of designs, so every little doodle is a potential sampler piece. I have a box of hand-decorated and painted papers (mostly leftovers from Collageland) and two boxes of hand-drawn collage elements. I have also cut some old art created in the 1980s. All these are a good addition to small printed pieces.
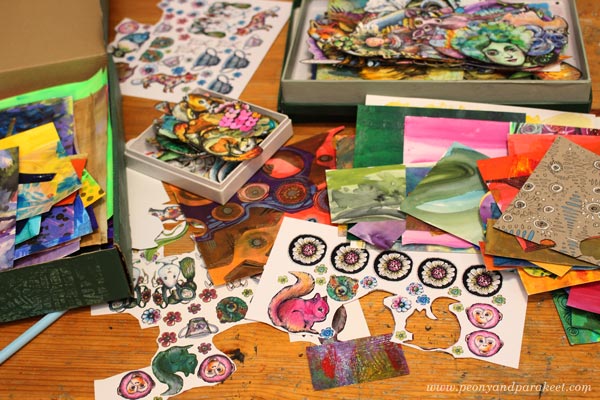
Of course, you can also use store-bought die-cuts, pictures from magazines, etc. but if all the elements are handmade, they will all fit together much better because they are all YOU!
Perfect Project for Hand-Painted Background Pages
If you are an art journaler, I bet your journal has a lot of pages that are more like backgrounds rather than finished pages. You can use them for collage samplers!
The background of this sampler was busy and bright, but I just added brown over some of the areas and let the colors speak, or should I say shout!
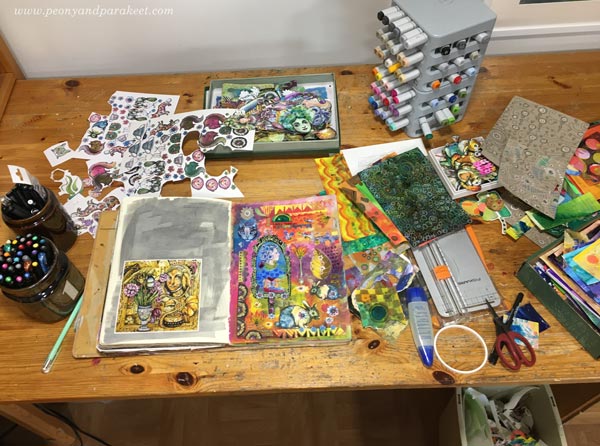
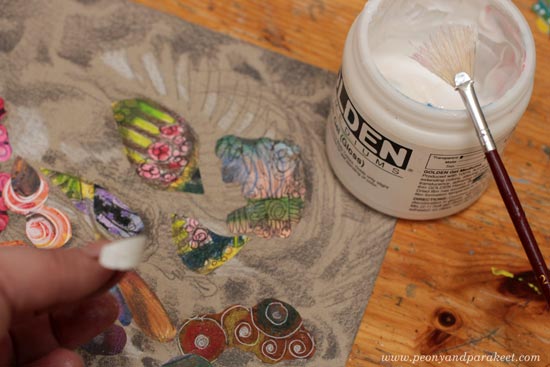
I attached the pieces with paper glue and some larger elements with double-sided tape. I usually use gel medium, but it’s messier, and it’s too difficult to cut all those tiny pieces with sticky fingers.
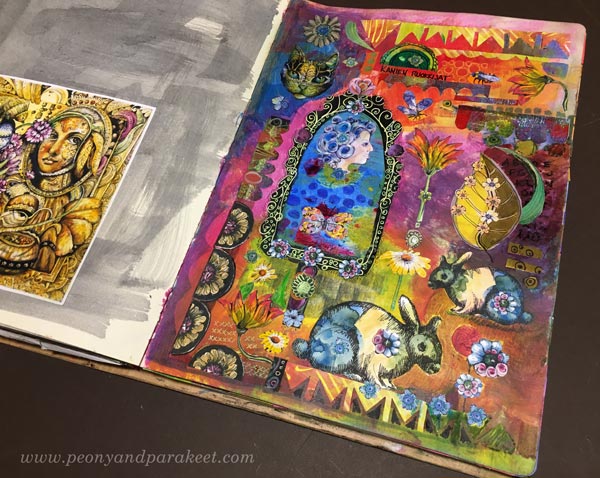
Self-Expression with Hand-drawn Collage Samplers
Sticking paper pieces can be just a relaxing hobby, like cross-stitching. But samplers can also tell stories!
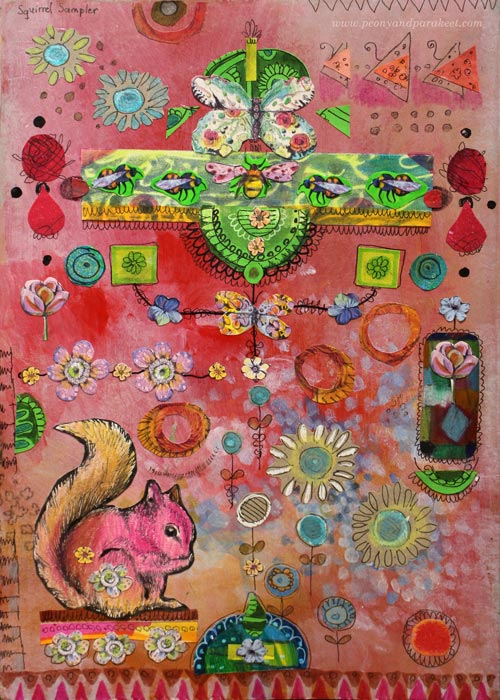
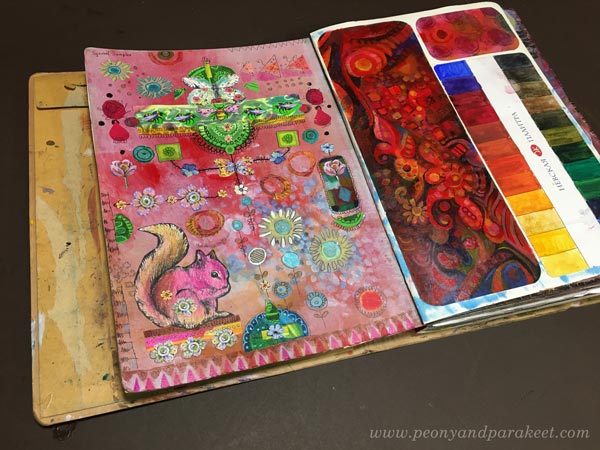
My first page is called Squirrel Sampler, and it has all kinds of little treasures that Paivi the Squirrel has collected.
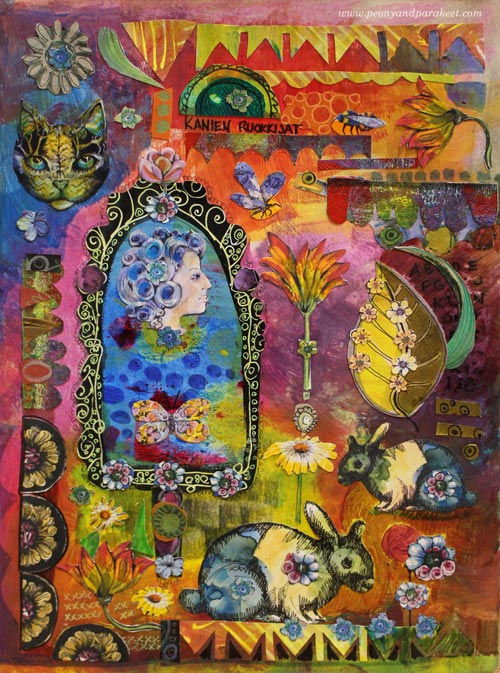
The second page is called Rabbit Feeders. It refers to women’s status and importance in Virginia Woolf’s novel The Voyage Out. An isolated woman looks at herself from the mirror and questions her importance for the world. I read Voyage Out as a teenager, and this allegory, even if it’s just a few rows in the book, touched me deeply.
It often happens that creative play evokes feelings and stories that are too big to express in any other way. I hope you’ll enjoy making these samplers!
Start drawing your sampler pieces – Subscribe to my weekly emails and get a free mini-course!
Dolls in a Gallery – Paper Collage Step by Step!
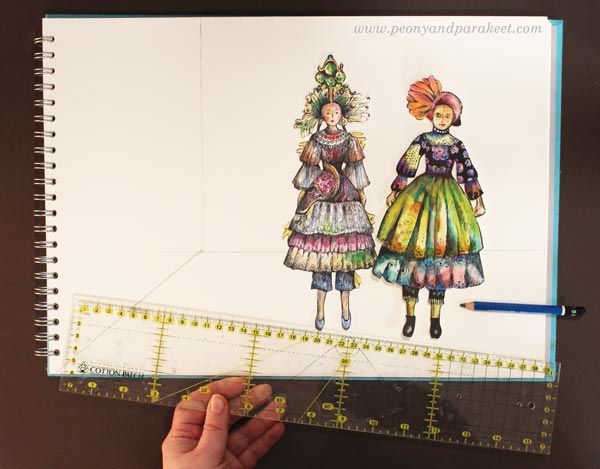
Last week, I published a video about drawing a paper doll. Now when you have the dolls, what’s next? Let’s take them to an art gallery, and show them all the other art that you have created! Follow me step by step to create a fun paper collage!
1) Draw Lines to Define the Space
Take a ruler and divide the paper so that it has two walls and the floor.
Start with the horizontal line and make sure that there’s enough room for the dolls to wander around the space. Then draw a vertical line approximately one third from the edge, and finally a diagonal that completes the side wall.
2) Paint The Floor and The Walls
I used watercolors to paint the background, but you can use any medium. Because you will add art on the walls and carpets on the floor, the interior can look quite plain at this point. Empty galleries usually are pretty sad-looking but that’s going to change in the next step!
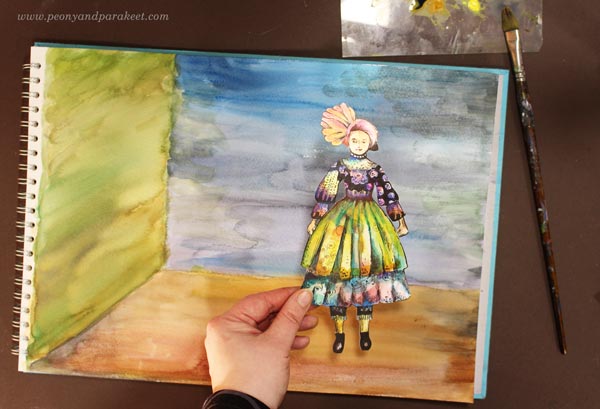
To make the gallery look more 3-dimensional, I used cooler colors on the back wall.
3) Decorate by Making a Paper Collage
Now the fun can begin. Turn your painting into a paper collage! Start by picking collage pieces to decorate the gallery. Hang art on the walls and make carpets on the floor. Go to your box of hand-decorated papers and use those! If you don’t have any, you can print some or cut images from magazines. But I think this project is the best if you can hang your art on the walls, and be the star of the gallery!
I also have a class called Collageland where I show how to make and use hand-decorated papers.
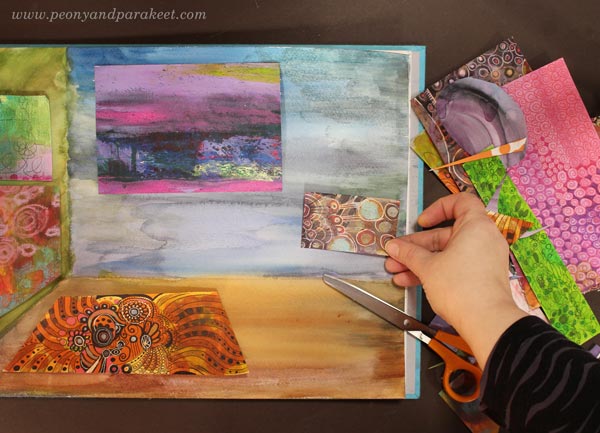
The back wall is the easiest to decorate because the papers can be rectangular there. But when cutting the pieces for the side wall, and the floor, make them inclined so that they follow the perspective.
To Glue or not to Glue?
I glued all the decorations with gel medium. If you make a pile of paintings and carpets, maybe some other furniture too, you may not want to attach them permanently so that you can change them. I didn’t glue my dolls in Step 5, but you can glue everything to complete the image.
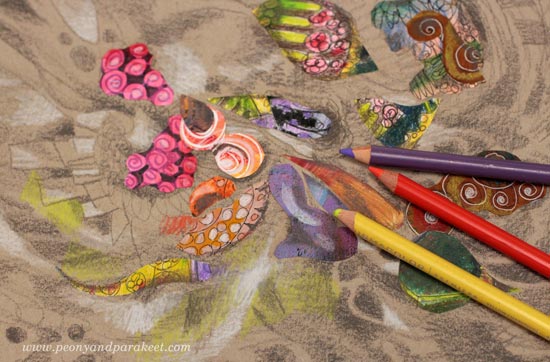
4) Add Details with Pens
You can add fringes on the carpets, shadows near the paintings and panels, and adjust colors.
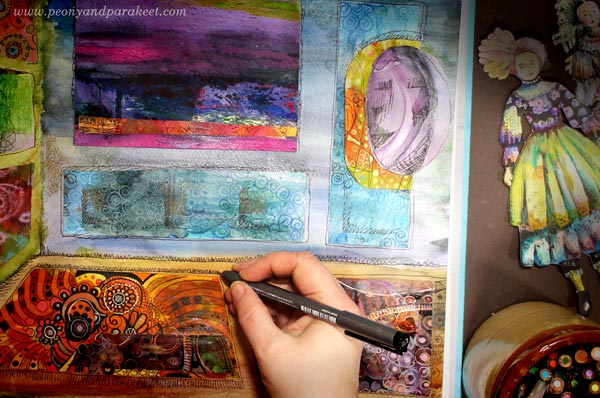
I use a black thin-tipped drawing pen (Copic Multiliner) and colored pencils in this step.

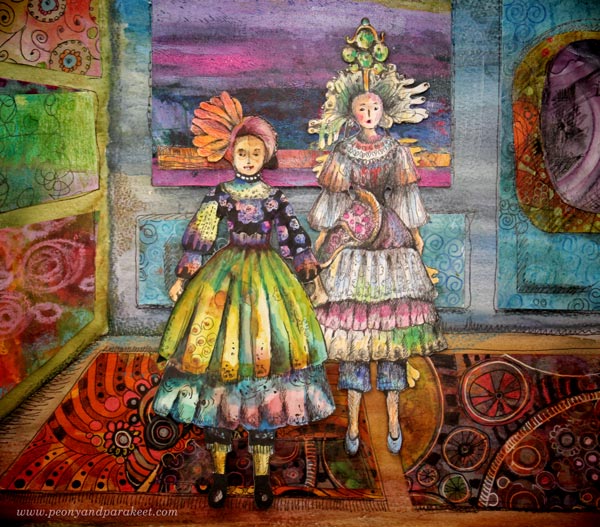
Here’s how my gallery looks when it’s finished. Because I love to take a step away from reality, I made a magic mirror on the wall. I made this paper collage on one of my A3-sized sketchbooks that has watercolor paper.
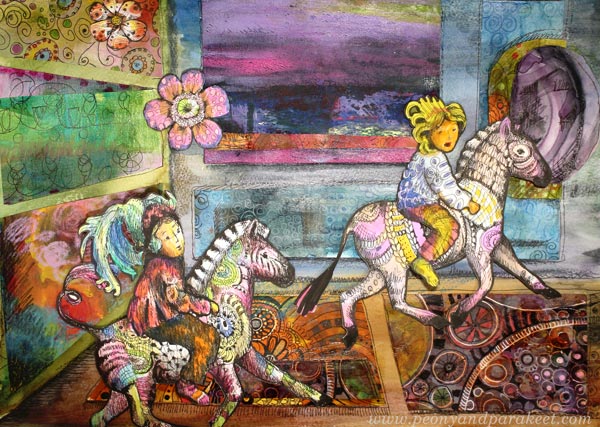
5) Let the Dolls in and Play!
Now invite the dolls to the opening! My dolls got so excited that the magic mirror became activated. It opened a door for the whole wild world!
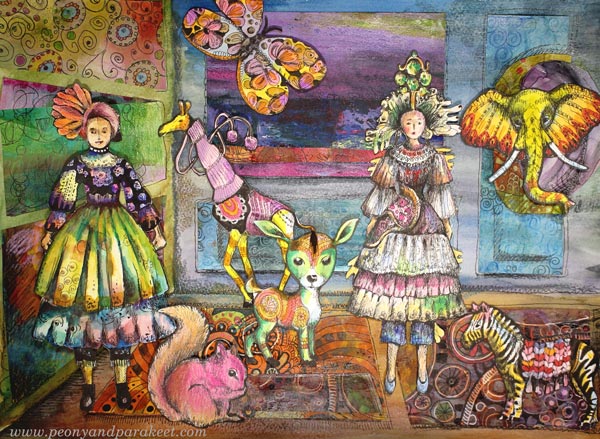
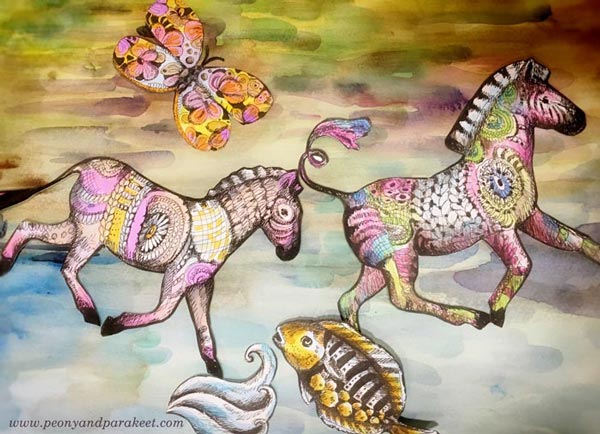
And after the opening was over, a couple of the guests decided to take an adventure through the mirror with zebras!
Drawing and Playing in Animal Inkdom
Take the paper doll with you, and come to draw and decorate animals with us in Animal Inkdom! You will get the published lessons immediately after the registration, and you can start drawing right away. Sign up for Animal Inkdom here!
Colored Pencil Collages – Playing with Color
Fall in love with colored pencils and make the most of your paper stash! I also recommend these classes:
1) Collageland – save time and effort by creating textile-inspiration with pens and paper
2) Inspirational Drawing – for you who wants to say: “I can draw!”
The Fun Process of Colored Pencil Collages
Here’s is an art journal page that started as a sad one. First, it only had some carelessly drawn lines. Months went by before it got some paint to accompany the doodles. After another long wait, it got some depth with colored pencils. It still looked unhappy, so I glued a piece of hand-decorated paper to cheer it up. Today, I found it again and was surprised how finished it looked.

This is often the way I make art journal pages: little by little, random lines, using up extra paint on the palette, saving a piece of paper from my stash. It’s a very unintentional process but after those finishing touches are added, it’s all good.
My Hand-Decorated Paper Stash
I have been doing this for a long time: making my collage papers and also saving the tiniest pieces. No matter what my main art projects are, there seems to always have time some scrap paper fun even if it’s sometimes just picking a small piece and gluing it on an art journal without analyzing what and why.

Colored pencils are one of my favorite supplies and I also have papers decorated with them. When I go through my paper stash, I often add some colored pencils on painted ones just to make them more valuable in my eyes. Then I also have some true treasures – papers that only have colored pencils on them. They take more time to make, and to me, they are like silk and others are more like cotton, the basic stuff.
Using Imagination with Colored Pencil Collages
When I am playing, odd is good. Paper pieces sometimes have a mind of their own, and strange results may appear! Here’s an art journal page called “Three Sisters”. It started with paper scraps but really came to life when I added colors to the background with colored pencils. See how I used many colors for the background so that it completed the composition and made the piece more cheerful.
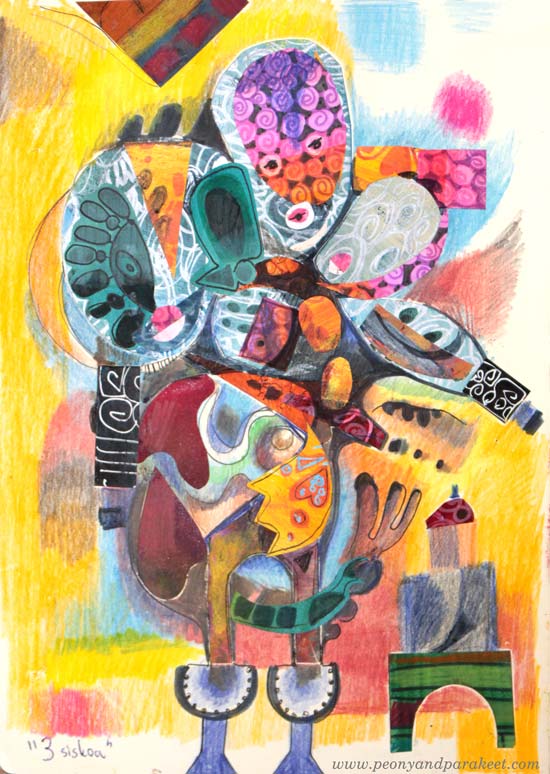
This collage started with a quite traditional idea. I wanted to make a doll. But when the doll got more heads, I followed the imagination instead of trying to stick with the original thought.
Start with the Expressive Background!
Create Step by Step!
Try this process if you often ponder these questions:
a) what to put in the background?
b) how to express with color?
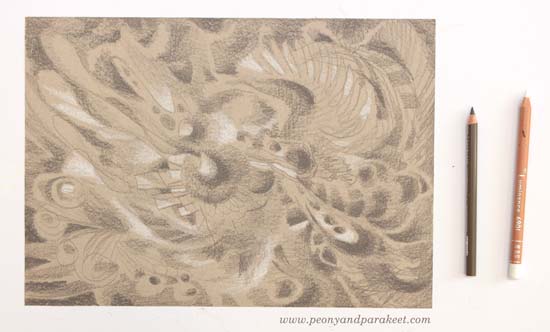
In this process, you will start with the background so that it creates a structure for the rest of the work. A grey paper enables you to use color for expression rather than trying to tone down a screaming scene when using only “beautiful” tones.
Supplies: Grey Paper, Colored Pencils, Paper Scraps
You will also need gel medium or paper glue for attaching the collage pieces, and a black drawing pen for finishing touches.

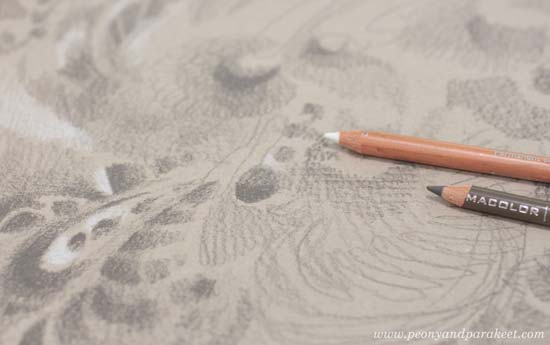
Step 1 – Coloring Freely
With white and dark grey (or black) colored pencils doodle random shapes. Fill some shapes by drawing, add shading, and have fun by playing with color values. Change the orientation once in a while so that your imagination keeps on going.
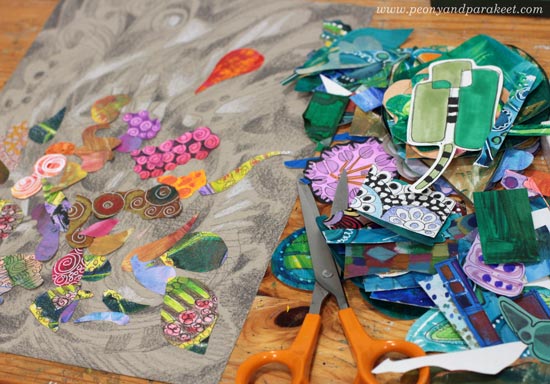
Step 2 – Cut Tiny Collage Pieces
The pieces for this step can be really small ones, and you can cut them even smaller. Here’s one piece from my stash and I cut a smaller shape out of it!

Don’t worry about the composition yet, just cut so many small pieces that you have a collection to choose from.
Step 3 – Add Some Light and Shadows to Collage Pieces
With the white and dark grey (or black) pencils, add some shadowing around the edges and some highlights with white. All the pieces don’t necessarily need this but it makes solid-colored pieces look much more interesting.
Step 4 – Glue the Collage Pieces
Use the background as a support structure and an inspiration source for your collage! If you have problems with composition, go through my free mini-course Loosen Up and follow the tips there!
Step 5 – Add More Color with Colored Pencils
This step integrates your collage pieces with the background.
Step 6 – Draw Final Details with a Drawing Pen
Add some loose lines and dark details with a black drawing pen.
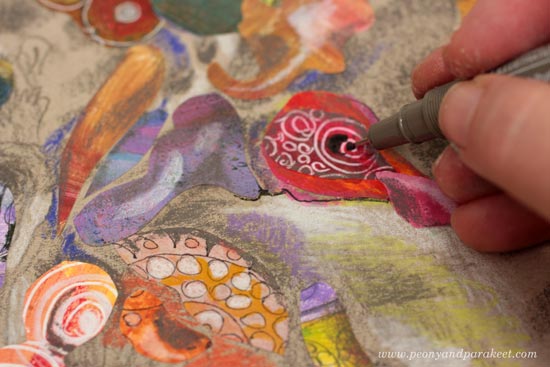
Here’s my finished piece, a fantasy creature!

Some Papers Last Longer than Others
I intended to cut some motifs out of this paper but maybe next time. Too precious for now! It’s inspired by Collageland.
Create Handmade Collage Art to Build Your Visual Dreamland – Buy Collageland!
The Inspiring World of Details – Ideas from Uffizi Gallery
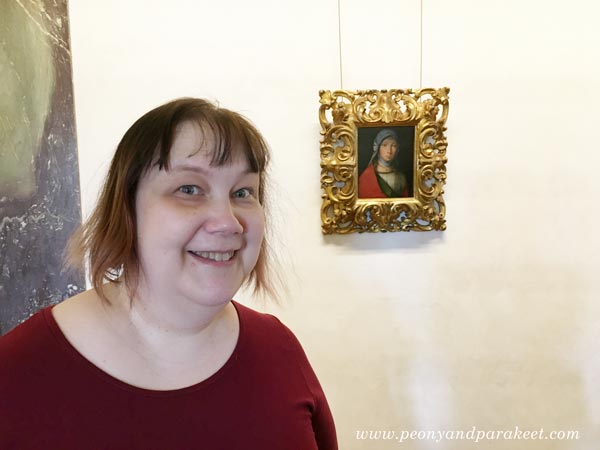
If you have followed my blog for some time, you know that this photo is very meaningful to me. It was a hot day in June when I visited Uffizi Gallery in Florence, Italy. The huge old building was filled with world-class art. But I wasn’t just going to look at the famous masterpieces like Botticelli’s Primavera or Birth of Venus. I was searching a small painting of Boccaccio Boccaccino.
Meeting Boccaccio Boccaccino at Uffizi
Boccaccino’s painting made my heart bounce when I saw it on Google at the beginning of this year. I made my version of it during the spring.
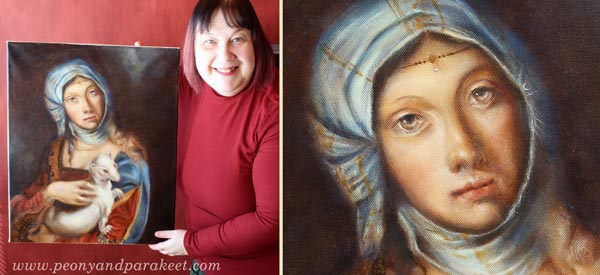
After finishing the painting, Boccaccino’s Gypsy Girl continued to fascinate me so that in June, I traveled to Italy with my husband to see the original painting. I tried to prepare myself for the situation that I wouldn’t see it. Sometimes museums lend paintings for other exhibitions or don’t have everything on display. But my journey wasn’t wasted: I got the chance to admire the painting, so tiny that I couldn’t believe my eyes. Namely, the whole spring I had tried to capture the gentle features for much bigger size, and it felt challenging!
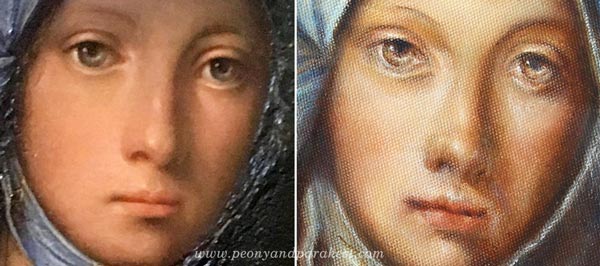
Now when I compare the details, I see many differences. My gypsy girl is not the same person than the original, but it’s ok. I feel that it resembles me and especially how I would like to be seen: gentle but observing, always protecting what’s precious.
Wouldn’t it be if I could tell my story to Boccaccio Boccaccino? I would tell him how I saw his painting on the Internet, in a big catalog that anyone can browse. I would tell him how I examined the images of the painting and painted a bigger version of it. He would probably wonder how I could afford for all the paints for the big version, and who had ordered such a large painting of a modest gypsy girl. “It’s just for me,” I would say, “this painting is so special that I don’t want to sell it.” “You must be a wealthy woman,” he would probably say and then continue: “Where did you say you come from?”. I would tell him about Finland, an area in the far north and show it on a map. Then I would tell him about airplanes. He wouldn’t probably believe anything!
But at the end, all I would like to say to him is this: “People from all over the world come to see your painting. They buy the ticket in advance. They queue. They sweat. They book the hotel based on its location. They take pictures of it. They examine them when they are back home.”
Isn’t that something any artist would like to hear?
More Uffizi – Some Ideas for Your Art Journals
1) Fresco Pages
Like any museum in Florence, Uffizi Gallery’s ceilings had a lot of frescos. The long hallways were full of illustrations.
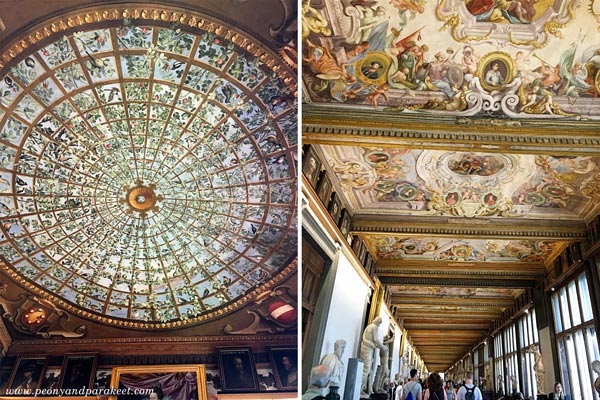
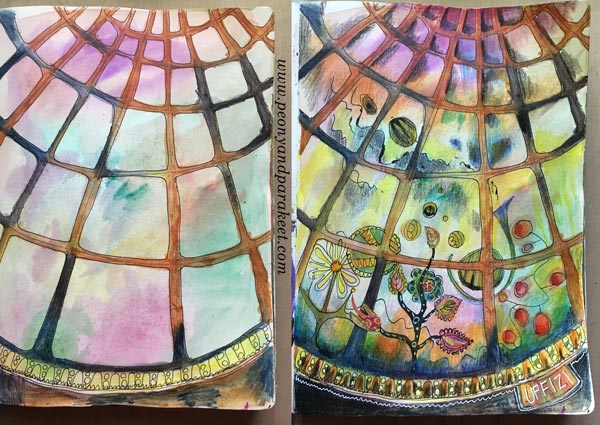
The round ceiling is so brilliant that I have to show you a close-up photo:
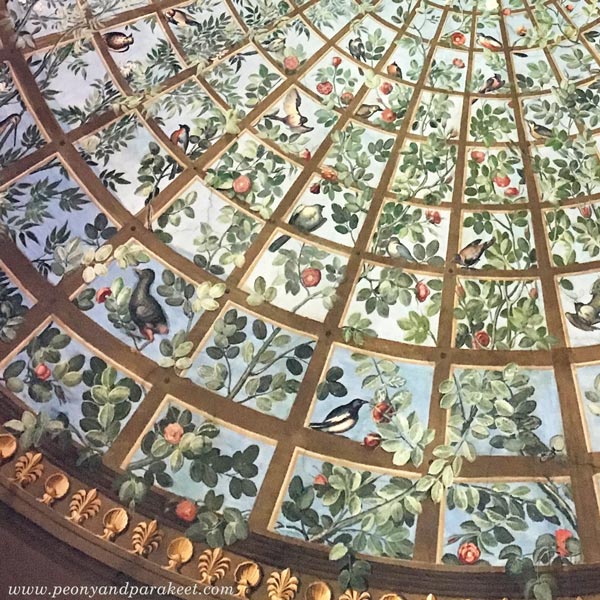
I love how the branches go to the back and to the front of the bars, and how the color changes in the background. It’s such a great idea that I also quickly recorded it onto my art journal!
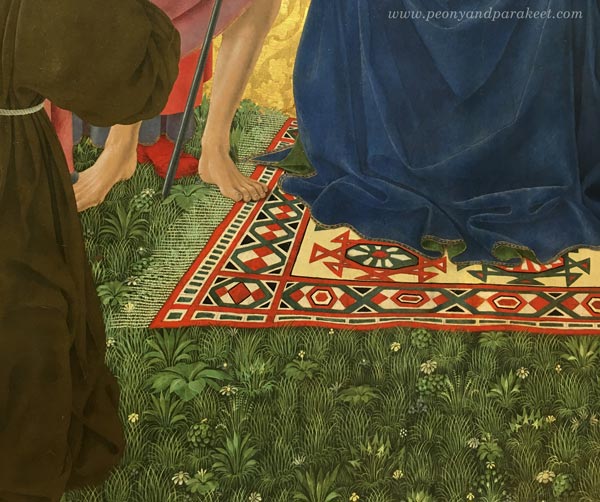
2) Delicate Patterns Filling Solid Areas
Another idea is to see the possibility of a solid or dull area. See how the grass can be more than just green color or green strokes. I saw quite a many paintings that had this:
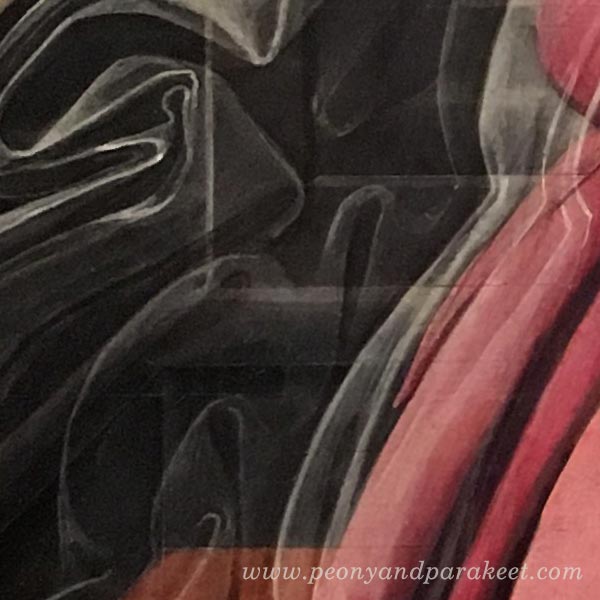
3) Translucent Elements
I am fascinated by the number of veils in Renaissance art, and especially how they are painted.
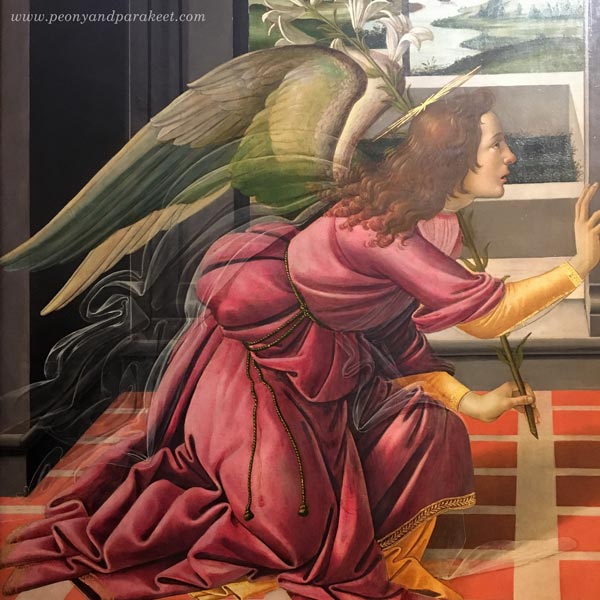
They are like abstract art if you look at them closer! See how the line changes in strength and how a little bright spot makes the fabric look shiny!
I also loved how the veil was painting in this painting:
Another idea: add stripes on those translucent elements!
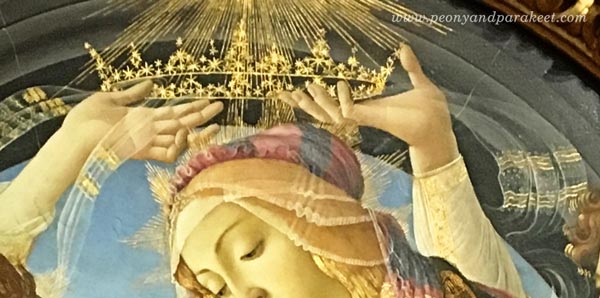
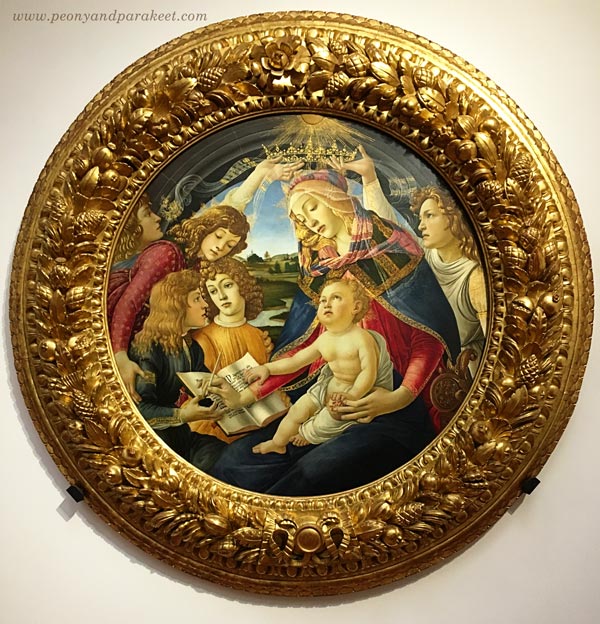
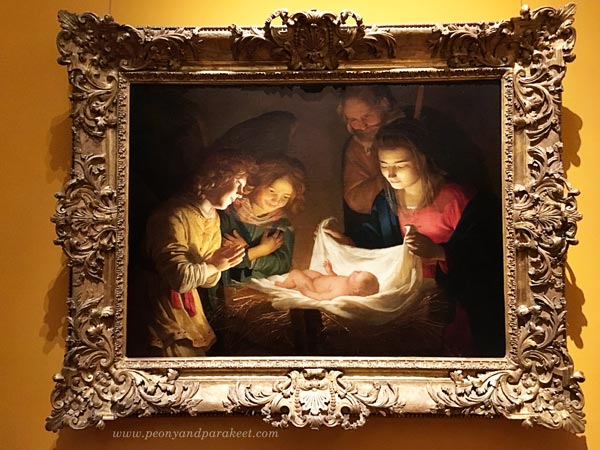
4) Light on the Center
I end this blog post with the simple idea that came from a stunning painting. Create a very bright element in the center and then add dark shadows around the painting!
As you can guess, it was an inspiring visit, and I could easily write and show more. Hopefully these inspired you, and hopefully, I will see you in the classes this fall.
Coming Up!
Online classes
Aug/Sept Collageland – a self-study class (textile-inspired collages)
Aug/Sept Inspirational Drawing 2.0 – available as self-study (drawing from imagination)
Oct/Nov Flower-themed online workshop (not your regular flower art class!)
Local workshops in Finland
Sept 9-10 Draw Freely – Piirrä vapaasti 1-2 (Suomeksi! – in Finnish)
Other news
I am planning to offer a free live webinar in September if I can just fit that into my schedule. Many have asked about my coaching program The Exploring Artist. I will rerun that at the beginning of next year.
Stay tuned and if you haven’t subscribed my weekly emails yet, subscribe here!