Start Art Journaling!
 With this post, I want to introduce more people to art journaling. I will create this art journal page step by step using a simple concept and few basic supplies. You only need watercolors, colored pencils, and a thin black marker pen.
I have created this page on a Moleskine notebook (size: 5 x 8 1/4 inches, 13 x 21 cm). Your journal can be larger or smaller. This page is created on the actual page of a journal. But you can also use a separate paper and attach it later, so you do not even need a journal to get started!
Journals
You can make an art journal from almost any notebook or old book. You can also bind one yourself. If you paint on the pages, thick pages are better than thin ones. For watercolors, absorbent paper is better than waxy one. But if you use water sparingly, even pages with a waxy surface can handle some watercolor.

I am currently working on three various sized journals. In addition to the Moleskine notebook, I have a black Smash book and a Dylusions journal. The paper in Moleskine notebooks is less absorbent than in the other two, but it still works with watercolors.
General Inspiration
An art journal can consist of any visual material. You can create a collage of cut-out images or printed photos. Or you can paint or draw, or do it all! The pages often have some writing too. You can cut words from magazines, write them on a computer and print them or journal by hand. As art journaling is a form of self-expression, I think that pages are at their best when you create everything by hand.
I do not believe in waiting for the inspiration. Once I have made the page, I usually realize what things have affected on it. Like when walking in the garden, I realized that my marigolds had had something to do with the page! So, do not wait until you have something to say or draw, just start creating! With these step by step instructions, you do not need a single idea before you begin!
Step by Step Tutorial for an Art Journal Page
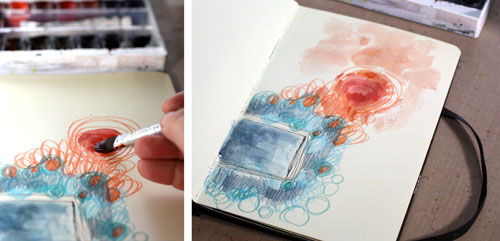
1) Choose the page and draw the first shape
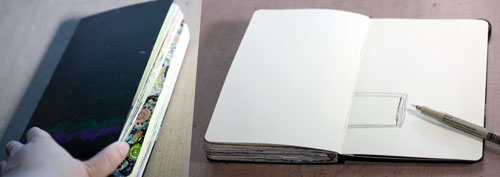
When I begin an art journal page, I usually feel quite stiff. The routines of everyday life can block our creativity. So it is no wonder that when you hold that brand new journal, you feel intimidated to start. Pick the page randomly as the first pages are the most usual causes of the blank page syndrome. Then take your thin marker and begin to draw. Slowly. Then a bit faster.
My imagination at this point was close to zero. I drew a rectangular and was able to mess it up so that I needed many lines to hide those clumsy strokes. Now I could have easily given up, no inspiration, nothing, just ruined one perfect blank page. But I knew better and went on.
2) Paint the shape with watercolors

To get my creativity flowing, change the marker to the watercolors. Constant interruptions are something that our rational side hates. That’s why it is important to be impatient, work quickly and continuously change the way of working. Paint the shape with watercolors and do not care how ugly it looks!
Painting the square did not make me feel especially creative. And with all the color choices I had, I chose a very conservative blue. Some would say that all the hope is lost, but I promised myself to continue to the next step.
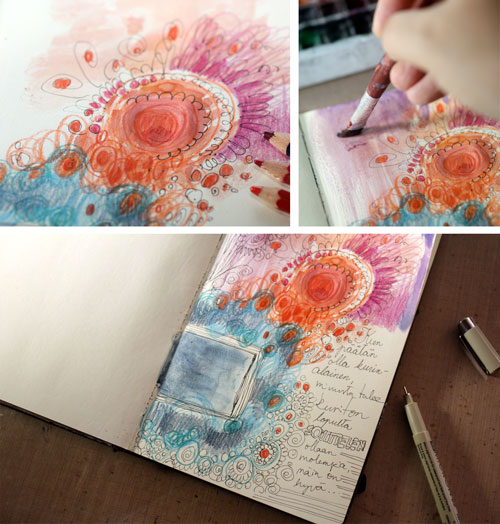
3) Doodle around with colored pencils and finish with a large shape
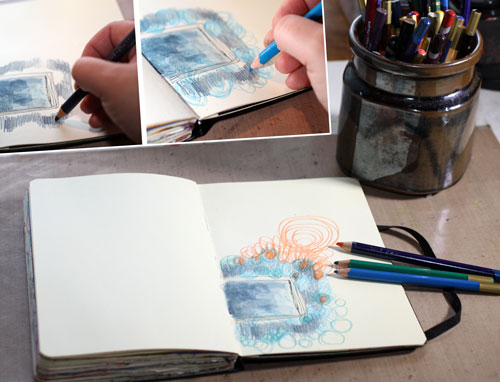
Start doodling with colored pencils. Believe me; you want to stay focused and work close to the shape. The rational thing to do would be doodling all over. Just stick to the area around the shape!
At this stage, I began to feel a bit anxious. It would have been so much fun to fill the page. But I followed my rules and remembered to change the color so that the process of coloring got interrupted. You can see that I began very traditionally, just with strokes. Then I changed the color and moved to drawing circles. After that, I picked another pencil and colored the circles.
The whole process so far has been pretty dull: First a square, then strokes, then circles. I felt a bit sarcastic at the moment: “What next? Triangles?” You can choose your doodles freely but end this phase with a bold movement: draw a large shape. Then abandon the colored pencils for a while.
4) Paint a new large shape with watercolors
Watercolor the large shape drawn in the previous step. Then clean your brush by dragging it around the shape.
You can see that when choosing the colors, I did not repeatedly use the same colors so that they would have spread evenly. Instead of that, I created two color areas: blue and orange. They both contain various hues of color. The blue area varies from gray-blue to blue-green, and the orange area includes warm red. This way there are two elements on the page: blue rectangle and orange circle.
They say in poetry: two is a conversation. Even at this early point, the page looks like an image. It makes you think: who are they?
5) Doodle with the marker

Fuzzy watercolors and soft color drawings look beautiful when they are partnered with a thin marker. Like in photos where something is blurry, and something is sharp, your page will look more appealing when you create the same effects.
Doodle around and over the shapes that you created in the previous steps. Don’t be afraid of crossing the shapes. In art journaling, a lot of time and energy can be spent in layering, but it requires nothing more than drawing over something beautiful to create even more beauty!
6), 7), 8) Colored pencils, watercolors, doodling
At this point of repetition, I began to feel pretty inspired. After coloring some doodles with colored pencils and painting some blank areas with watercolors, I felt inspired enough to write something that I thought that I am experiencing. I wrote: “When I decide that I have to be under control, I will be out of control. Then I make an agreement with myself: let’s be both!”
9), 10), 11) Watercolors, colored pencils, doodling
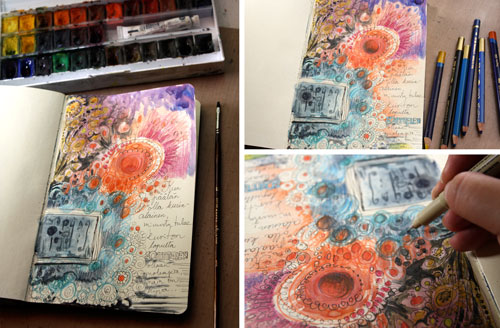
Now we are in the final round of making the page. Because these are the steps where you fine-tune your artwork, use a thin brush and very little water with watercolors. When adding details with the marker, change the orientation of the work once in a while. Many times it is easier to focus on the details if you turn the page upside down.
In poetry, they say that if two is a conversation, then three is a dance. I emphasized the upper left area to create a third element. It made the page more dynamic. Namely, at that point, I was feeling super dynamic and inspired!
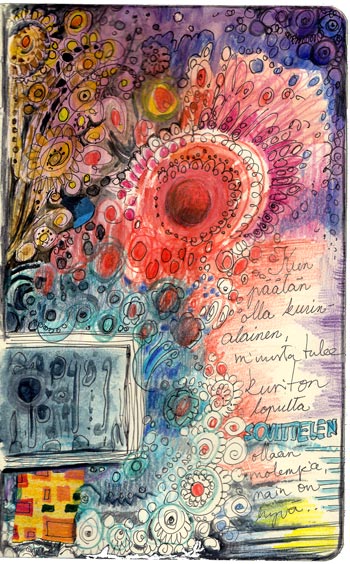
12) Finished?
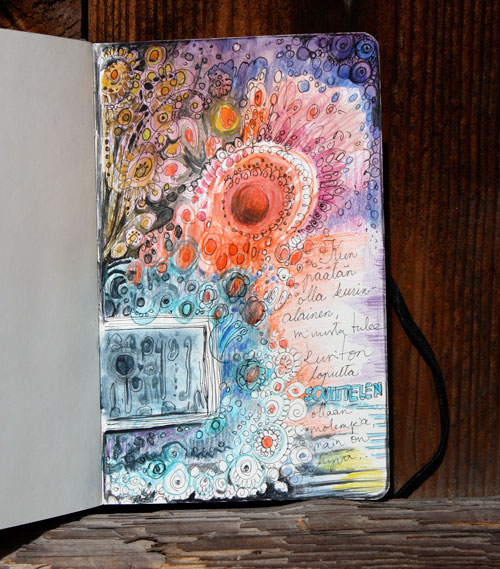
When you assume that your page is finished, it is time to take a pause and examine the work.
When I examined mine, I saw that my rational side is there in the form of a computer screen and my creative side in the form of an orange flower. I decided to add a little hand decorated paper piece under the computer screen to make it look more like a computer. Then I added another tiny blue piece besides the orange flower to make the orange pop.
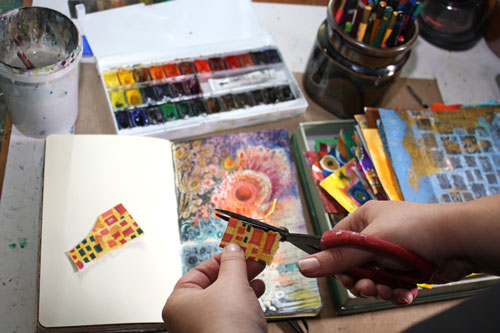
When you use your own hand drawn papers for collage, they will integrate beautifully. (New to hand decorated papers? See the basic instructions.)

The finished piece now expresses my love for the internet and computers. If that subject was given to me at the beginning, would you think that I could have created that image? Never! I would have stared the blank page and after a while, be as bored as my beagle is at the moment! Getting started even if you don’t feel like to and still finding the happiness of self-expression along the way – that is the magic of art journaling!
Let me be your art teacher: Subscribe to my weekly emails!
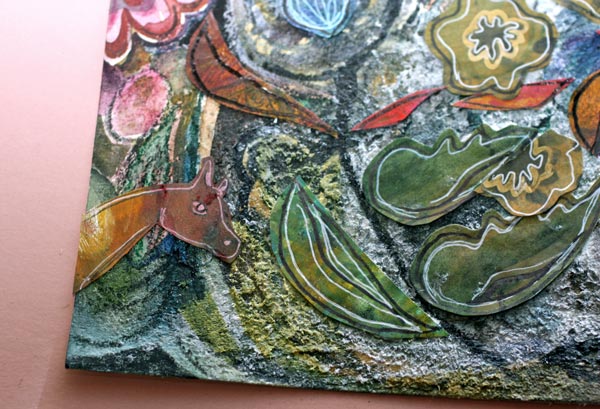
Gobelin Tapestry in Mixed Media
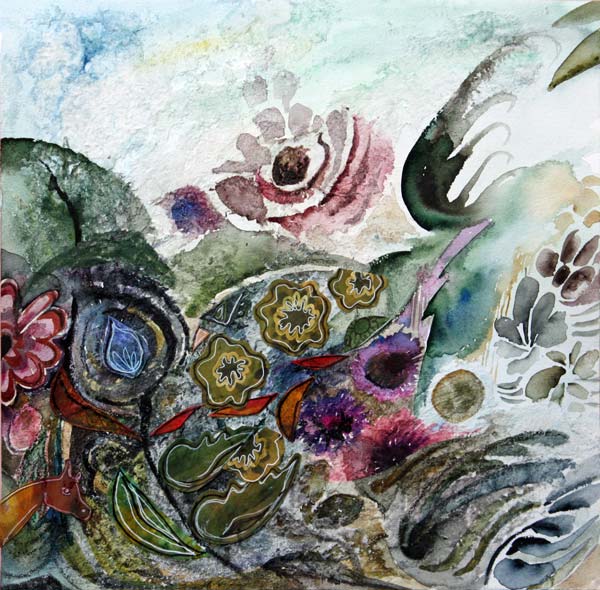
I like the sources of inspiration be quite distant. They should not instantly make my mind figure out the result. While packing craft supplies to empty a sewing room for renovation, I found some pieces of woven upholstery fabric. Those reminded me of a Gobelin tapestry, the woven wall hangings.
You could think there’s nothing more conservative and static than those, but I was immediately inspired by two things: 1) to show how beautiful muted colors can be 2) to create a dynamic composition that still reminded of textiles.
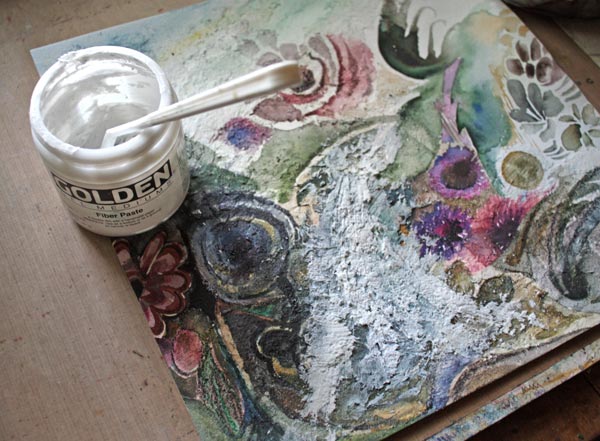
Fiber Paste in Mixed Media Art
To get into the spirit of heavy woven tapestry, I chose to use a lot of fiber paste to create a texture on a fairly smooth watercolor paper.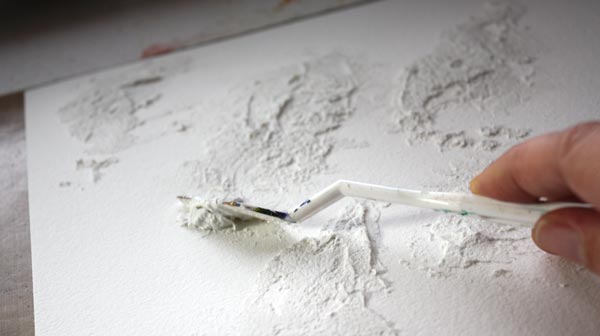
Now, the rational thing would be to spread the paste evenly. Or to spread the splotches evenly. But as I wanted to create a dynamic composition, I chose to add fiber paste mostly to the left side of the work.
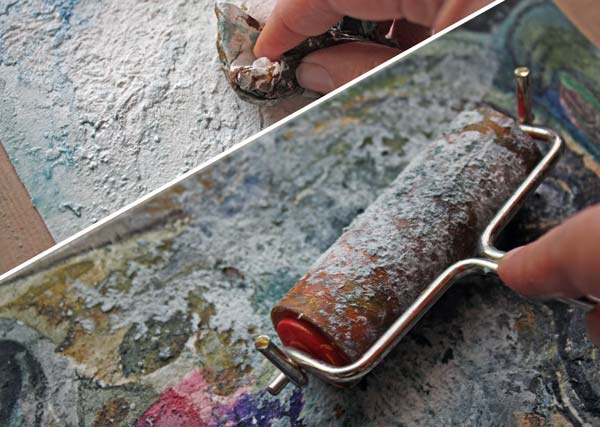
With fiber paste, you can create interesting, uneven surfaces by using tissue paper or various tools to spread the paste. You can also use fiber paste for creating layers and attaching collage pieces (more about those later in this post).
One more good thing in fiber paste is that once it’s dried, you can paint with watercolors over it. I find the change in the surface texture somehow good for my creativity. It is impossible to paint accurately when working on fiber pasted area. That makes me accept the imperfections right at the beginning. Too much self-control can be destructive to the creativity. So, fiber paste is one of my medicines to let go!

Watercolors
Here I chose to work with watercolors instead of acrylic paints because they are much faster when creating delicate color variations. I usually mix watercolors by dipping the brush to many color pans on the same go and letting them mix naturally on paper.
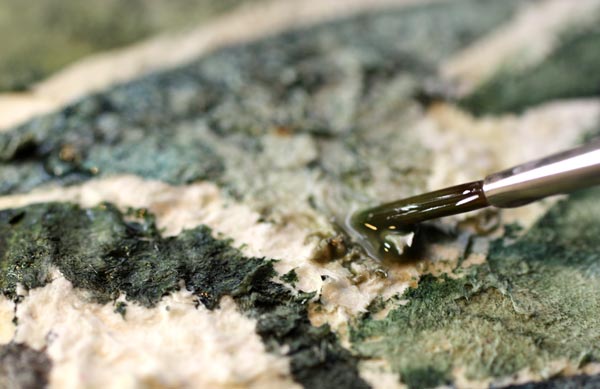
With watercolors, you can easily change the intensity of color. I often start with a fairly dry brush and intensive color. After a stroke or two, I then add plain water to dilute the color. This technique is shown well in the video where I paint watercolor postcards. On the fiber paste surface, you can use a lot of water for lighter shades.
Mixing Colors
I still remember my moment of mixing black with other colors. I was a teenager, and it was a warm summer day. Acrylic paints were quite new to me, and I wondered how they should be mixed to express the hot weather.
The dark shadows made me think of black. I remember the surprise of getting beautiful purples and browns. That was a moment when I realized that the power of colors is not just what I admire in other people’s work, I can learn it too. By mixing colors, I could express anything!
Just this year when I bought my newest watercolor set, I discovered browns. I wondered why there are so many brown shades in the set, but now I know: mixing colors with browns create beautiful hues! In this piece, I have mixed the colors from both browns and blacks.
Collage
I was pretty happy with most of the painting – except the lower center area. The composition of the center elements did not work. To create something totally new, I used my most common method: to make it ugly and then try to save it. I took the jar of fiber paste and began to cover the bad areas with the paste.
“You have ruined it now,” said a bitter voice in my head.
Have you ever experienced the same? It is the moment where you can truly stop pleasing others and begin creating art.
I took the pile of hand decorated papers and started cutting. Fast!
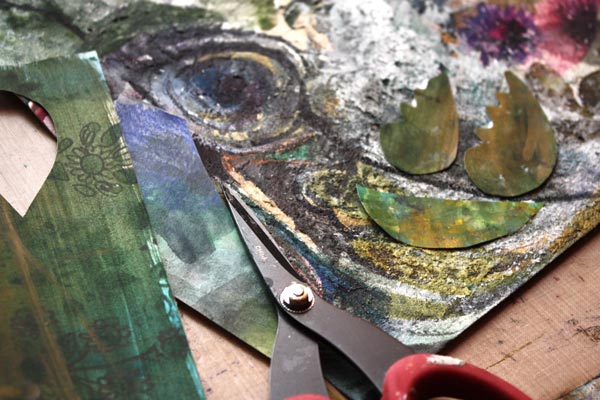
Some time ago, when I made those decorated papers, they were so ugly I almost threw them away. But now they looked like they were made for this muted color palette! And the fiber paste works as glue so it was easy to attach the pieces.
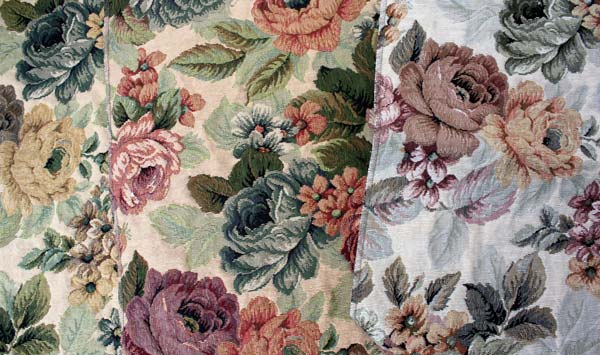
While cutting the pieces, I watched the fabric of the two chairs in the library room where most of the creating happen. I found the chairs at a recycling center a few years ago. I took them for renovation, so I was able to choose the fabric.
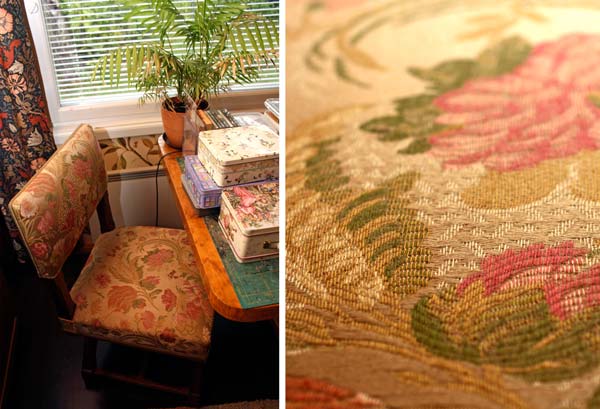
I love the fabric’s silky texture, romantic pattern and how well it goes with the wallpaper and William Morris’s curtains! Looking at that chair made me realize what I needed to add the feel of fabric to the artwork. To cut several similar flowers to represent a repeating pattern!
Finishing
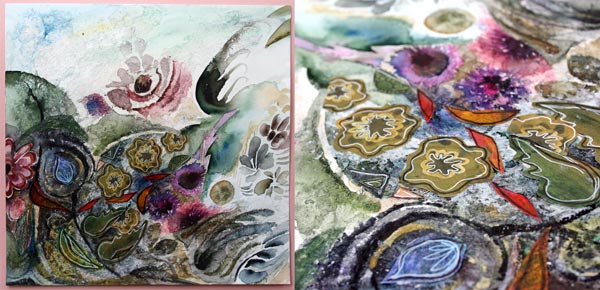
After drawing some detailed lines with colored pencils and markers, the collage seemed to be finished. But then I remembered the original idea: Gobelin wallhangings. Don’t they often have deer in them? A small deer was added in the lower left corner to wonder about the blowing winds!
I have noticed that many mixed media pieces are made from commercial products. I want to encourage you to create your own elements and textures. Your art will be much more original and complete. No factory-made flower can express your emotions as accurately as the ones you make yourself!
Let me be your art teacher: Subscribe to my weekly emails!
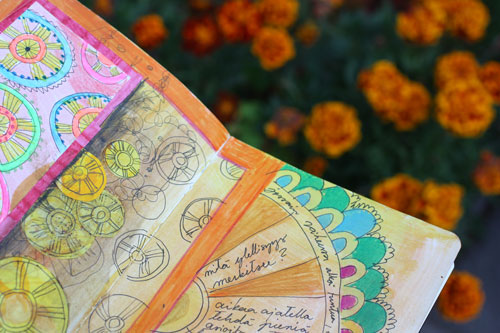
Art Journal Inspiration from Children’s Books

The art journal spread shown above is created from hand decorated papers, colored pencils, and markers. The main message here is “You can ride with your imagination in any way you want.” As it implies, I like my art journaling to capture dreams and fairy tales, not so much everyday life.
Mini-Worlds and Fantasies
I think that an art journal can be childish and playful. The way I see it, children’s books are the predecessors of them. Children’s books also combine illustrations and text to create mini-worlds and stories. I love to add both decorative and naive elements on the same page, and children’s books are great inspiration for that!
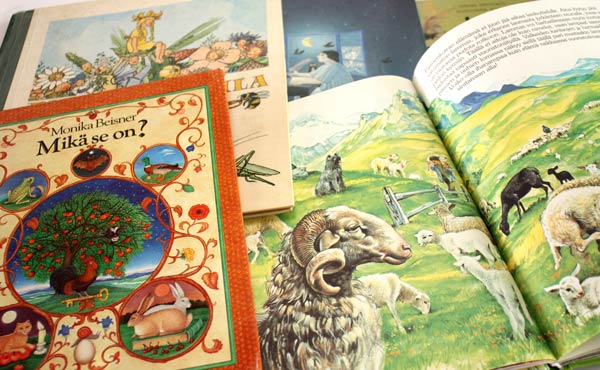
I buy used children’s books from recycling centers. They cost only a few euros (few dollars). That is a fantastic value considering all the inspiration they can give. I pick the books that have a lot of good quality illustrations. As I love detailed drawings, I try to find books with sharp lines and many details. Browsing children’s books can be a good practice for finding your artistic style. Pick the books that you feel most drawn to and then list all the things they have in common. I prefer books that have matte pages because I sometimes create collages from them. Then it is good if I can draw or paint on them.
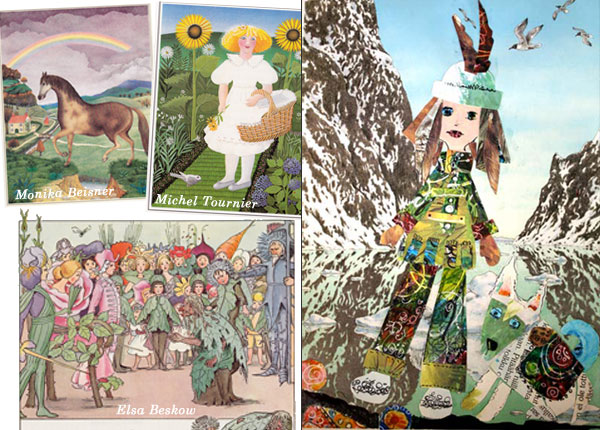
I made the collage on the right while teaching at a workshop last fall. It’s one of the pages where I have used the papers from children’s books. I often give few pages from various books for each participant of the workshop. It’s much easier to start creating when you don’t need to stare blank paper.
That little explorer resembles anyone who is entering the world of children’s books!
Subscribe to my weekly emails – Get a free mini-course!
How to Trust Yourself when Creating Art
When I begin creating art, I often have petty thoughts like: “I want to draw a flower” or “I want to create something pink.” Even if I create regularly many times a week, I am still bothered by the fear of failure. I know I have to handle that at as soon as it comes, preferably before the first brush stroke. Why? Wouldn’t it be fun sometimes to draw that single flower or create that pink square? I believe that if we give ourselves that kind of clear commands and simple tasks, we don’t really trust our creativity. The big question is always: do you trust yourself when creating art?
The Unpredictable Nature of Art
If you trust yourself, you can step into the world of unpredictability. Not knowing exactly what to aim for is a major factor when creating art. We can set restrictions and principles, but we have to leave space for unpredictability. It means that we are more creative if we do not have the clear picture of the result.
Setting Restrictions on Supplies
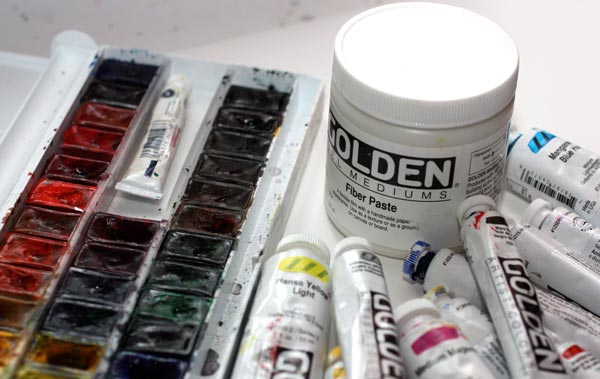
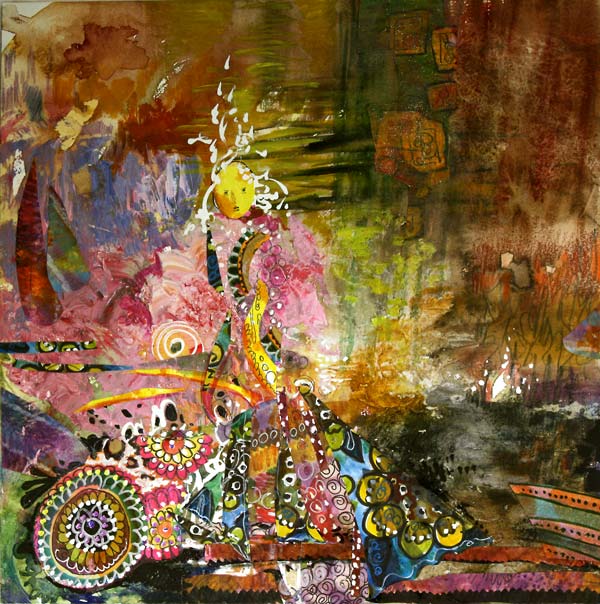
These are the art supplies that I gathered when I began making the collage of this post. Watercolors, acrylic paints, and fiber paste. I also picked a thick watercolor paper and cut it to a square. I chose the supplies but left behind the thoughts about what I was going to make.
Find what You Want to Express
My method is to browse art books just before creating art. I do it only for few minutes, and I try to pick art that really lifts my spirit, raises the bar, sparks my imagination. Usually, it is something from the history of world art. This time I browsed a picture book from impressionism.
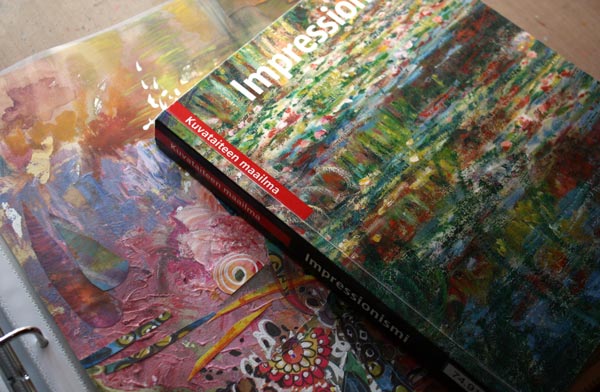
So, do I advise you to get a book of impressionism? No. I advise you to name what spheres you want to reach when making art and pick images which resonate with that. They do not have to be the same style than what you want to accomplish. The more important is the feeling that they evoke in you. When I browsed the book of impressionism, I thought how art is above all the mundane things. How those artists who lived at the end of the 19th century have managed to describe the beauty in the way that is still understood. How the brush strokes, full of paint, were successfully set to represent weightless light. All that would be exciting to see in my piece too.

When the first watercolors hit the paper, I still had some self-doubt: I could not ever do anything like the great impressionists. I heard the sarcastic voice in my head: “Reborn Monet, yeah right!” But that sarcasm is the moment when I know I am almost there: I am almost leaving the rational side of me behind. Then I just need to wow to trust myself, stop seeing any desired images in my mind and start working fiercely.
Layering (With Some Moments of Self-Doubt)
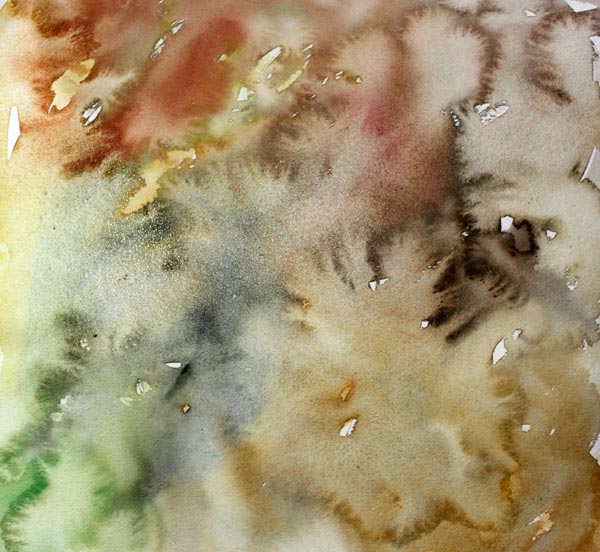
I often start with watercolors because they cover the paper quickly. Even if I have the idea of creating some surface structure, I wanted to use watercolors first to get into the mood of uncontrolled splashes.

While waiting for the watercolors dry, I mixed some acrylic paint. Pastel shades like many impressionists used to choose. 
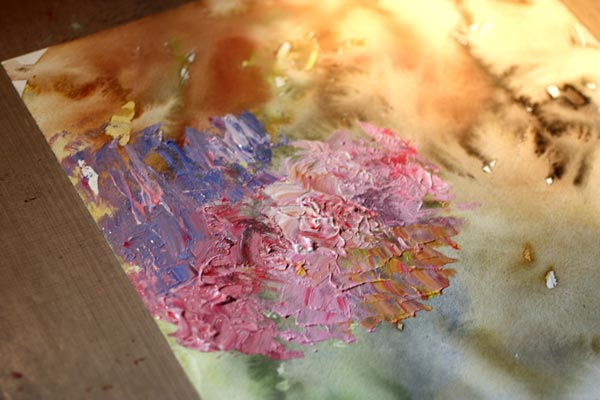
To get some interesting texture with the paint, I used a palette knife instead of a brush.
After playing a little with the palette knife and thick paint, I became clueless of how to continue. It’s important to recognize these moments. If you are not aware of these, your rational side takes the control and decides to do things you really cannot justify. Like: “Let’s use the rest of the paint to cover the surface evenly.” Or: “Let’s get some other colors and splash the paint here and there.” When you feel that you do not know what to do, don’t do the obvious. I might browse some pages of the book again to get back into the mood. Or change the media, the solution that I made this time. I doodled something not so important with the colored pencils just to realize I wanted to continue with watercolors and a thin brush.
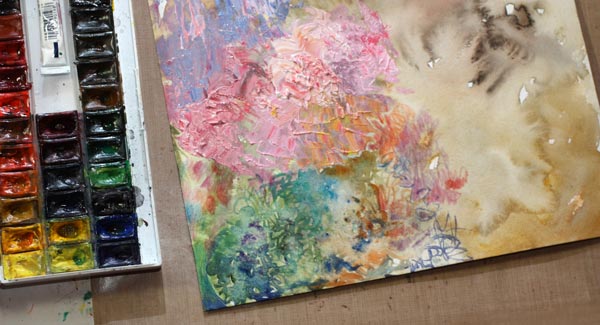
When I got bored with colored pencils and watercolors, I opened the jar of fiber paste. Even if I often prefer to stay with the basic art supplies, fiber paste is something I like. It not only creates an interesting texture like watercolor paper, but it also works like a watercolor paper. You can paint over it with watercolors and create beautiful details to your work! 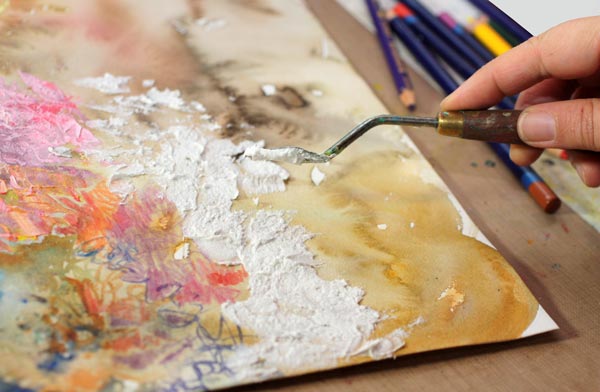
Trying to achieve distinct variation in the surface texture, I used the palette knife again.

Then my mind was empty again, so I browsed few pages from the book again and then continued with colored pencils.

When I reached the next point of frustration, I decided to change to the watercolors and work with high speed. Working fast helps to get creativity flow.
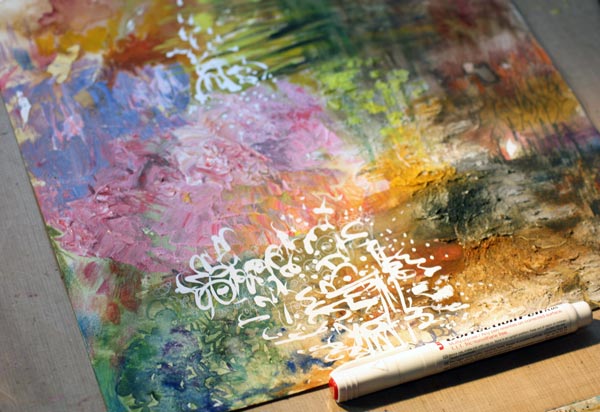
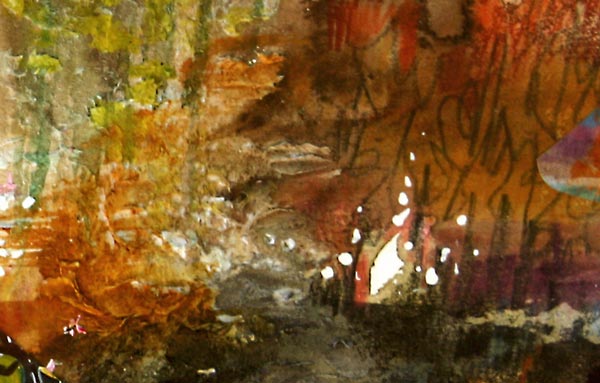
Once the paper was covered all over, I started adding details. A white correction pen is great as it usually works on any surface.
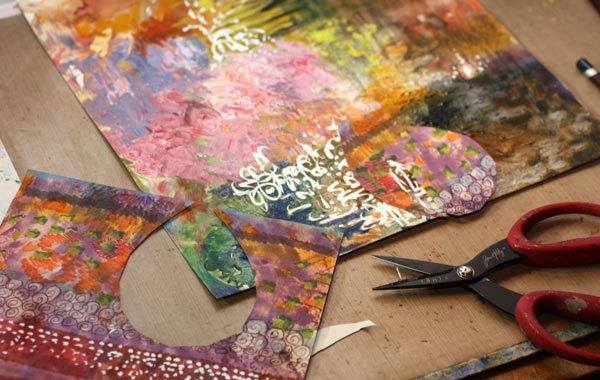
Hand decorated papers are great for details. I picked some of my prettiest papers and began to cut them. The paper shown in the picture isn’t that great as an artwork, but it’s versatile for collages as it has a lot of variation.
Finishing
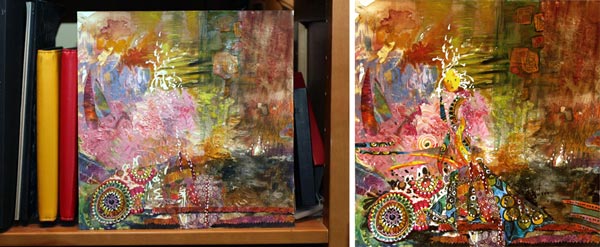
I felt that it was time to begin finishing the work. It is always useful to stop and think. I often put the artwork somewhere where I can look at it, like on the nearest bookshelf. Then I step away and try to figure it out where to lead the viewer’s eye. Here’s another step where you should not question your trust: It will be great! You just need to connect some dots and find the lost pieces of the puzzle. Like I did when I realized that there is someone in the picture. I added the faces and made the rest of the character more visible. Then some tiny adjustments to the composition and after that, the work was finished.

I think that this piece is aesthetically very much my style, but the impressionistic approach to the surface structure makes the work interesting.
Never underestimate the power of layering: this is my favorite detail, the white area showing the blank watercolor paper. It was created in the first phase, and it still exists in the end. If I had done the obvious and filled the paper with each media layer by layer, this little detail would not exist. So, cherish each stroke and trust your creativity! Focus on the feeling, not to the result! You are allowed to feel like a world-class artist even if you know you are not. Fly to the world of imagination!
This might also interest you: – Stretch Your Artistic Style
Let me be your mentor in art: Subscribe to my weekly emails!