10 Black and White Art Techniques with Personal Stories
I have made the first ten prompts of Inktober 2019, and want to share the art techniques and stories behind the images. I have been following the official Inktober prompts that are single words. By brainstorming around the prompt, I have decided what the first element is, and then worked from one association to another. After creating the image, I have documented my thoughts in writing. For me, Inktober is as much about finding personal stories than making the drawings. The stories help me to see where I am as an artist and as a person in general.
For these first ten images, I also set an art technique to make creating in black and white more interesting. I hope you find these black and white art techniques inspiring too!
Day 1 – Ring
Technique: A big solid shape in the background. I like to use a brush pen for large black areas.
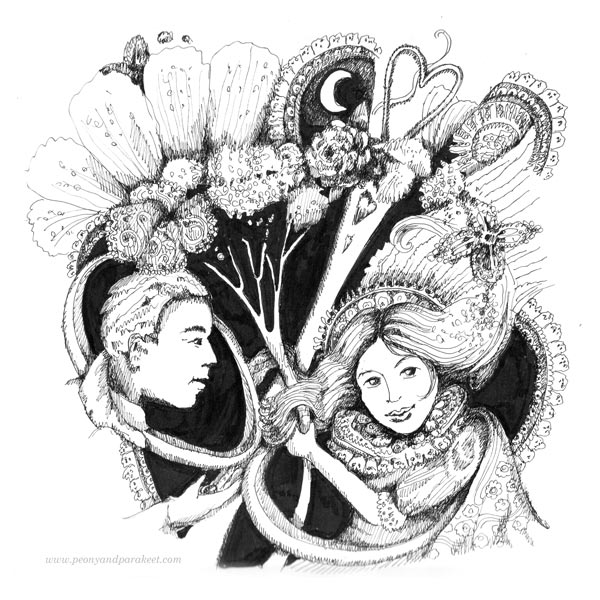
Story: As a teenager, I read Jane Austen’s novels and wondered if those handsome and honorable men really exist. But when I moved to a bigger town to study at the university, I found my Mr. Darcy. Dark hair, brown eyes, doesn’t smile or talk much, but when he does, it’s always worth listening. He looks at my art like Mr. Darcy watches Lizzie playing the piano. He has many skills, but he never brags about them. What others might consider as faults, are what makes him whole to me. So here’s to commitments and true love!
Day 2 – Mindless
Technique: Strong shadowing so that the outlines disappear to the background. It is quite time-consuming but I love the 3D effect.
Story: Instead of mindfulness, I practice mindlessness. I like to think about thinking, imagine the impossible, and when I relax, I knit, because it can be done mindlessly. Pick a circular needle and row never ends – until it’s 3 am and the low energy level makes you stop! The mindless world of imagination where no one needs to do laundry, make dinner, or find a missing sock, is what we humans need every single day. It’s a world of magic that we carry inside us, and no matter how mindless it feels, it’s one of the best things in being alive.
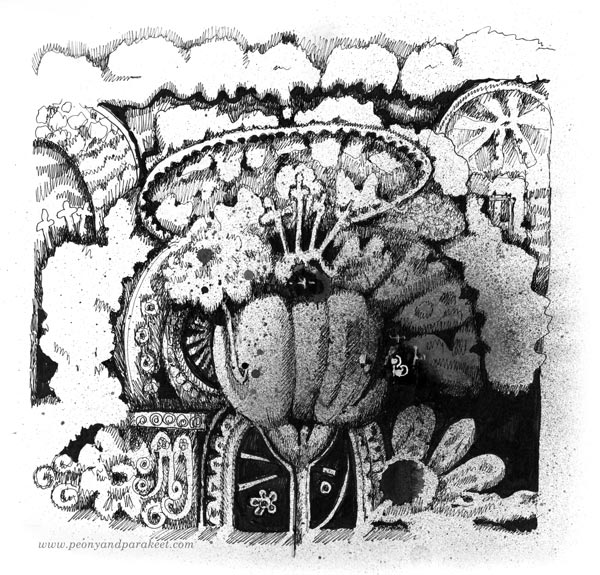
Day 3 – Bait
Technique: Using white space. The earlier I get the idea about the content of the image, the easier it is to leave white space as well.
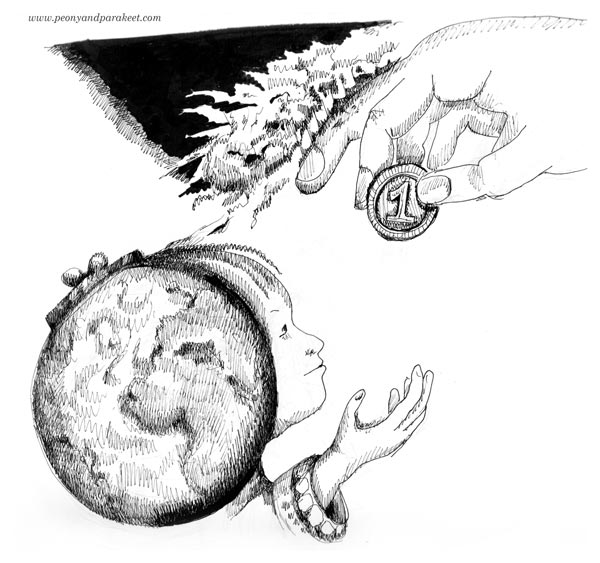
Story: In today’s world, money seems to be everything. Still, we know that there are more precious things like saving the globe. Sometimes I wonder if someone gives us small rewards just to distract our attention from the bigger destruction. Is the world only a big purse waiting for the next coin, or can we stop the fire?
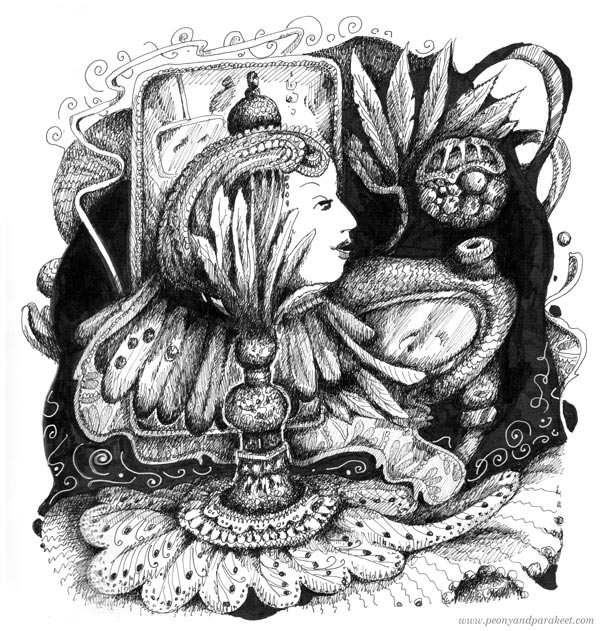
Day 4 – Freeze
Technique: Spraying black ink. It’s often the best way to remove blank page syndrome!
Story: I love historical places and old art. When I begin to create, I imagine time-traveling to the past. My pens take me to an old palace and start vigorously blowing dust away. I imagine revealing all the beautiful designs under white cloths, opening windows and letting fresh air come in. What’s frozen begins to warm up and get color. My biggest dream is that I can make the forgotten world bloom again.
Day 5 – Build
Technique: Using lots of circles and round shapes. I also like to start with a simple circle and then slightly adjust it. See the jewels, for example!

Story: When we draw, we are free to build anything. Impossible becomes possible, small can be big and big can be small. All the things we see and collect can be toys for the imagination.
Day 6 – Husky
Technique: Shades of grey. I sprayed ink to make the start grey already. Then I added more grey shades by drawing thin parallel lines.
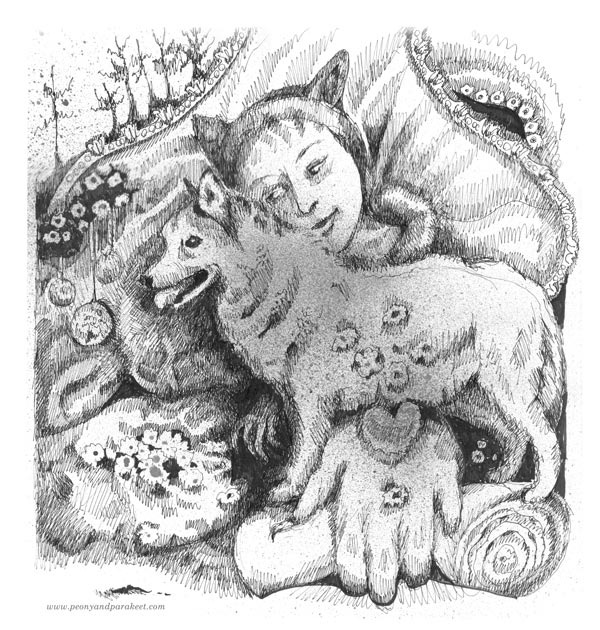
Story: Having a dog of my own – that was my dream as a child. I drew dogs and imagined taking them to shows and running a kennel club. I read books about dogs, learned to identify hundreds of dog breeds, knitted stuffed toys that were as close to real dogs as possible. I wondered how it would feel to be a dog, to look at the world from the animal’s perspective, to run with four legs, and to love undoubtedly. It was a long wait. I was over 20 years old when I finally got a dog, a little spaniel. Now I have two beagles, and I hope I don’t ever have to live a day without a dog. Yes, I am definitely a dog person, what about you?
Day 7 – Enchanted
Technique: Rectangular blocks in watercolor. I used only Dr. Ph. Martin’s Hydrus liquid black for the image.
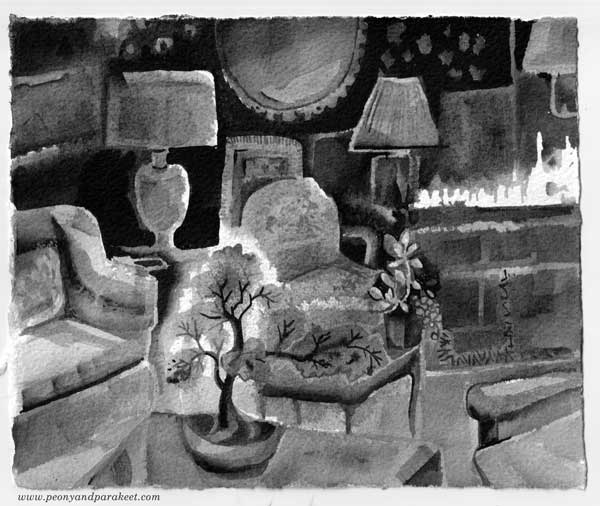
Story: If I had to choose between outdoors and indoors, my choice would be indoors. Now when it’s autumn, it’s easy to make the home look like an enchanted place. Just switch off most of the lights, light some candles, and make sure you have houseplants, preferably bonsai trees. They look magical in the dark and bring some outdoors to the indoors as well!
Day 8 – Frail
Technique: Combining watercolors and drawing. Some of the areas are painted only so they look softer.
Story: I hope that it wouldn’t be so difficult to remember that people are like plants, not always saying aloud what they feel, think, and plan to do. Their pots can be broken, their roots can be too dry, and their vision can be blurry. But they function, participate, and comprehend anyway. Their beauty is more about persistence than perfection. Their origin is more about cohesion than separation. I wish I could remember that like plants, every person is unique but still shares the need for warmth, hope, and attention.
Day 9 – Swing
Technique: Detailed figure as a focal point, and abstract freely-painted shapes in the background. I love to play between abstract and representational.
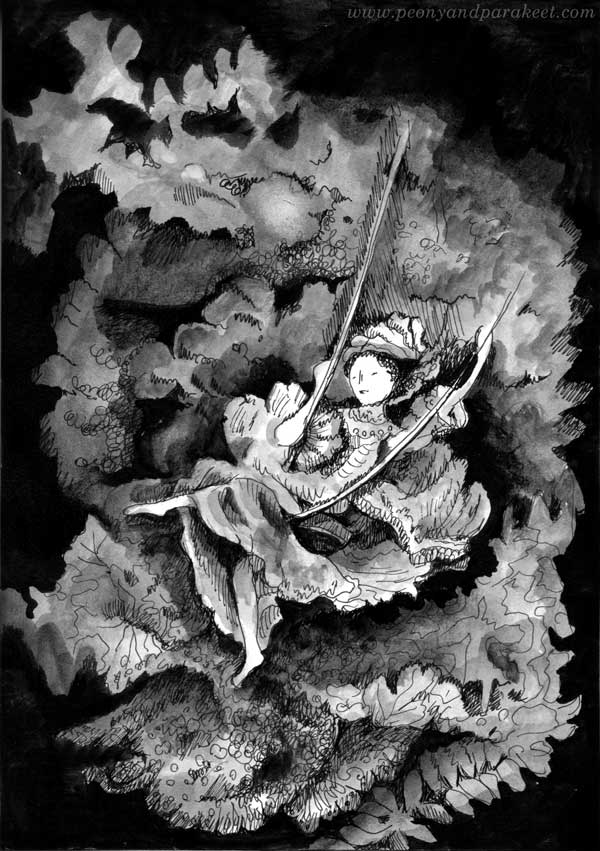
Story: Rococo is one of my favorite historical styles, and I always try to find a way to include some of its abundance in my art too. So no wonder that today’s prompt immediately brought a famous Rococo painting to my mind. It’s Jean-Honoré Fragonard’s Swing, where the main character is a young woman, and other people and details are secondary to her. When we are creating, we are that lady on the swing. The outer world becomes more distant, and we get to rest in the sceneries of our minds.
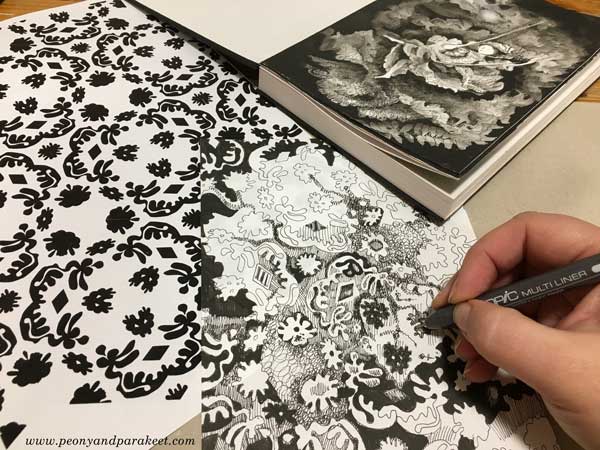
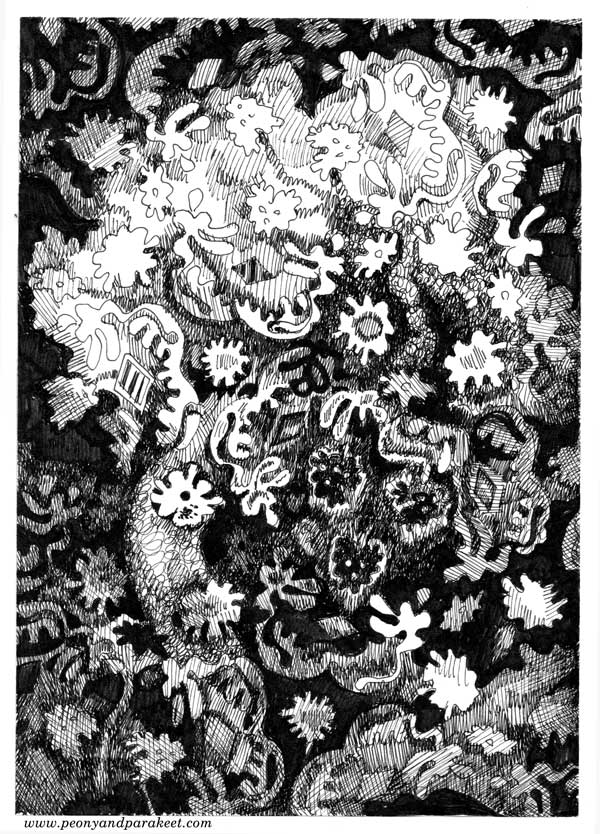
Day 10 – Pattern
Technique: Designing a pattern, then making it look like a representational image.
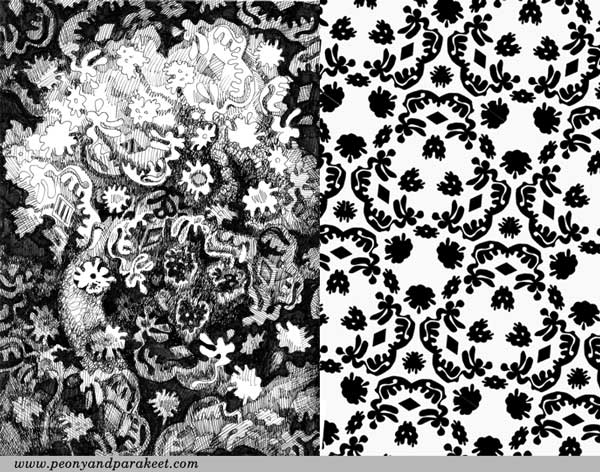
I drew a few black shapes in Photoshop and arranged them so that they formed a pattern. Then I traced the printed pattern on another paper by hand. By changing the darkness of the shapes and the background, I made a fall scenery.
Story: I haven’t ever taken an ink blob test, but I assume I would see plants. Bonsai trees, orchids, herbs, flowers in bloom, seedlings, you name it. “I hate nature,” I said as a child when a teacher praised my essay. She was astonished: “But you write so beautifully about your surroundings!” I have always wanted to get away from the influence of plants but have never succeeded in it. They enchant me with their silent whispers. Their organic shapes are like stamps in my mind when I start drawing. They never leave me alone, let me be who I am not. The more I age, the more I surrender. My imagination lives in a pot, blooming only when plants are.
What can’t you escape? What do you keep creating time after time?
Inktober Warm-Up Exercise
It’s soon October and with that – Inktober! Last year, I did all 31 prompts. Read about my previous experience here and here!
This year, I intend to make at least some drawings. And because Inktober was such a great experience for me last year, I want to support you to take it too. Here’s an Inktober warm-up exercise. I hope it inspires you to use inks and black felt-tipped pens to create black and white art. Follow the steps to keep going!
1) Paint an Abstract Composition
Let’s start by playing with liquid ink! Mine is Dr. Ph. Martin’s Bombay India Ink. I make the image on Leuchtturm 1917 Sketchbook.
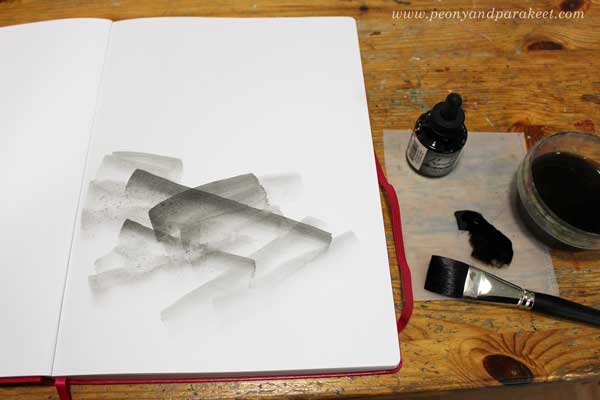
Put a few drops of black ink on a palette. Mix some water to the ink so that it’s grey rather than pitch black. Make some pale strokes with a flat brush. Then add new strokes on the top of previous ones. Work slowly! Enjoy each stroke and the translucency of it.

Turn the brush upward and make narrow strokes by using the tip of the flat brush. Experiment with both wet and dry brush.
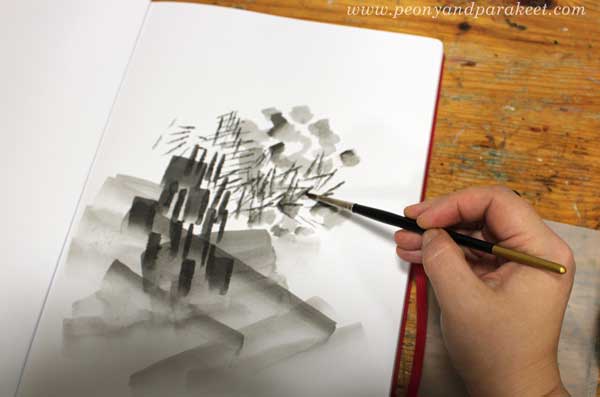
Pick a small round brush and add some ink on the top of the narrow strokes. Now you should have an abstract composition that has a variety of painted elements.
2) Fill Spaces Between the Painted Areas
Use a brush pen or black ink that hasn’t been watered down. Focus on the center of your composition.
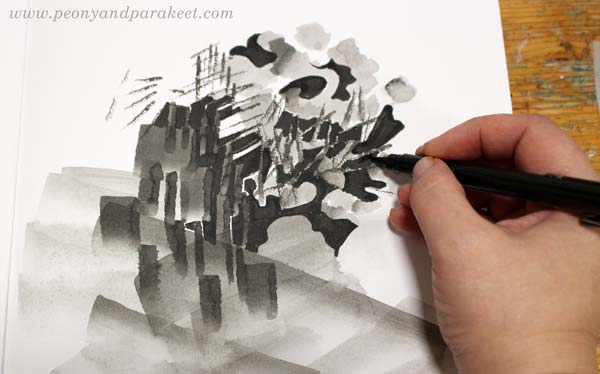
Fill most of the spaces between the painted areas with black ink. Leave some white to highlight the best parts. Black adds depth to the grey composition.
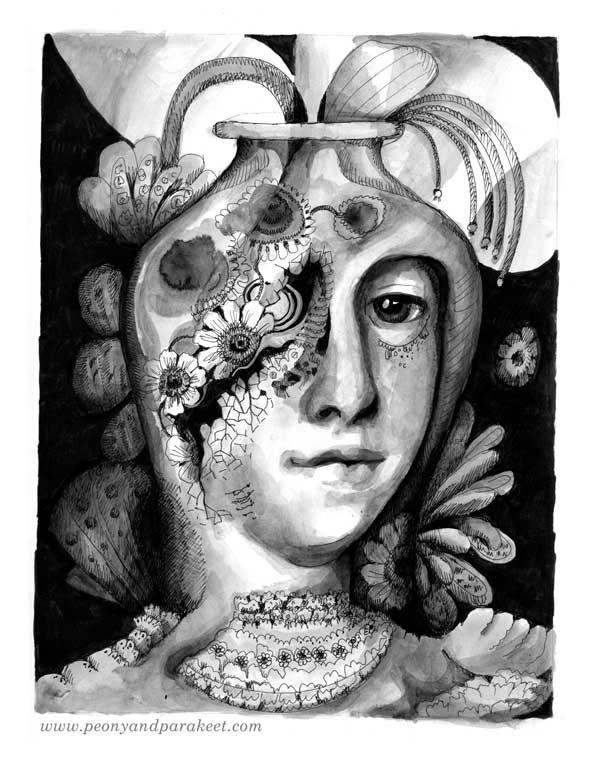
3) Draw Realistic Objects
Select black thin-tipped drawing pens of various thicknesses. I use Copic Multiliners from 0.05 to 1.0.
Choose a realistic object that you want to repeat in the image. My choice was women’s faces. For example, flowers or birds could be great too.
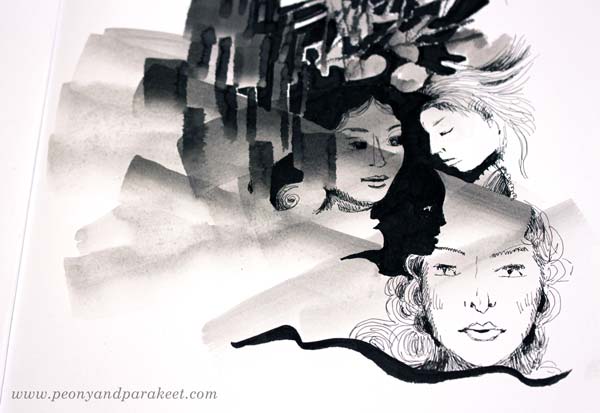
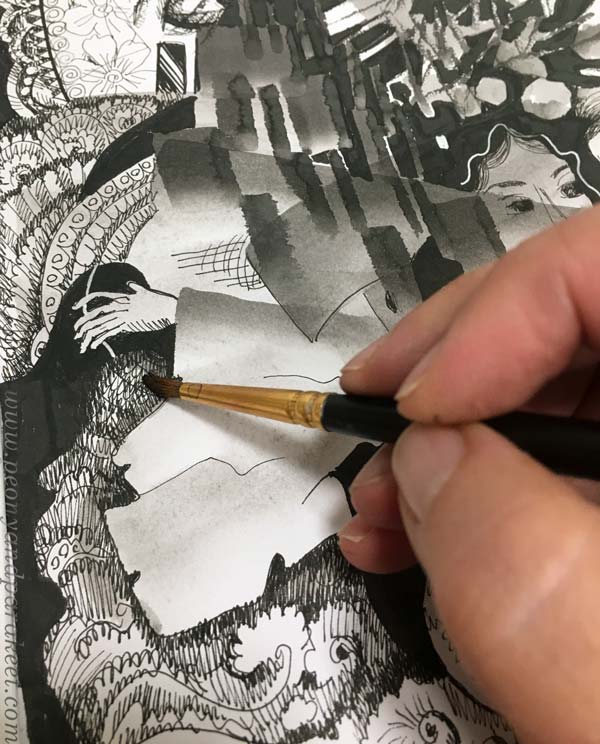
Look at the abstract composition and seek for places where you can add the objects. Add more black, and adjust the shape of the pale areas so that they partly outline the objects. When drawing the objects, play with the scale so that some are big and some small no matter where they are located in the image. All the objects don’t have to be fully visible. Some can hide partly behind the abstract elements.
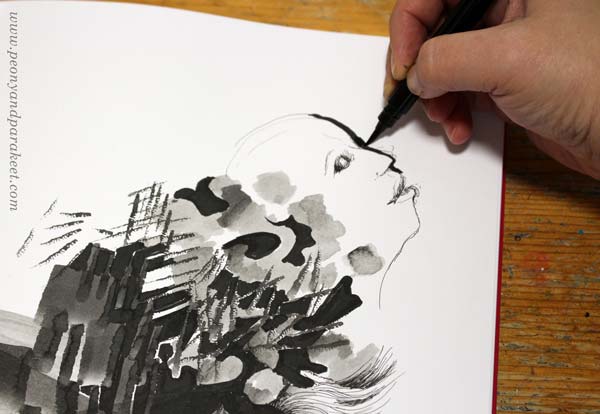
I like to draw faces so that I sketch it first with a thin ink pen, and then adjust it by adding a black element beside the face. (In my classes Animal Inkdom and Magical Inkdom, I show easy step-by-step methods for drawing all kinds of fun figures.)
4) Doodle Decorations
Continue with the black drawing pens, and doodle on the blank and pale areas. I also use a handmade oval template to get a big geometric shape that is fun to decorate.
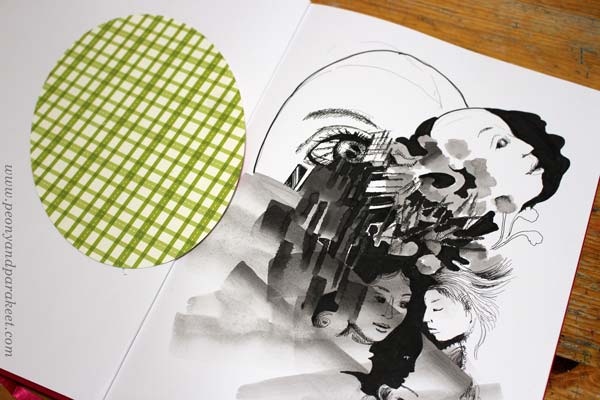
For decoration, the sky is the limit, but I like jewels, frills, laces, waves, and flowers!
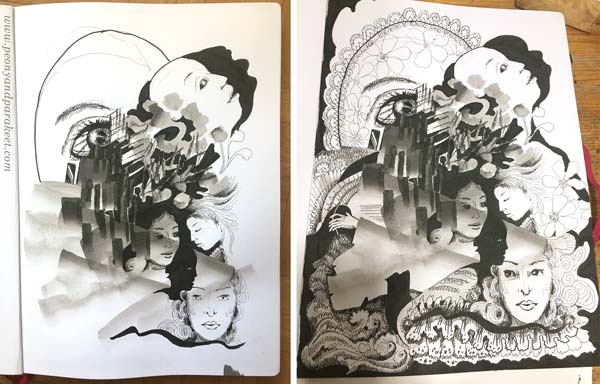
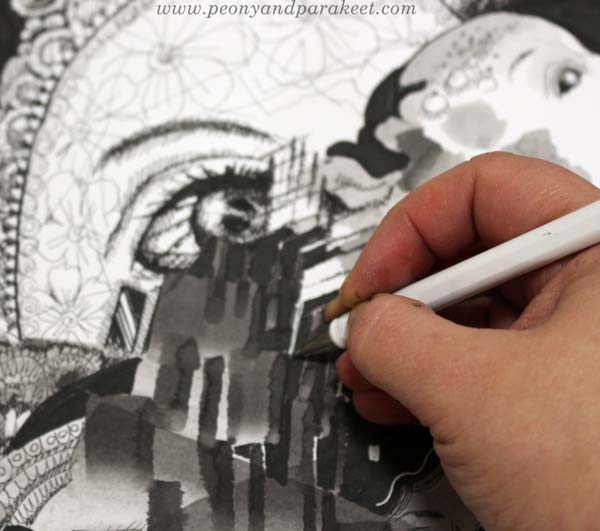
When doodling, I also add shadows to the elements by drawing thin lines side by side.
5) Finishing Touches: Shadows and Highlights
Squeeze your eyes and point all the white areas. Usually, there are too many and it makes the image look busy. Pick a brush and paint most of the white with diluted black ink.
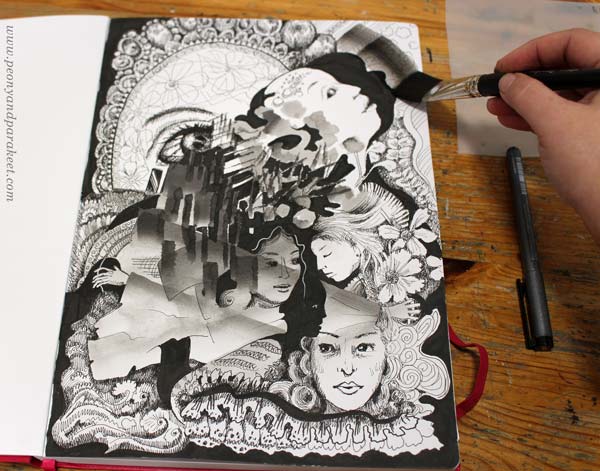
Especially the areas that are near the edges are worth toning down.
I also like to paint over the shadowed areas to give them a softer look.
White gel pen can be handy for those areas that need a little bit more white.
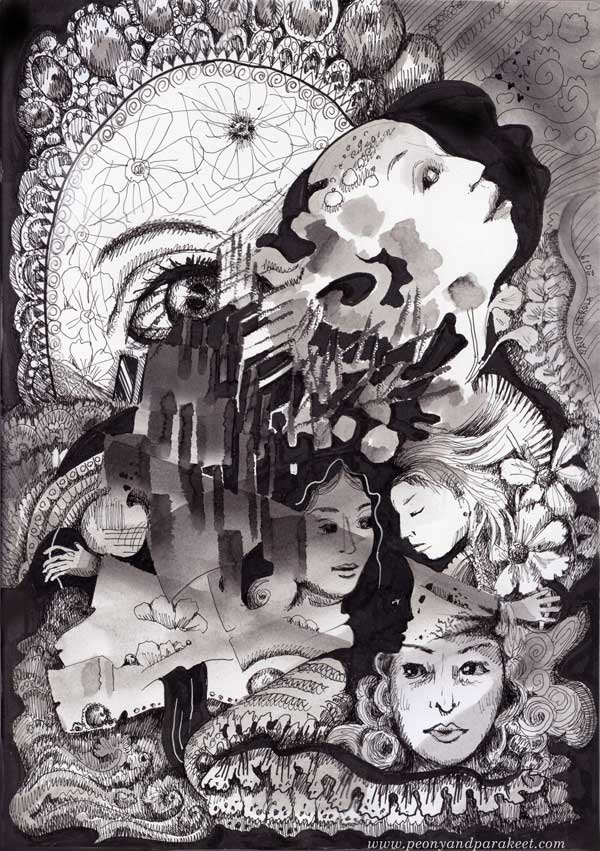
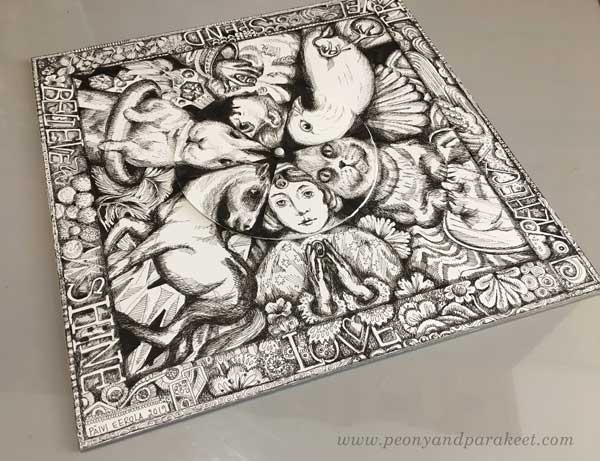
Inktober Warm-Up – Finished Piece
Here’s my finished piece again. See how limited the number of white areas is.
I hope you enjoyed this Inktober warm-up! Tell me – are you going to participate in Inktober?
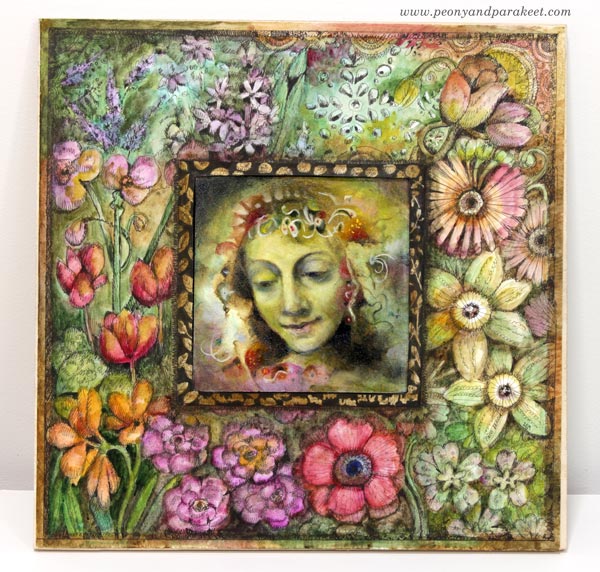
Between Fine Art and Illustration – Combining Both Into One Artwork
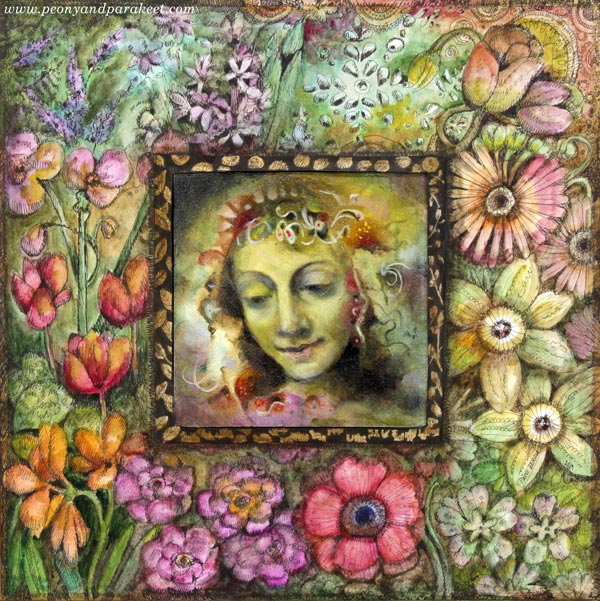
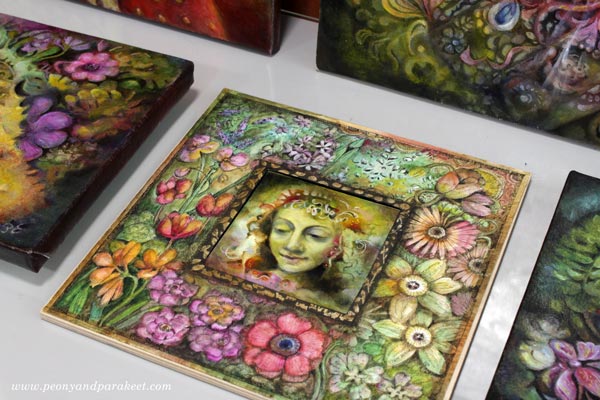
This week, I continue showing pieces that will be presented in the upcoming group exhibition “Flower Gardener’s Diary” (Kukkatarhurin päiväkirja, 9.- 22.9.2019, Hietsun Paviljonki, Helsinki). This one is called “Flower Fairy’s Year.” I will be presenting both paintings and drawings, so I wanted to create a piece that would build a bridge between fine art and illustration. I hope you find this project inspirational!
Inspiration Piece: Wheel of Fortune
When building the class Magical Inkdom earlier this year, I made a fun drawing called Wheel of Fortune. It has a center that’s separate from the rest of the piece, and it can be rotated so that the heads of the figures change. The bigger drawing is attached on thick cardboard so that it feels like it’s a game board, not just a flimsy piece of paper.
I wanted to use the idea of a separate centerpiece and sturdy base for this project too.
Fine Art Centerpiece: A Miniature Oil Painting
The project started by finishing a miniature oil painting that I suitably had in progress. It’s only 4 by 4 inches.
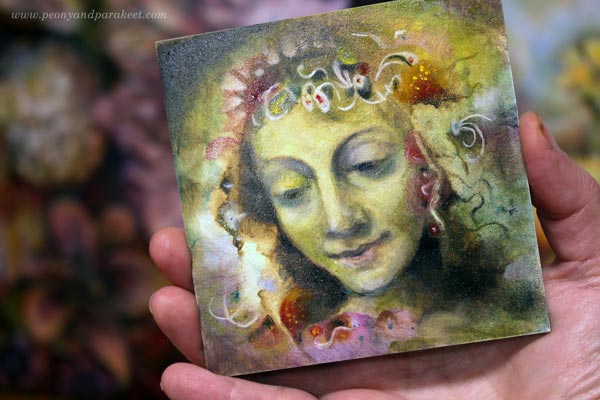
The painting was made very traditionally. I sketched the face with charcoal, and then made an underpainting with umber and white. I used Bernardino Luini’s portrait of Saint Catherine as a loose reference for the facial features.
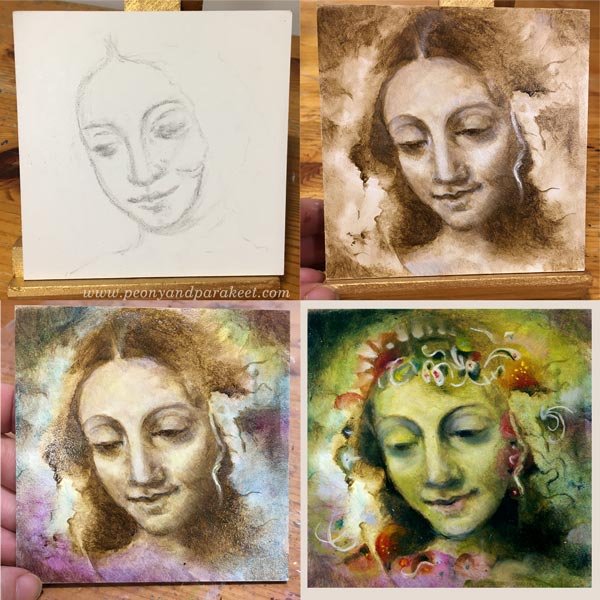
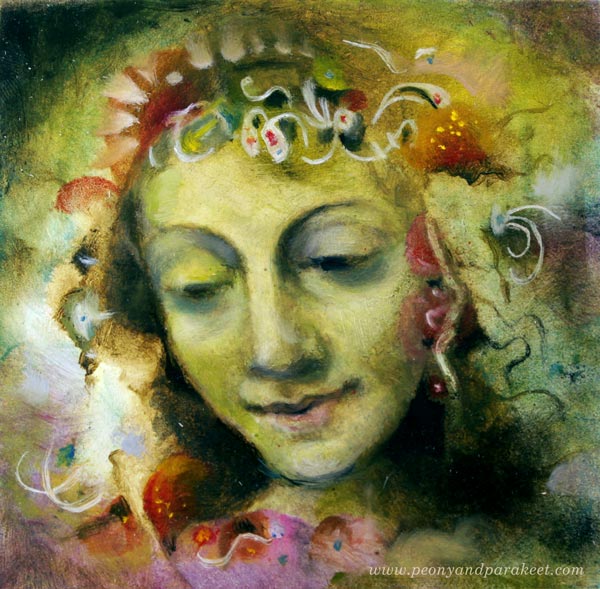
The color layers were thin so that the previous layers stayed visible too. It took a bit of courage to give a green wash to the face, but I really like the result. Decorations were easy and fun. They are quick lines and shapes that make the saint look like a floral fairy.
With oil, the most difficult thing is to wait for every layer to dry separately. Other than that, I find oil easier to handle than acrylic paint.
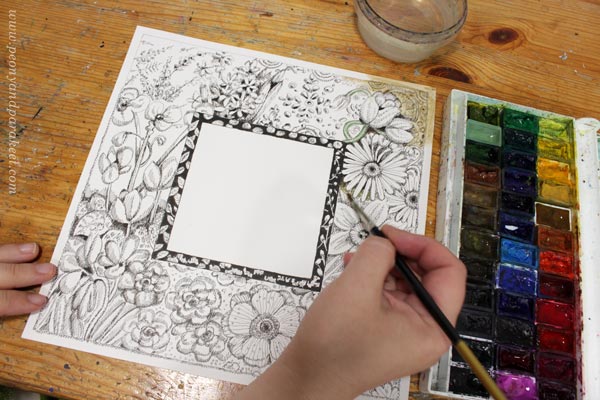
Illustration: Decorative Flower Frame
For the frame, I cut a piece of Bristol paper. It’s about 10 by 10 inches.
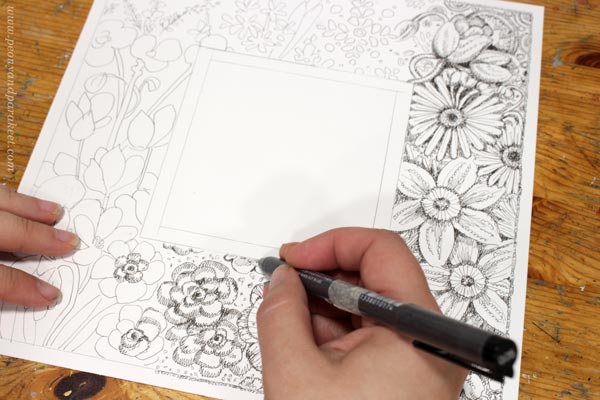
I wanted to include flowers from January to December so that the frame is like a clock that has months instead of hours. The drawing was made with Copic Multiliners (I mostly use 0.05 tip), and I colored it with watercolors.
Plywood Base
My original idea was to cut two layers of cardboard so that the topmost layer would have a 4-by-4-inch hole. But when I told my husband that “Ideally, the base would be wooden”, he went to his workshop and came back with a hand-carved plywood base!
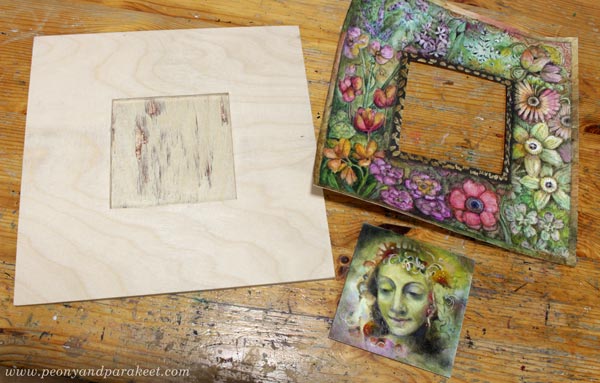
Putting All The Pieces Together
I painted the plywood black near the surroundings of the miniature painting. It makes sure that the plywood won’t show if the piece is observed from different angles. I varnished the oil painting with Gamvar and let it dry overnight. I put a plastic plate over the frame to reduce the curviness of the paper after painting it with watercolors.
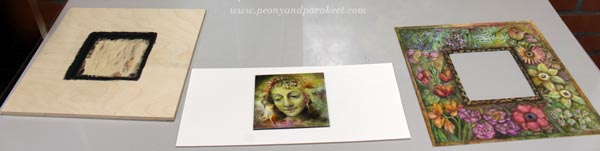
Then I glued the painting to the base with gel medium and attached the frame with double-sided tape. Finally, I marked a line of 0.5 cm from the edge of the base and made sure that the motifs extend there. This piece will be professionally framed, so I didn’t want to leave too much empty space around the edges.
Between Fine Art and Illustration
In the art world, there’s a lot of talk about choosing between fine art and illustration. Many define fine art so that it comes up solely from the artist’s own creative expression when illustration illustrates a story or can easily be used with the text. One way to separate them is the number of copies. Fine art pieces are often unique or manufactured in very limited quantities only when illustrations are more of everyday art, consumed by the masses. Some say that it requires talent to create a piece of fine art, and just art education to create a piece of illustration.
In my artistic path, I have found the definitions both helpful and destructive. It has been essential for me to expand to illustration – to learn how to visualize text and written ideas. It has made me more connected with the surrounding world, and it has also brought me more work. However, I feel that art is free, and without exploring that freedom, it’s also difficult to create insightful illustrations. So I have tried to keep up with both worlds.
However, I hate when people say that you have to choose between fine art and illustration. For me, bringing the two approaches as close as possible has been a working solution. I think this project shows really well how one is not the enemy for the other.
I can’t wait to show you more pieces that I have finished for the exhibition! I will also have many framed and will blog about how I selected the frames in the upcoming weeks. Stay tuned!
Come to draw fantastic art (+ fantastic frames) with me –
Sign up for Magical Inkdom!
Right after the registration, you will get all the lessons, and you are good to start drawing! >> Sign up here!
Embellish with a Hand-Drawn Frame

Do you remember this piece? I drew it in June but back then it looked much more modest. It was only black and white, and there was no hand-drawn frame.
I rediscovered the drawing when I was going through recent drawings and paintings. I will attend a group exhibition called “Flower Gardener’s Diary” in September. I have quite a lot of work that goes under that title. In fact, if the exhibition would be called “No Flowers This Time”, I would be in trouble.
Doodling a Hand-Drawn Frame
I had given it a title “Flowers for the Soul” for this piece, but I thought I could rename it as “Flower Gardener’s Dream” if I would polish it a bit.
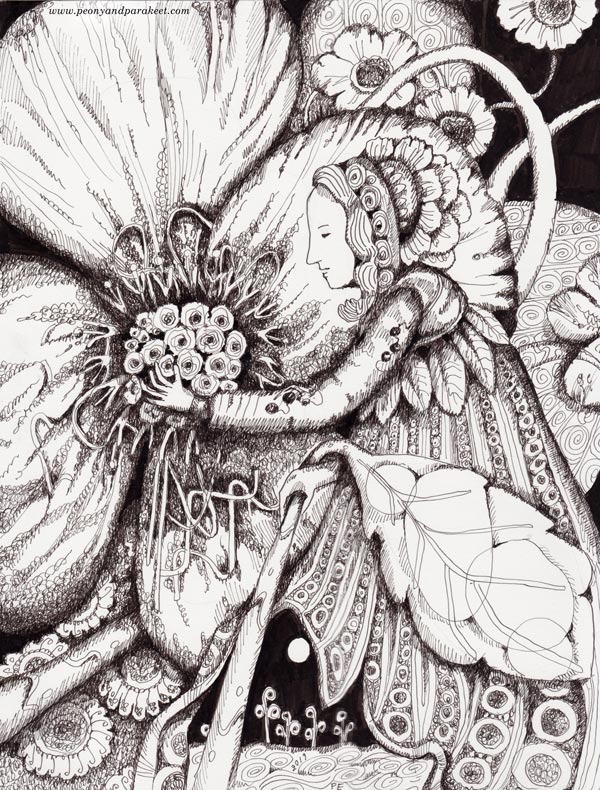
I cut a larger piece of paper and started drawing rough doodles around it. I can doodle quite quickly because I have been practicing a lot lately. I haven’t only drawn a bunch of exercises and additional examples for the class Magical Inkdom but also learned a lot when watching myself in the videos while editing them. It reminds me of athletes who train themselves mentally by watching their performances. Fortunately, doodling is not an Olympic sport because it would be my obsession to be the one who represented Finland!
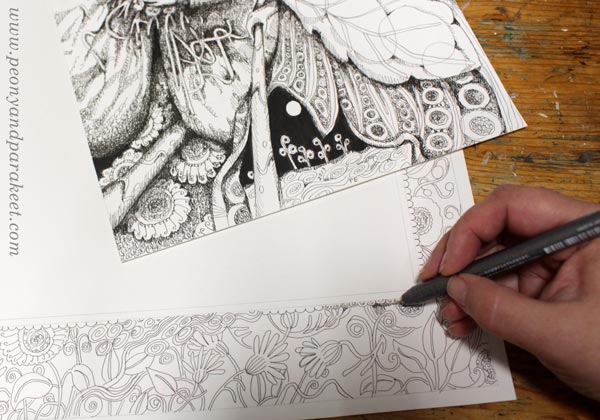
It always amazes me that what is first just an ugly doodle, becomes a decent drawing after adding shadows and details. The magic of time and effort!
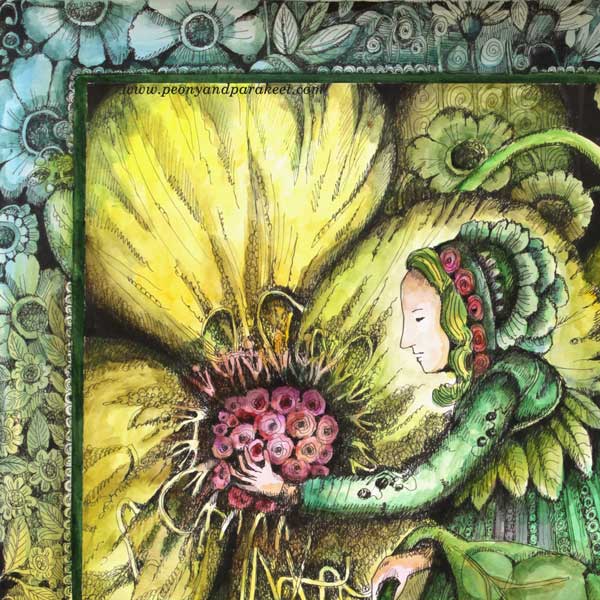
Coloring the Image + My Favorite Color
If I had to name the favorite color of my watercolor set, I would probably say Daniel Smith’s Rich Green Gold. It’s an ugly-looking paste that looks more like Poor Wasted Mud, but when you add water to it, you begin to hear music, feel the atmosphere of a big palace, and you straighten the back because the rich woman inside you is wearing an elaborate dress.

Most of that cool yellowish color is Rich Green Gold. Who could not love that luxurious color!
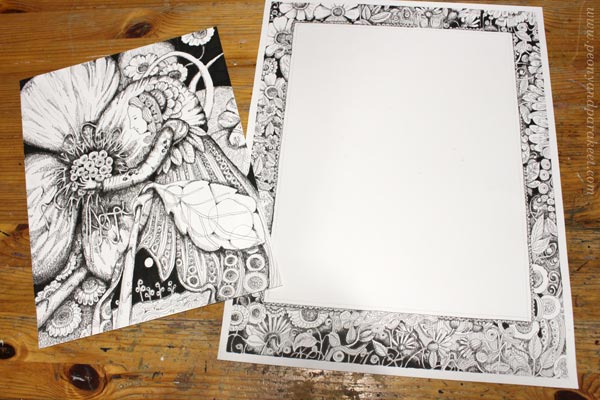
Two Versions – With and Without the Frame
I used double-sided tape to attach the image on the larger paper with the frame. Here are the two versions side by side. Which of them do you like better?

I am happier with the colored version because it highlights the night scene.
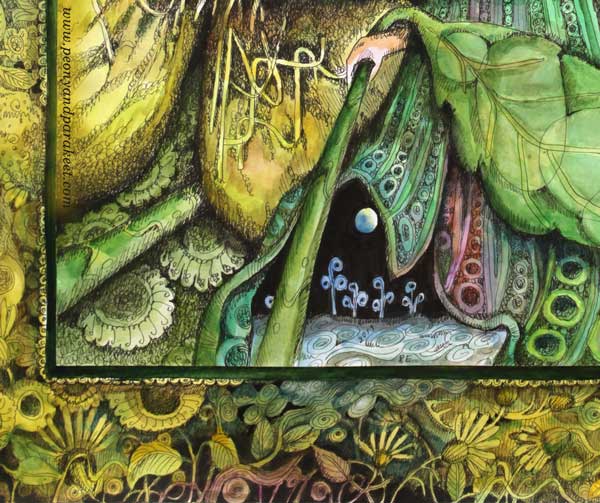
After all, this is about us who love flowers so much that they fill our minds also when we are sleeping.
Hand-Drawn Frame Obsession Continues
I have also been finishing some oil paintings that have been in progress for an embarrassingly long time. Having a deadline is a powerful motivator, eh? I don’t show them all in this blog post, but save them for upcoming weeks. Here’s a snapshot of the tiniest one. She is some kind of flower fairy too, and I am thinking about making a hand-drawn frame around her too. Because this is an oil painting on board, it would require some extra assembly. But I think it would look wonderful if there would be hand-drawn flowers around her. What do you think?
Come to draw fantastic art (+ fantastic frames) with me –
Sign up for Magical Inkdom!
Right after the registration, you will get all the lessons published so far, and you are good to start drawing! >> Sign up here!