Could Needlework Define Drawing?
Over 20 years ago, when studying computer science, control engineering, and automotive engineering, I got used to being the only girl in many lectures. But it was not only that. Whatever book I read, whatever formula I learned, it was all written by men. Soon, it felt natural. The field of technology was ruled by men.

When I think about drawing, I see the same thing. Throughout the history, the skill of drawing has been defined by men. Many say that if you draw 3-dimensional and photorealistic images, you can draw.
But could needlework define the way we draw? Could we think more about textures, structures, and shapes than the actual dimensions? Could we tell stories where we travel inside rather than outside?
I don’t say men can’t do all that. My message is that too many women who are experienced quilters, seamstresses, needleworkers feel that they are far away from drawing.
Why Draw?
When you hold the pen instead of the needle, you are able to experiment in much less time. With a little bit of guidance, your imagination will start to grow. You will be able to see your creativity in a new light!
My quilting and embroidery got a friend from art journaling when I began to draw.

There’s no reason why needlework could not define the way we draw. Or at least be our inspiration when we draw.
Let me be your art teacher: Subscribe to my weekly emails!
Art Quilts in a Modern Way

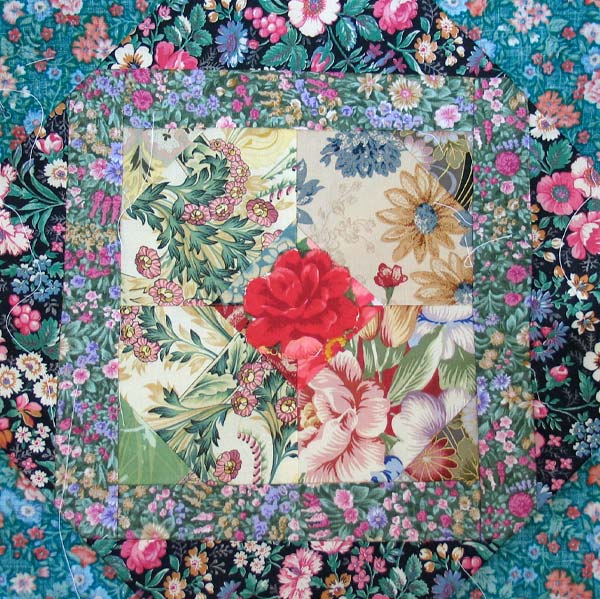
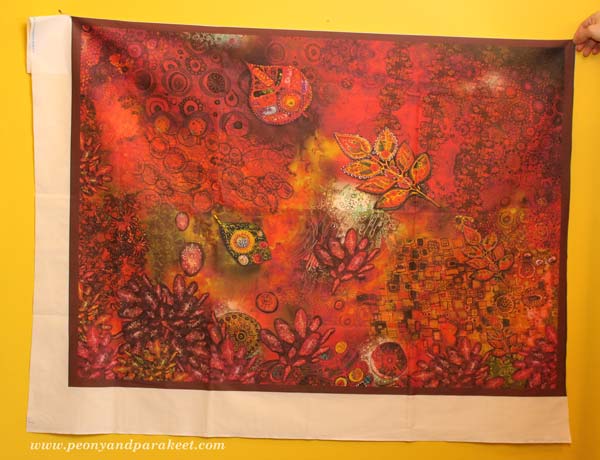
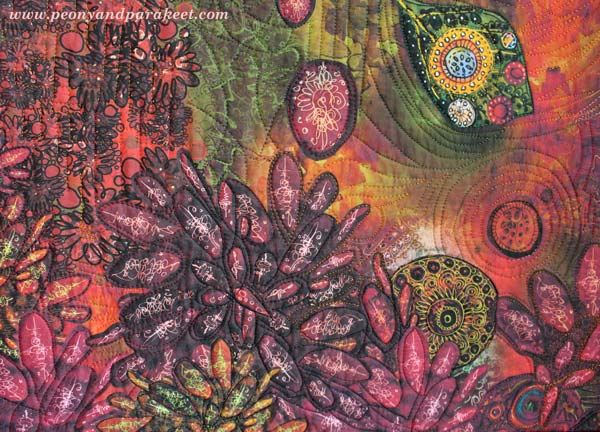
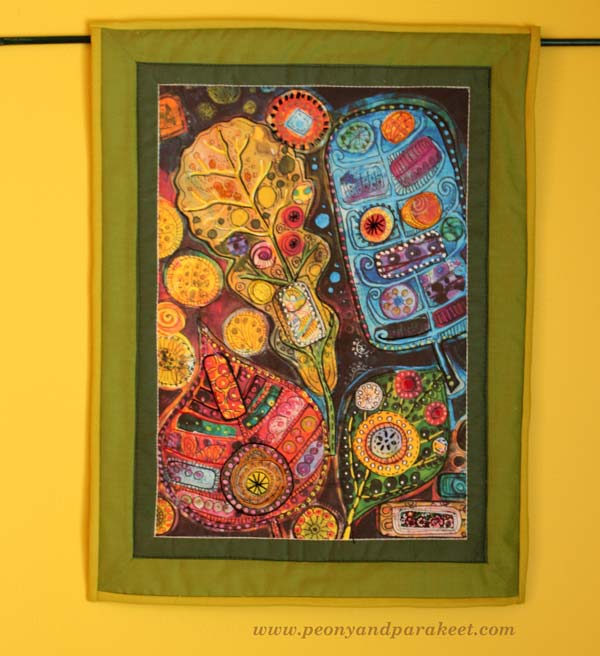
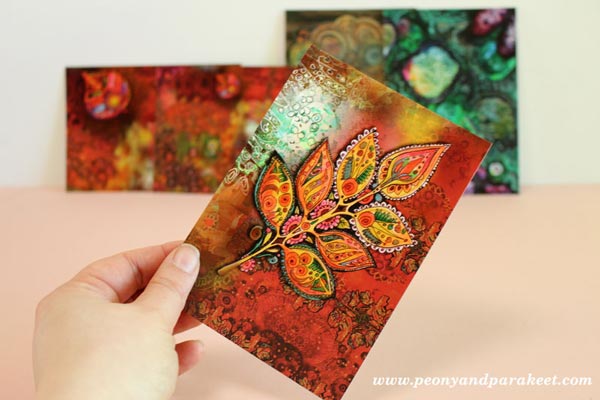
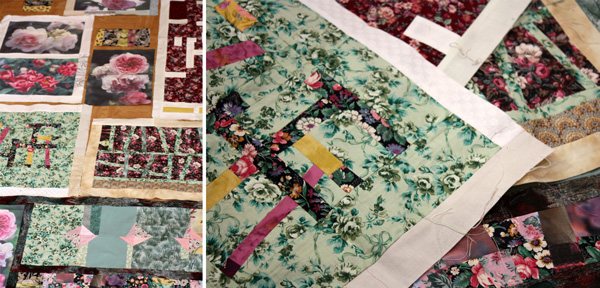
Here’s something that I have wanted to show you for a long time! I have been working with a custom order which made me think of a new idea: to create fabric prints and make quilted wall hangings from them. This idea is very versatile as you don’t have to be a quilter, you can print your art on fabric and use it for bags, purses, clothes – anything!
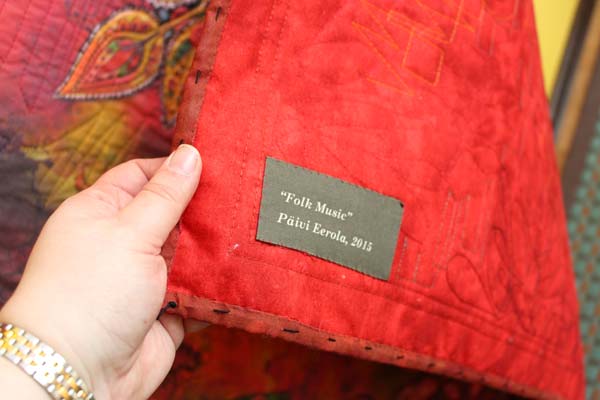
The artwork above has been composed digitally of various art pieces that I have made. The person who ordered the wall hanging is a fan of modern folk music and the color red. (If you have not listened to modern folk songs, try Hanneke Cassel for example!)

I created one new collage piece for the artwork. All the other details are picked from my archives.
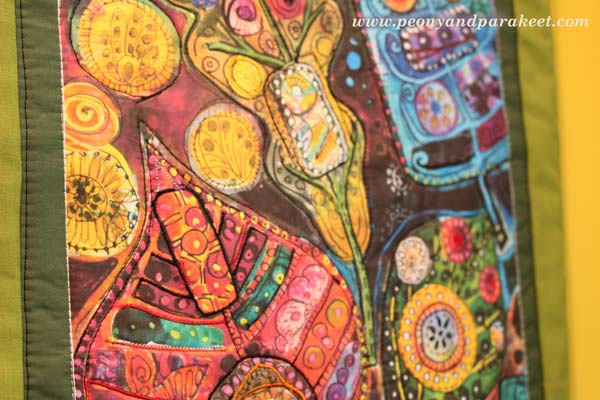
It was pretty exciting to send the artwork to Spoonflower. When I received the fabric, the print quality was really sharp and detailed! I already knew from the previous experiences that big areas of black don’t print well, so I avoided those.
If you are a quilter, you know that the fabric will look so much better when quilted! I sandwiched cotton wadding, two layers of fusible interfacing and backing fabric and took out my sewing machine.
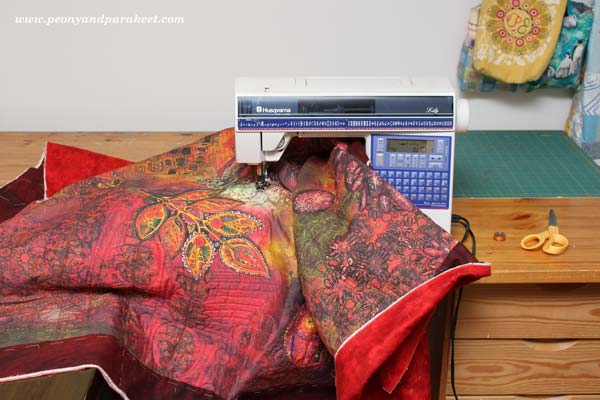
I am not very experienced with free-motion quilting using the free-motion foot, so I used even-feed foot instead. But with patience, I was able to create quilting that enhanced my brush strokes.
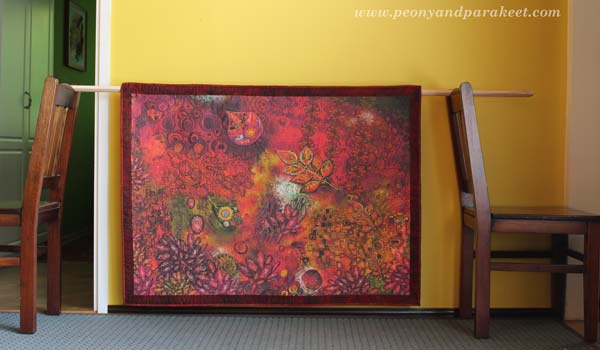
The finished quilt is about 45 x 39 inches.
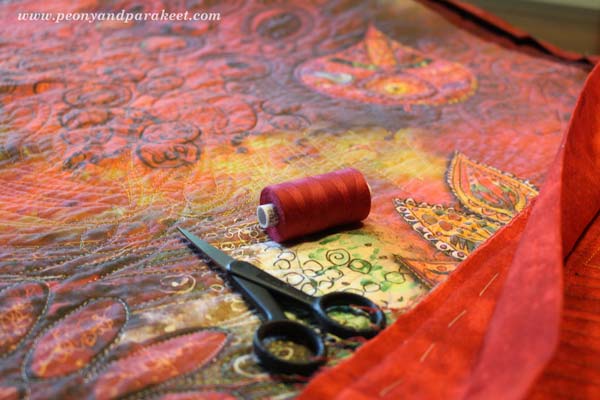
I used various colors of shiny embroidery threads for quilting. Using black thread brings the real black that was not produced by digital printing.
Quilting on watercolor!

Entering the flow state when playing modern folk was in the center of my inspiration.
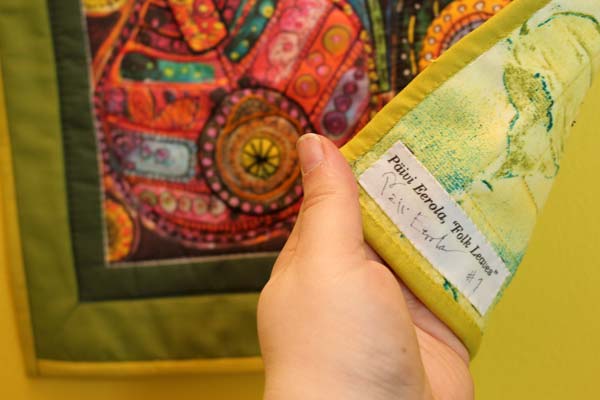
I added the label to the printing file too.
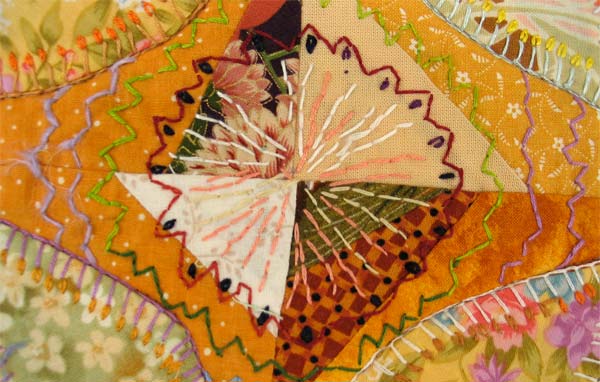
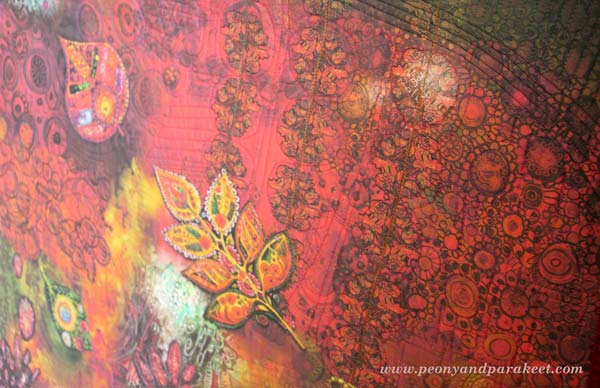
Here’s another project that I actually made earlier to test the idea. This one does not contain much digital processing, I only took a good photo of the original art and enhanced it a little bit.
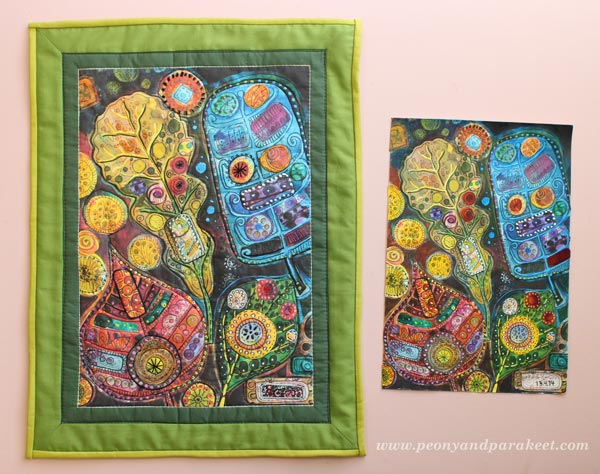
I think this artwork looks really good on fabric! The actual idea when creating the original was to mimic hand embroidery! Read about creating the original artwork: When Pens Replace Needles
I added some embroidery before quilting but found out that quilting works well as decoration.
A printed fabric label can be found from here too.
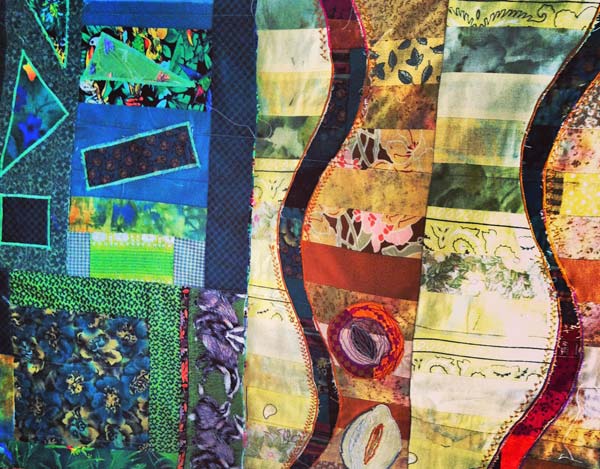
I also have more fabric prints waiting to be transferred into art quilts!

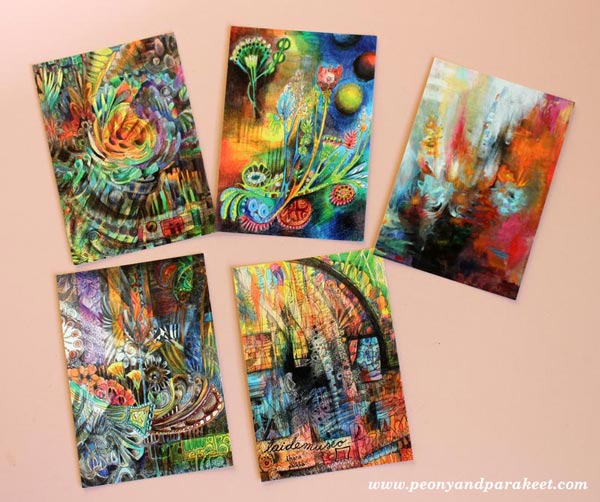
Paper prints news: New card sets have arrived at my Etsy shop.
Life can never be too colorful!
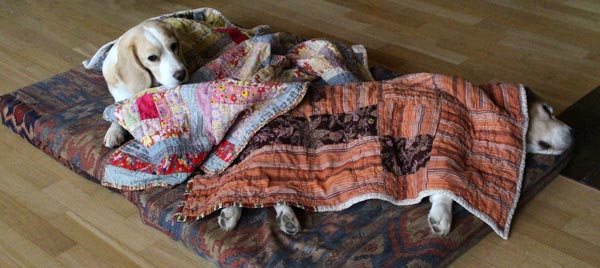
Stella and Cosmo send their greetings to all artists and quilters: Have a relaxing weekend!
Let me be your art teacher: Subscribe to my weekly emails!
Using Fabric on Art Journal Pages
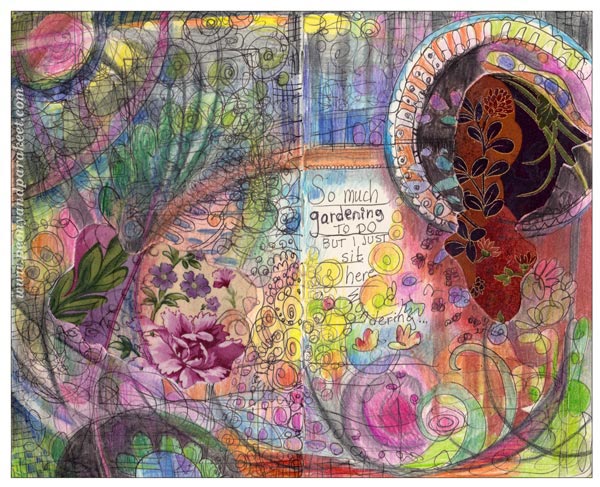
At this time of the year, at the beginning of summer, there’s a lot to do in the garden. I started early this year, but recently there has been so many activities that I feel I have neglected the garden. This guilty feeling also showed up on my latest art journal page!
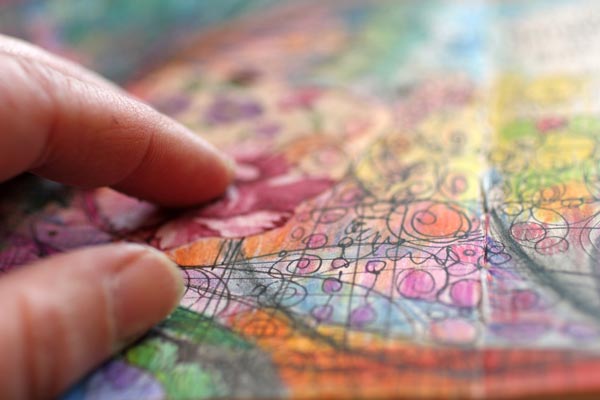
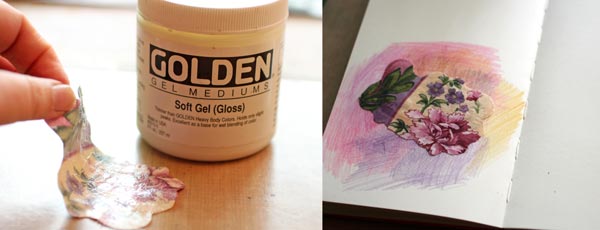
This page is made on a spread of Moleskine Sketchbook, so the image is fairly small, about 10 inches in width. A special feature here is that I have added two small cotton fabric pieces to boost my imagination. Using the technique of fabric collage was just a sudden idea, but I love how the page feels when touched!
I attached the first fabric piece at the early stage. Golden Soft Gel Gloss Medium was used for attaching the fabric.
After attaching the fabric, I doodled with a black drawing pen to get the creativity going.
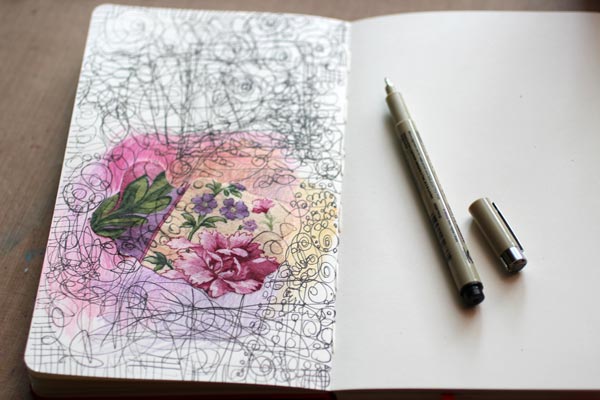
When I began coloring, I realized that I want to create a spread instead of a page. So I attached another fabric, purposefully a bit different from the first.

While coloring the page, I added more details. As my garden looks wild at the moment, I wanted to show the growth on the page too.
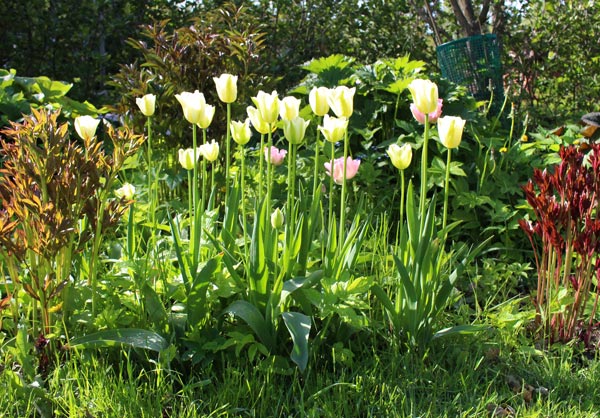
Here’s one corner of our front garden. Tulips bloom beautifully, and peonies (my favorites, of course!) grow fast. Lots of weeding to be done!

Why not try some fabric collage in your journal?
Let me be your art teacher: Subscribe to my weekly emails!
How to Create More Often
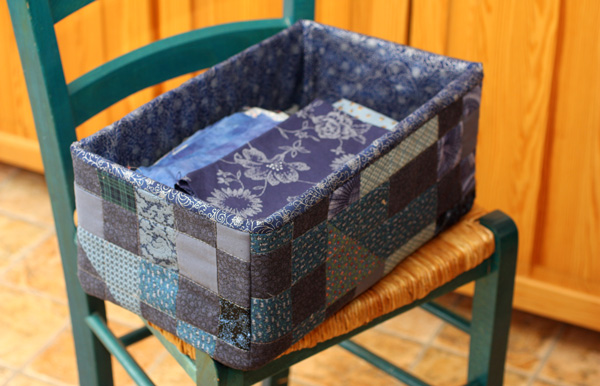
For many years, I have been dreaming about constantly making quilts. I have even recorded that into my art journal. Even if I have quilted almost all my life, especially in the recent years, I have had difficulties to arrange time for it. It has always seemed to require so big block of time that I am able to arrange that only few times in a year.
I am especially fond of modern quilting. One of my favorite quilting blogs is Crazy Mom Quilts by Amanda Jean Nyberg. She is especially focused on quilting from fabric scraps. I also love her book Sunday Morning Quilts. There are so many days that I have browsed the book, admired my fabric stash and felt sorry for myself not to have enough time for the actual making.
I don’t like showing unfinished projects, but as a proof, here’s one of the many patchwork projects which has been untouched for months. And, my dream is to make more of these quilted boxes for the fabrics (the pattern is from the book Sunday Morning Quilts)
The problem: How to create more often?
I have asked so many times:
– How to quilt more often?
and answered to myself:
– Arrange more time.
– Buy more fabrics, books, classes or subscribe to a magazine.
– Follow more blogs, have a Pinterest board for inspirational quilts.
– Organize your scraps first.
– Take more/less time for planning … etc.
None of that worked. But now have found the solution! I have developed a method derived from digital scrapbooking, another hobby of mine.
A Case Study: Scrapbooking as a regular practice
I had a similar kind of problem with digital scrapbooking, just not so bad. I wanted to do more of that but often realized that I had not done anything for a long time. Last October I decided to start scrapbooking one page a week with Project Life style: insert photos to a grid and make it simple. I only included one photo of each day or two, so it was not a big task to fill the page during the week. I decided that one page per week would be my minimum dosage. If I wanted to do more digital scrapbooking and be more creative, I could create more pages if I had any energy left.
What happened? I have not only created those weekly pages but 12 other layouts as well. That’s 33 pages total in 3 months which much more than my usual pace! Surprised by the result, I began to think about the magic behind that. And – could it be use for quilting as well?
Here’s is what I discovered.
1) Lack of time is not an issue, moving from one task to another is.
It did not require much time to take a sewing machine and start sewing. The reason I needed bigger and bigger time blocks to begin, was because I was thinking about too big tasks that seemed overwhelming. In other words, I required too much of myself. After working late in the evening, I should have started sewing a big quilt in a snap! The more I thought about starting, the less time I had to actually to do that and the less inspiring it sounded. When moving from one very different task, like writing, to another, like quilting, is not easy for the brain.
2) Lack of energy is not an issue, if the task is small and interesting enough.
It’s amazing how tired we can feel ourselves, but still spend time browsing computer or watching tv instead of going to sleep! There must be some energy left in us! I got that energy in use by telling myself that I was allowed to make only one little task. That way I did not imagine doing a lot and feeling a lack of energy for that. It also helped if I had some freedom to perform it. Then it sounded not only manageable but also interesting.
3) When the task is done, move to working with bigger projects.
The biggest thing that I learned is that I should always keep the promises for myself. If I presented a little task to get myself going, I should never ever make the task considerably bigger. Why? Because the next day I remember that one small task is actually a huge one and I don’t want to start it anymore. After I have made the small task and if I feel like doing some more, I can move to the bigger projects – to those unfinished ones that I actually want to finish!
Here’s how I adapted all that for quilting:
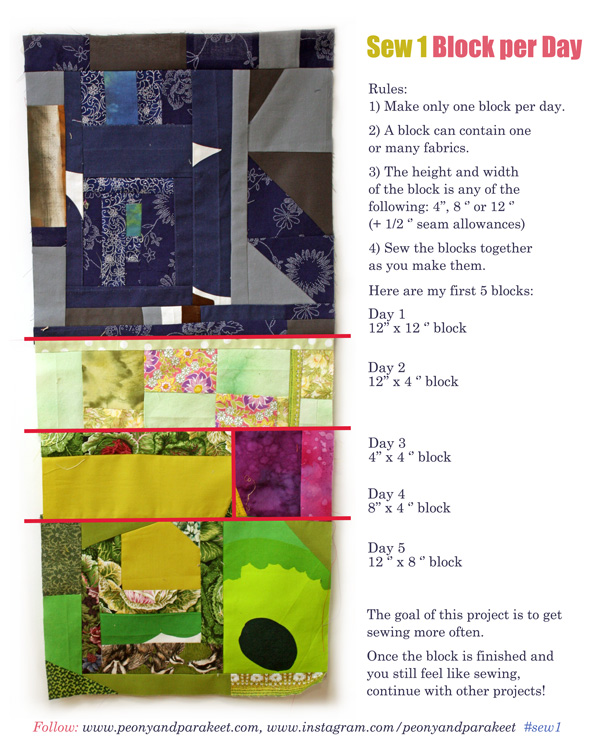
Sew One Block per Day
I decided to start a new quilt. But instead of planning and measuring, I just set few simple rules for each block. If I feel exhausted I can only pick one fabric, cut one 4-inch square and call it the block of the day. At the most I can make one 12 ” square with as much piecing as I feel like. But that’s it – no other blocks are allowed on the same day.
I started the quilt on the 1st January and here’s what I have made so far. This won’t most probably be my greatest quilt but more importantly, I have started to make a quilted box, a red one for the red fabrics. And – it is so much fun to sew it!
As the result of the new project, my studio has turned into the sewing room!
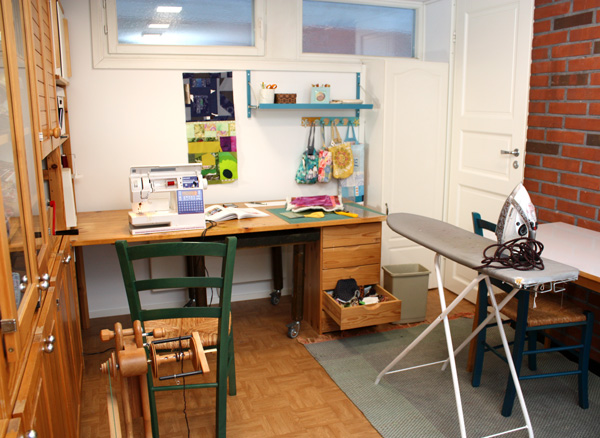
The little project bags are also handsewn (two of them are made just recently!). The old cardboard box is for buttons and been inherited from my husband’s grandmother.
Now you might ask:
How to apply this to art journaling?
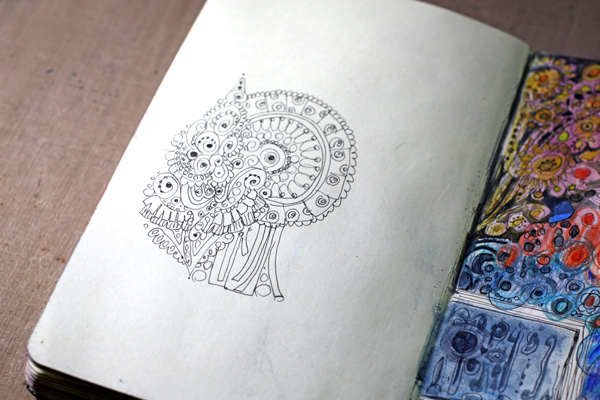
Why not make a page in phases from element after another! Here’s what I have made in two days: two little ornaments. I continue adding one doodled element or text each day. When the page is full, I will start coloring the elements, each at the time.
Preorder my class: Artistic Embroidery with Pens and Paper
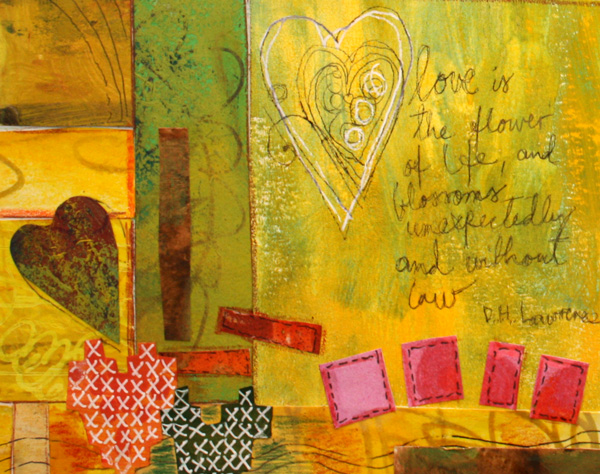
D.H Lawrence has said: “Love is the flower of life, and blossoms unexpectedly and without law.” You can replace the word “love” with the word “creativity”! But whether love or creativity, I believe that we need to do a little push to make the blossoming really happen. Like one doodle per day!
If you love crafting, quilting and needlework and want to show it in your art journal too, preorder my class from 21 Secrets Spring 2015 art journaling workshop! Let’s add little treasures to our pages! (Here’s also a recent blog post about the class).