Painted Paper Collage – 6 Tips for Intricate and Fun Art
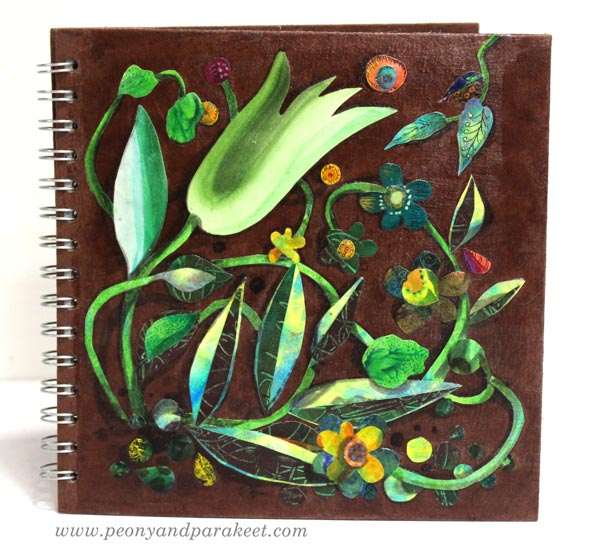
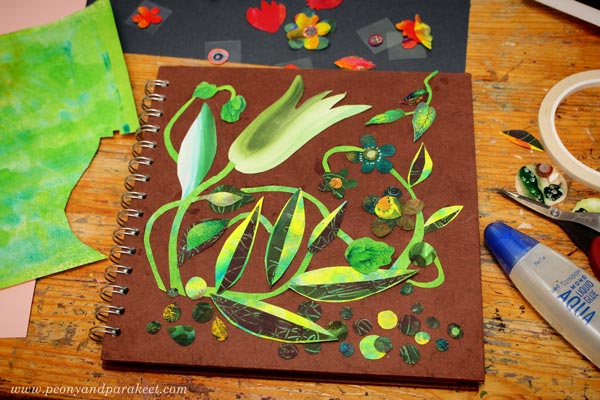
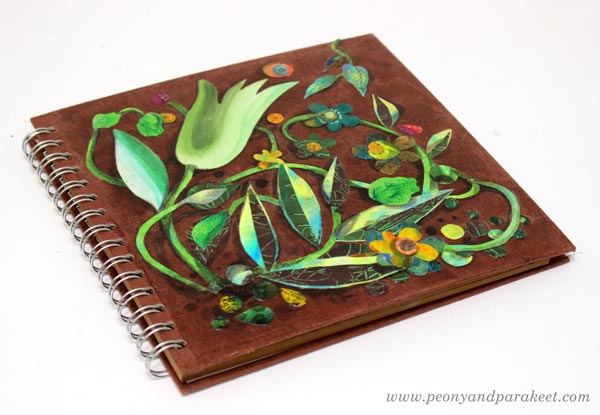
Here’s an 8-by-8-inch sketchbook that I decorated with painted paper collage. Even if all my art is not collage art, I love it. Painted collage art often replaces traditional sketching so that I paint and cut papers to grow the ideas that don’t feel mature enough for bigger work.
In this blog post, I share some tips that are handy for this kind of creative play.
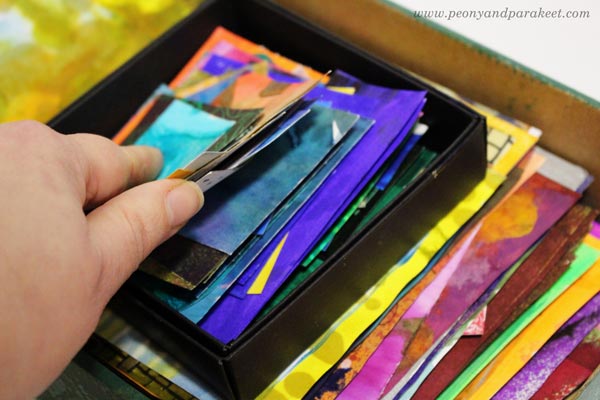
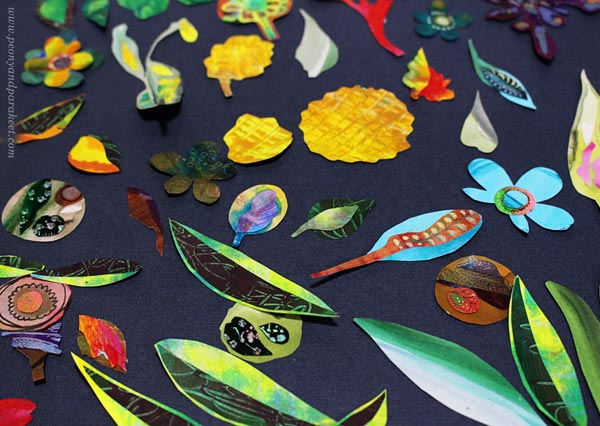
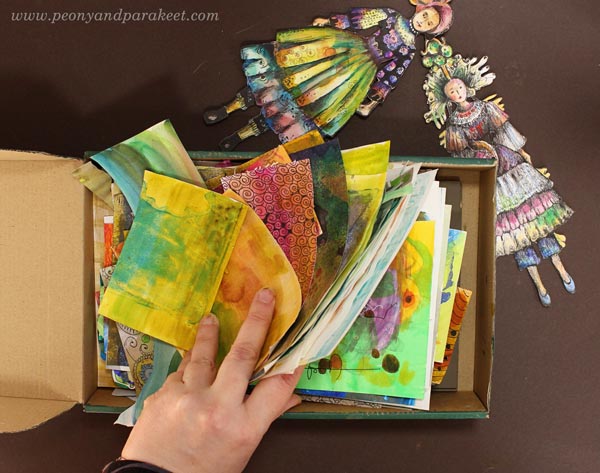
Tip #1 – Organize Painted Papers by Size
I have a box for small paper pieces and another for bigger ones. I keep the papers rectangular in shape so that they are easy to browse.
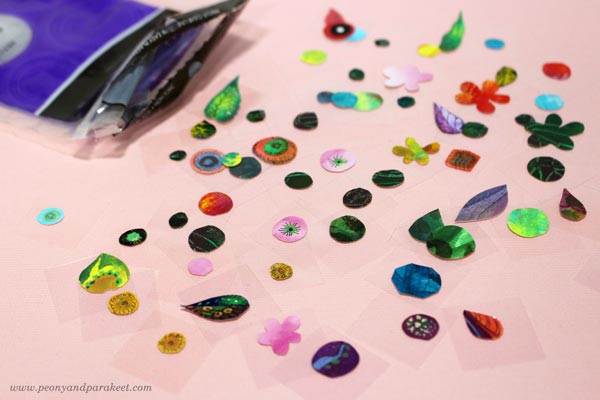
Tip #2 – Add a Lined Adhesive to the Tiniest Pieces
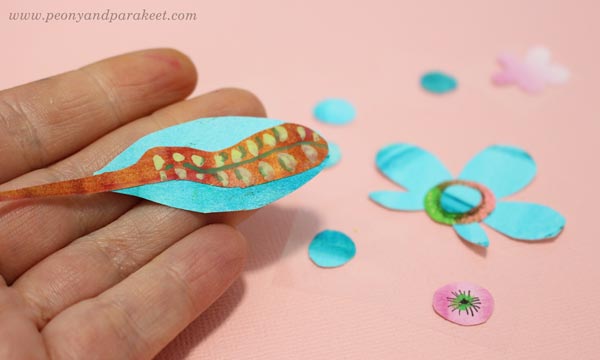
I like to make intricate collage art so I have tiny collage pieces. Small hand-cut pieces are difficult to handle and get lost easily. Thermoweb has clear adhesive dots called Zots (affiliate), that come with two liners, and they are perfect for both storing and attaching small paper pieces.
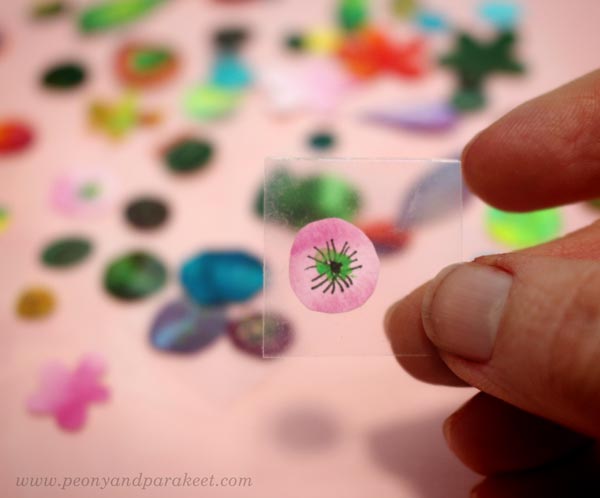
Zots are very flat compared to many glue dots, and they have two liners. Just remove the first one, attach the piece, and then remove the second liner when gluing the piece on a collage! Here you can see a close-up picture. This is the smallest size of Zots.
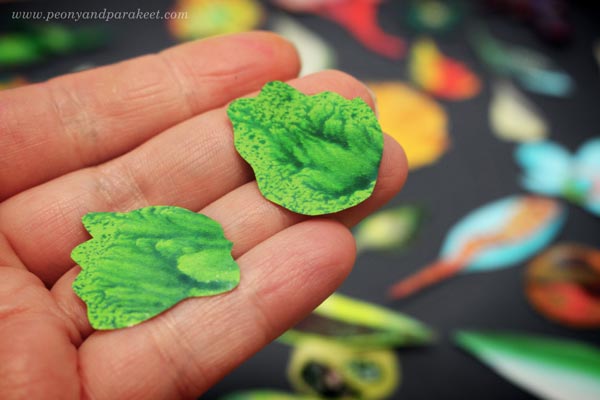
Tip #3 – Make Clusters
Attach small pieces on the bigger elements and treat each piece as a small artwork!
I also like to decorate clusters by painting and drawing.
However, I sometimes have elements that are so beautiful that they don’t need anything on them.
Tip #4 – Group and Layer!
When composing the painted paper collage, use connecting lines and intersecting shapes. They make a more elegant and coherent composition than if the elements don’t touch each other.
Tip #5 – Add Shadows
For the sketchbook cover, I used grey Faber-Castell PITT Artist Brush Pens (affiliate) to color shadows on both the elements and the background.

Shadows add depth and make the elements look less separate from the background.
Tip #6 – Sealing
I like to attach the collage elements first with glue dots, double-sided tape, or some paper glue and then use gel medium for sealing. This way, my fingers stay fairly clean when I am building the composition. At that stage, I attach the elements only partly, and they get glued when I am sealing the work.
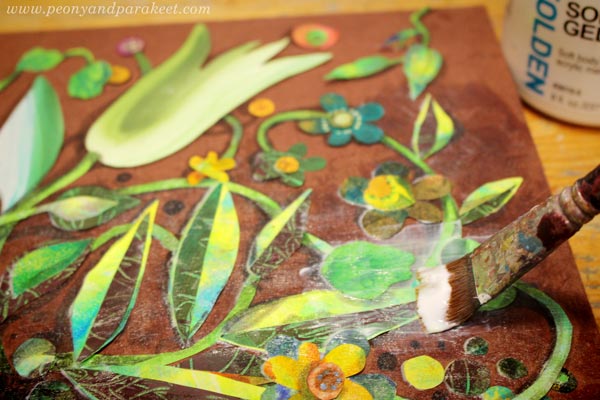
For sealing, I use several layers of gel medium (Golden Soft Gel Gloss (affiliate) is my favorite), especially for the items that will be touched regularly.
Painted Paper Collage – More Ideas
- For those who want to start by making some papers:
Choose Kiwi, Arboretum or Romantic Doodles - For those who like to play:
Dolls in a Gallery – Paper Collage Step by Step! - For those who need to dig deeper as artists:
Draw Your Innocent Little Secrets! - Class recommendations:
Collageland
Inspirational Drawing
Modern Mid-Century
I hope you found these tips both practical and inspirational!
Dolls in a Gallery – Paper Collage Step by Step!
Last week, I published a video about drawing a paper doll. Now when you have the dolls, what’s next? Let’s take them to an art gallery, and show them all the other art that you have created! Follow me step by step to create a fun paper collage!
1) Draw Lines to Define the Space
Take a ruler and divide the paper so that it has two walls and the floor.
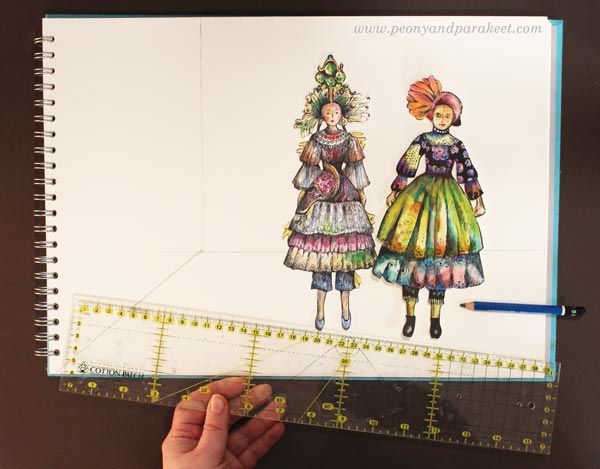
Start with the horizontal line and make sure that there’s enough room for the dolls to wander around the space. Then draw a vertical line approximately one third from the edge, and finally a diagonal that completes the side wall.
2) Paint The Floor and The Walls
I used watercolors to paint the background, but you can use any medium. Because you will add art on the walls and carpets on the floor, the interior can look quite plain at this point. Empty galleries usually are pretty sad-looking but that’s going to change in the next step!
To make the gallery look more 3-dimensional, I used cooler colors on the back wall.
3) Decorate by Making a Paper Collage
Now the fun can begin. Turn your painting into a paper collage! Start by picking collage pieces to decorate the gallery. Hang art on the walls and make carpets on the floor. Go to your box of hand-decorated papers and use those! If you don’t have any, you can print some or cut images from magazines. But I think this project is the best if you can hang your art on the walls, and be the star of the gallery!
I also have a class called Collageland where I show how to make and use hand-decorated papers.
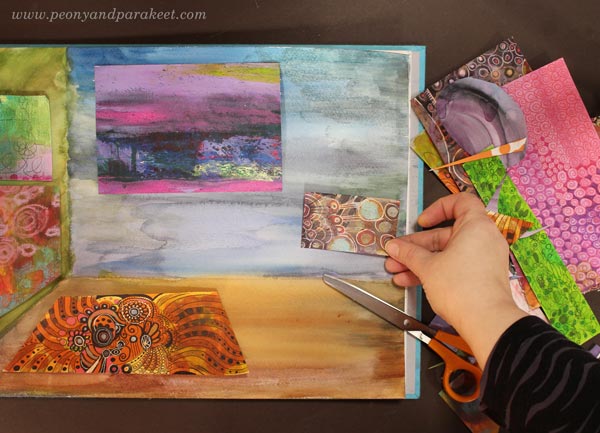
The back wall is the easiest to decorate because the papers can be rectangular there. But when cutting the pieces for the side wall, and the floor, make them inclined so that they follow the perspective.
To Glue or not to Glue?
I glued all the decorations with gel medium. If you make a pile of paintings and carpets, maybe some other furniture too, you may not want to attach them permanently so that you can change them. I didn’t glue my dolls in Step 5, but you can glue everything to complete the image.
4) Add Details with Pens
You can add fringes on the carpets, shadows near the paintings and panels, and adjust colors.
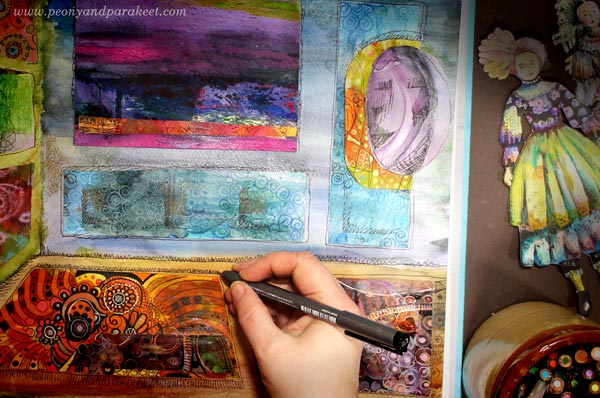
I use a black thin-tipped drawing pen (Copic Multiliner) and colored pencils in this step.

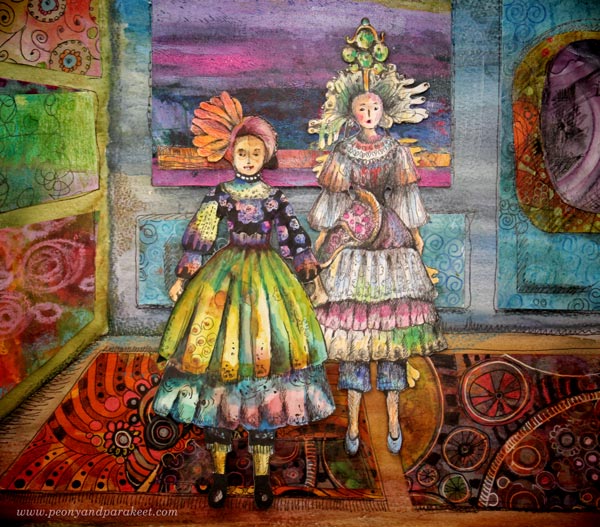
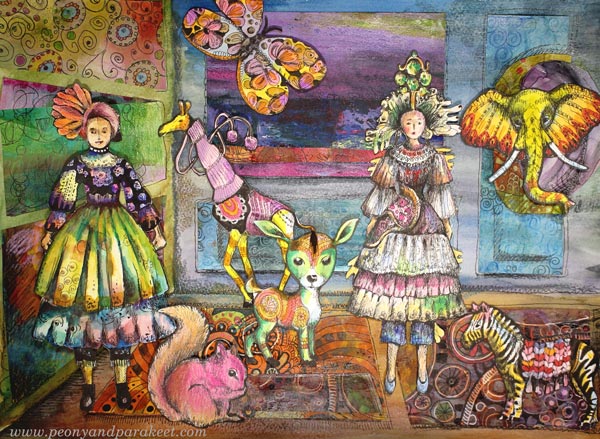
Here’s how my gallery looks when it’s finished. Because I love to take a step away from reality, I made a magic mirror on the wall. I made this paper collage on one of my A3-sized sketchbooks that has watercolor paper.
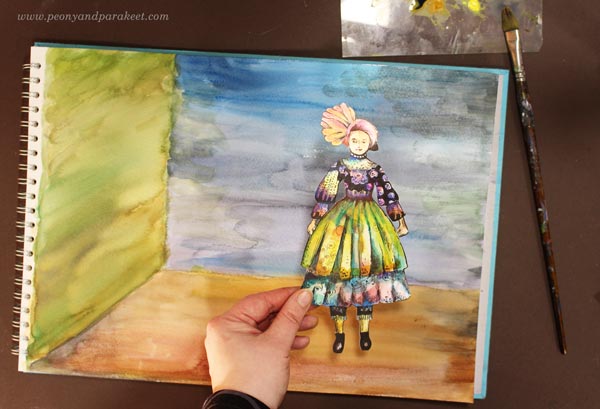
5) Let the Dolls in and Play!
Now invite the dolls to the opening! My dolls got so excited that the magic mirror became activated. It opened a door for the whole wild world!
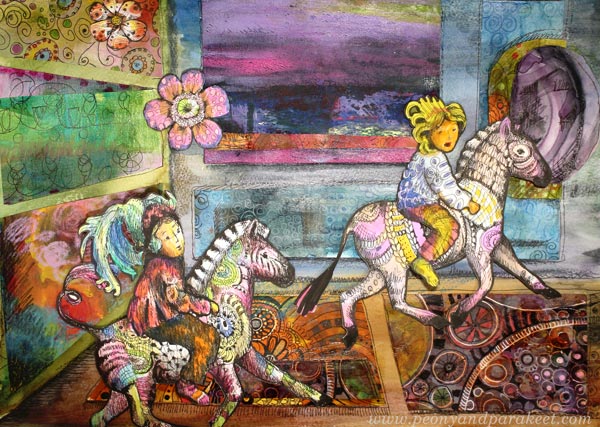
And after the opening was over, a couple of the guests decided to take an adventure through the mirror with zebras!
Drawing and Playing in Animal Inkdom
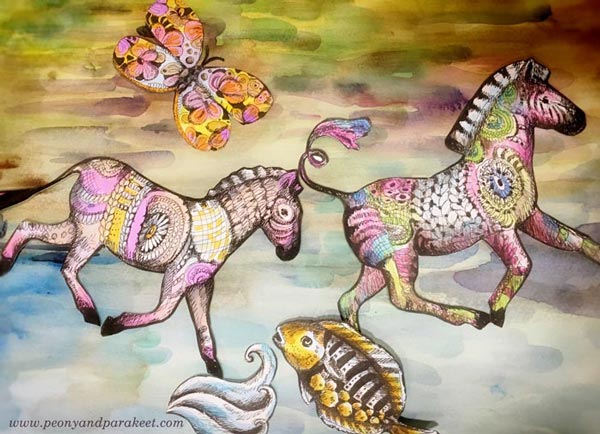
Take the paper doll with you, and come to draw and decorate animals with us in Animal Inkdom! You will get the published lessons immediately after the registration, and you can start drawing right away. Sign up for Animal Inkdom here!
Do You Feel Insecure About Your Art?
On Wednesday morning, I prepared my studio for a recording. Usually, when I set up the camera, I am excited and ready to paint. But this time I was struggling. However, I did manage to put the video together because it gave me the opportunity to talk about insecurity and self-doubt – common feelings for all artists!
Feeling Insecure and Why? – Watch the Video!
Follow the Inspiration – Join the Live Webinar!

Meet me in a free live webinar! I will be sharing what inspires me currently and giving ideas for your art as well. Join me on September 21st, 11 AM PST / 2 PM EDT / 7 PM BST / 9 PM EEST!
To participate the webinar:
1) Register by choosing “Save My Spot!”
2) Mark the date Sept 21st and your local time to your calendar.
3) Follow the link a few minutes before the webinar begins.
I will be broadcasting live from my studio. Come to get new ideas for your art and chat with your friends in art! You will also hear more about my upcoming classes and how I have been collecting inspiration for them.
The event will be recorded, and the replay will be available for all who register.
Follow the Inspiration: Register here!